6
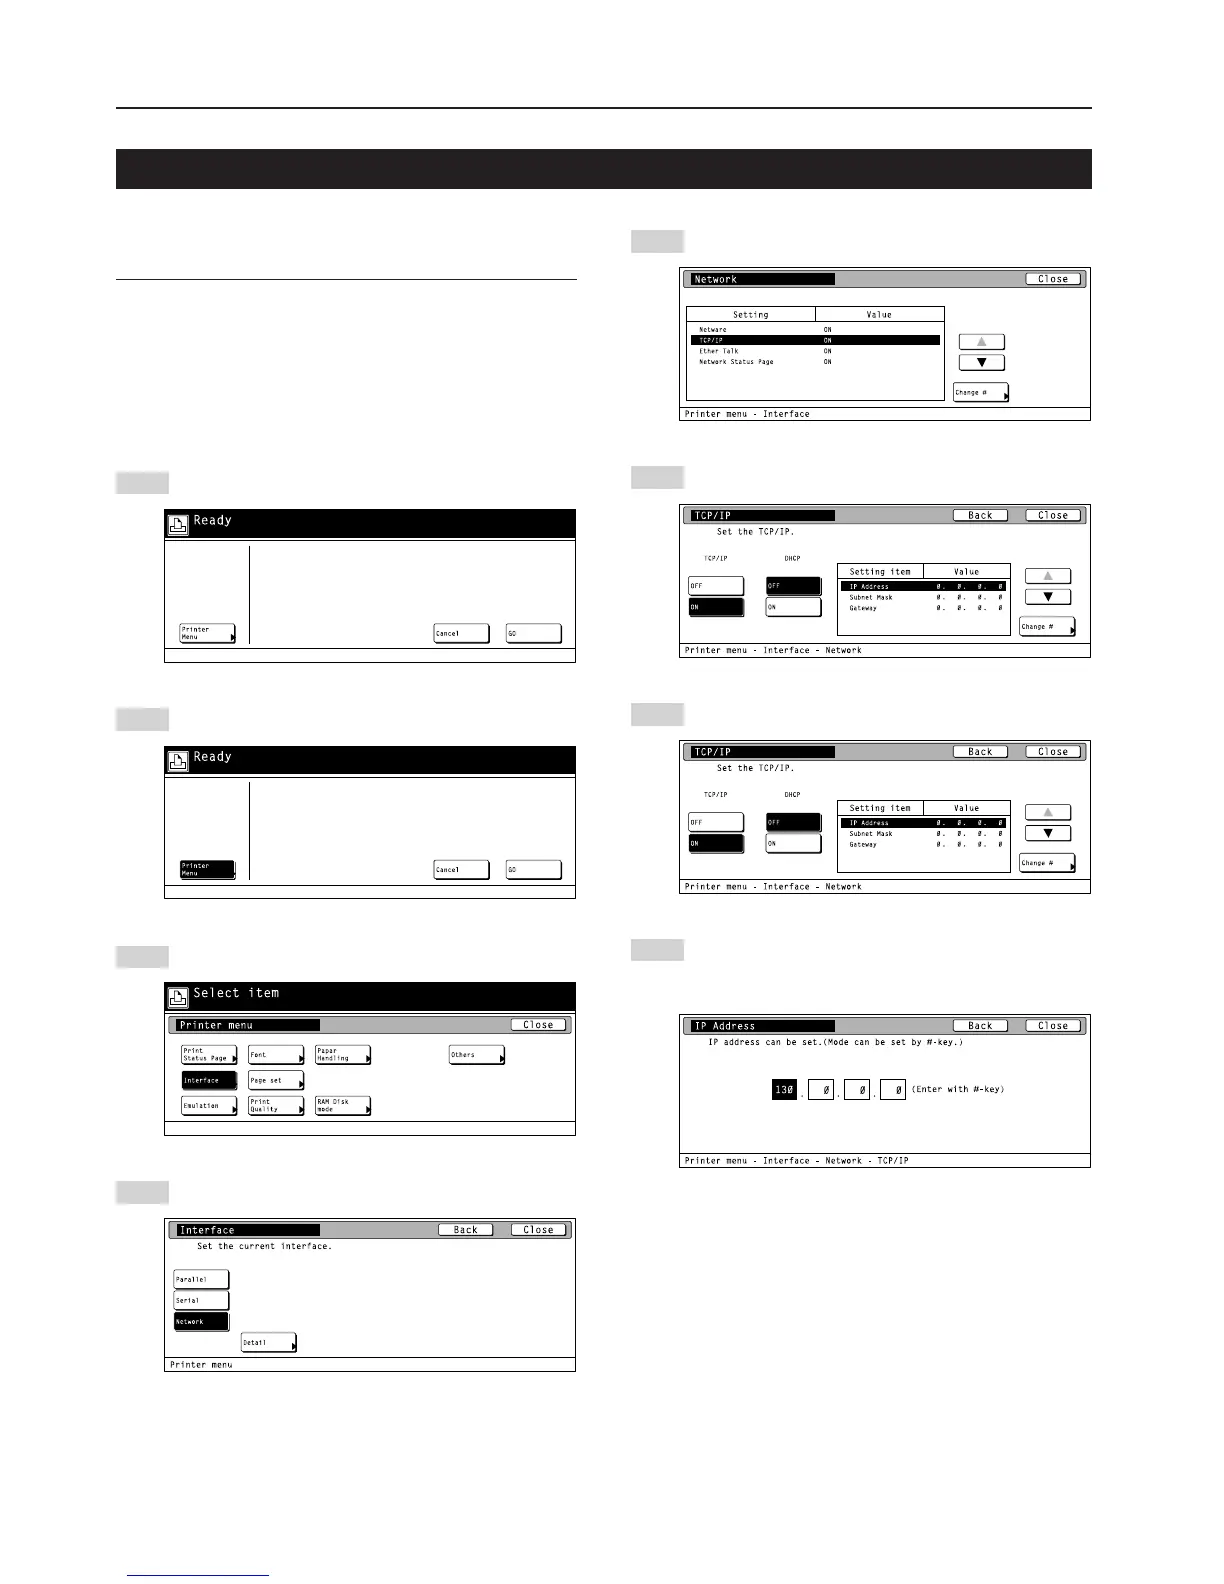
2. Set-up
Use the “▲” and “▼” cursor keys to select “TCP/IP” and
then touch the “Change” key.
Select “ON” under the “TCP/IP” setting and “OFF” under the
“DHCP” setting.
Use the “▲” and “▼” cursor keys to select “IP Address” and
then touch the “Change” key.
Use the numeric keys to input the address. Input the first
block of 3 digits of the address in the highlighted area.
• Press the sharp (#) key to set the address after inputting
each block of 3 digits.
To use the printer as a network printer, it is necessary to set an IP
address for the printer.
Notes
• The IP address that should be registered here will differ depending
upon your network environment. Check with your network
administrator BEFORE performing this setting.
• If you are using a DHCP server to automatically configure the IP
address, this setting will not be necessary because DHCP server
configuration is already enabled as the factory default setting.
* To cancel the setting midway through it, press the Stop/Clear key.
Press the Printer key. The printer will switch to the printer
mode.
Touch the “Printer Menu” key.
Touch the “Interface” key.
Touch the “Network” key and then the “Detail” key.
1
2
3
4
5
6
7
8
2-4 Network (TCP/IP) settings
 Loading...