34
the metal coupling of the machine.
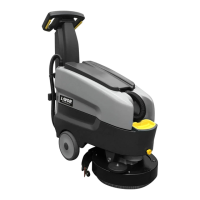
Switch on the machine using (PhotoE-32) the general
ON/OFF switch on the control panel (PhotoE-13) .
Select the brush rotation with the brush switch
(PhotoE-33) and start the brush rotation pulling the
control lever (PhotoA-2) : the brush will couple auto-
matically.
To assemble the pad holder follow the same proce-
dure.
Do not allow the length of the rows of brushes to
become lower than 1 cm.
Do not allow the thickness of the abrasive disks to
become less than 1 cm.
Working with excessively worn brushes or excessively
thin abrasive disks may damage the machine and the
floor.
Regularly check the wear on these parts before start-
ing to work.
Disassembly or replacement:
Check that the brush motor and the suction motor are
off (the corresponding warning lights must be off).
Lift the squeegee using the specific lever (Photo B-19).
Grab the handlebar (Photo A-1) and leverage on it to
lift the front part of the machine rotating it on the rear
wheels;
Activate the drive lever while pressing the button
(PhotoE-35).
In this way the brush will be released automatically.
For the removal of the pad holder follow the same
procedure.
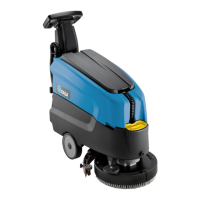
6.3. MACHINE TRANSPORT
To transport the machine while not working, proceed
as follows:
Switch OFF the machine using (PhotoE-32) the gen-
eral ON/OFF switch on the control panel (PhotoE-13) .
lift the squeegee using the lifting/lowering lever
(PhotoB-19).
Holding the handlebar (PhotoC-20) push it downward
in order to lift the front part of the machine by rotat-
ing it on the rear wheels;
While holding the machine in this position, push it
to the new working area or to the parking area.
6.4. SQUEEGEE ASSEMBLY
Lower the squeegee using the specific lever (Pho-
toB-19).
Put the two fixing pins of the squeegee (PhotoH-28)
inside the holes in the squeegee support (PhotoH-44)
.
Screw the two knobs (PhotoG-45) in order to secure
the squeegee to the support (PhotoG-28) .
Connect the suction hose coming from the machine
to the suction coupling pipe on the squeegee body
(PhotoH-27) .
6.5. SQUEEGEE DISASSEMBLY
Lower the squeegee using the specific lever (B-19).
Disconnect the suction hose from the coupling pipe
on the squeegee body (PhotoG-27) .
Unscrew the two knobs (PhotoG-45) that secure the
squeegee to its support.
Lift the support of the squeegee (Fotp H-44).
Remove the squeegee.
6.6. SQUEEGEE BLADES DISASSEMBLY /
ASSEMBLY
Disassemble the squeegee from its support ( see 7.5).
Unscrew the knobs (PhotoI-31) and remove metal
blade retainer (PhotoI-30).
Extract the fixing bolts (PhotoI-24) and remove the
front metal blade retainer (PhotoI-25);
remove the squeegee rubber blades tearing them
from a side.
To replace the squeegee rubber blades, follow the
same procedure on the contrary starting from the
front blade;
lock the fixing bolts (PhotoI-24) retaining them in the
squared seats in the squeegee body;
then, place the rear rubber blade (PhotoI-29) and the
metal blade retainer (PhotoI-30), locking them with
the fixing knobs (PhotoI-31).
6.7. SPLASH GUARD ASSEMBLY/
DISASSEMBLY
- Unscrew the 2 screws of the splash guard (Pho-
toA-12).
- Unscrew the screw of the bumper wheel (PhotoA-11).
- Open the hook (PhotoA-12).
- Remove the splash guard.
6.8. ACCESSORY ASSEMBLY/DISASSEMBLY
BRUSHES, PAD DRIVERS AND
ABRASIVE DISKS
Never use the machine if brushes or pad drivers
and abrasive disks are not perfectly installed.
Assembly:
Make sure that the brush plate is raised; otherwise lift
it by following the instructions provided in the spe-
cific section.
Make sure that the main switch on the control panel
is set to OFF “0” .
Bring the brushes (or the guide disks equipped with
abrasive disks) near the connections, under the brush
plate; lift them, bring them through the centering
flange, and turn them opposite the rotation direction
until you hear the stable “click” connection.
Do not allow the length of the rows of brushes to
become lower than 1 cm.
 Loading...