Page 5
507246-02 6/2019
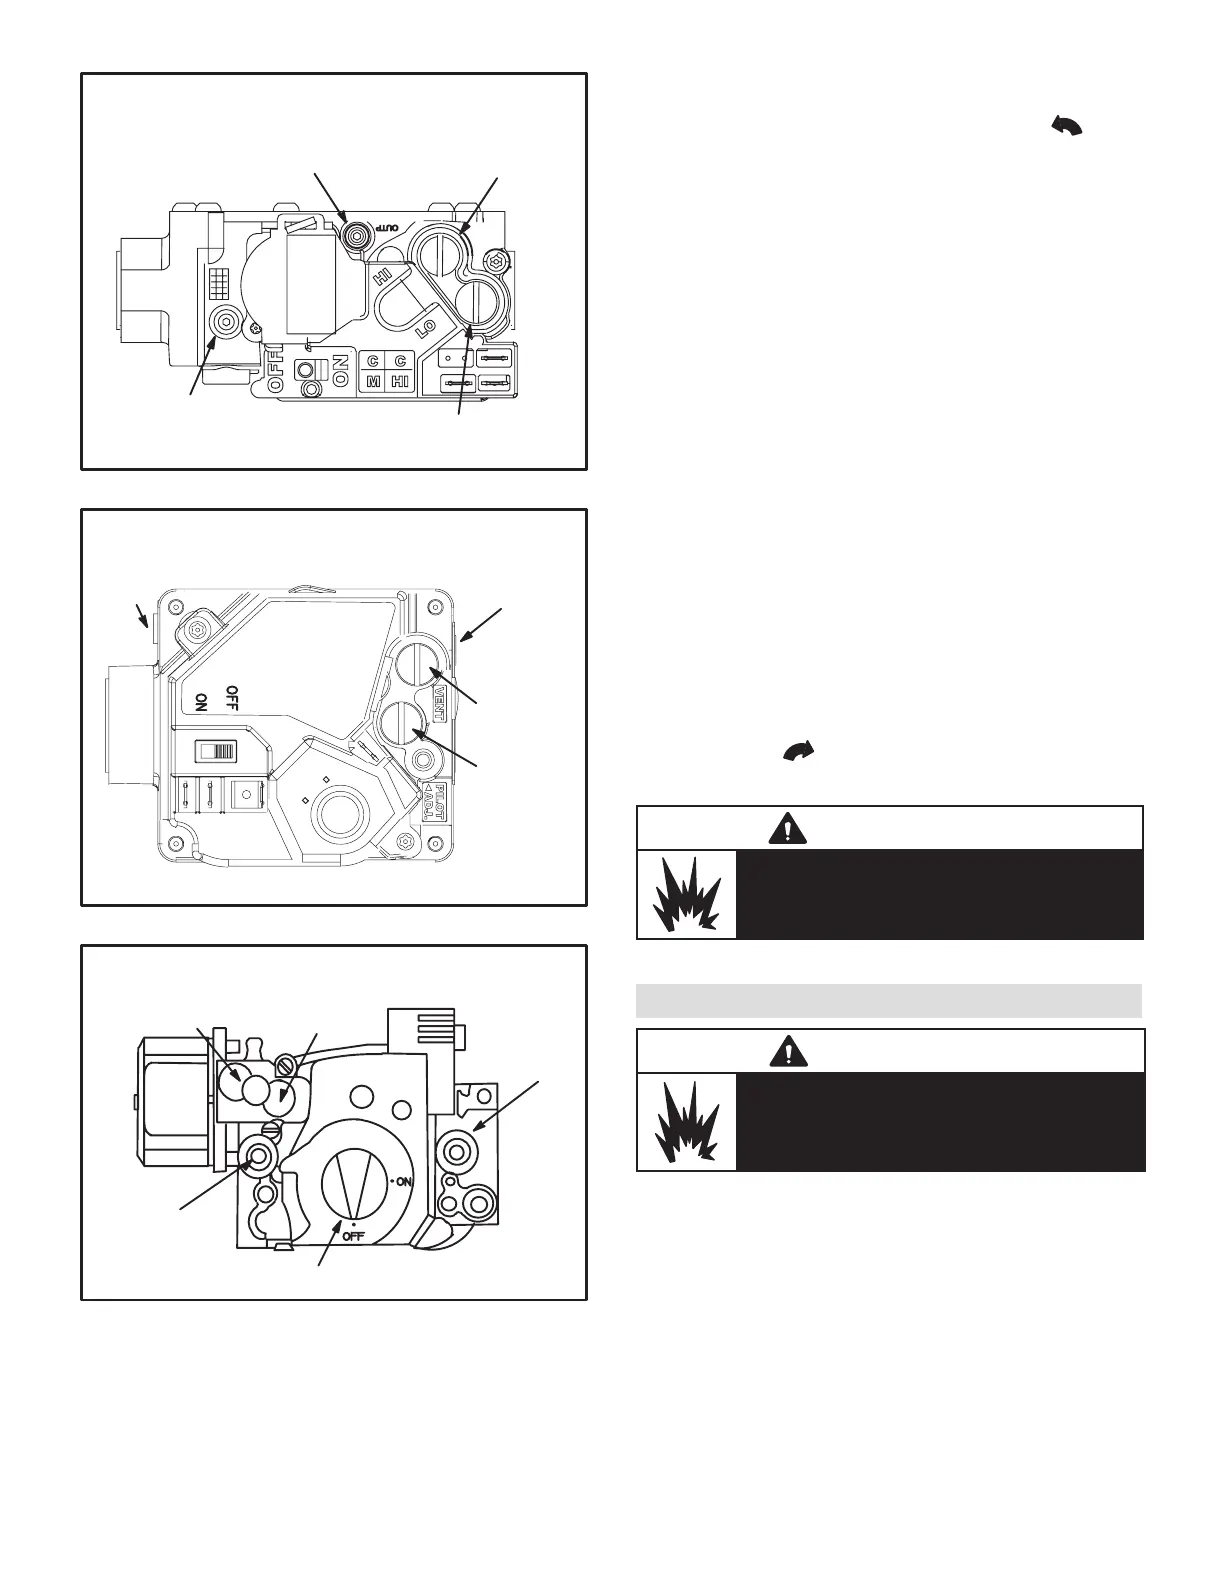
WHITE RODGERS 36J54 GAS VALVE
Two-Stage
GAS VALVE SWITCH SHOWN IN OFF POSITION.
LOW FIRE
ADJUSTMENT
HIGH FIRE
ADJUSTMENT
INLET
PRESSURE
TAP
MANIFOLD
PRESSURE TAP
FIGURE 2
WHITE RODGERS 36H54 GAS VALVE
Two-Stage
LOW FIRE
ADJUSTMENT
HIGH FIRE
ADJUSTMENT
INLET
PRESSURE
TAP
MANIFOLD
PRESSURE
TAP
GAS VALVE SWITCH SHOWN IN ON POSITION.
FIGURE 3
HONEYWELL VR8305Q SERIES GAS VALVE
GAS VALVE KNOB IS SHOWN IN OFF POSITION.
LOW FIRE
ADJUSTMENT
HIGH FIRE
ADJUSTMENT
INLET
PRESSURE
TAP
MANIFOLD
PRESSURE
TAP
FIGURE 4
7 - Turn gas valve switch to ON. See Figure 1, Figure
2, or Figure 3. On Honeywell VR8305Q gas valves,
turn knob on gas valve counterclockwise to ON.
Do not force. See Figure 4.
8 - Close or replace the heat section access panel.
9 - Turn on all electrical power to appliance.
10 - Set thermostat to desired setting.
NOTE - When unit is initially started, steps 1 through 9
may need to be repeated to purge air from gas line.
11 - The ignition sequence will start.
12 - If the appliance does not light the rst time (gas
line not fully purged), it will attempt up to two more
ignitions before locking out.
13 - If lockout occurs, repeat steps 1 through 10.
14 - If the appliance will not operate, follow the
instructions “Turning Off Gas to Appliance” and call
your service technician or gas supplier.
Turning Off Gas to Unit
1 - If using an electromechanical thermostat, set to the
lowest setting.
2 - Before performing any service, turn off all electrical
power to the appliance.
3 - Open or remove the heat section access panel.
4 - Turn gas valve switch to OFF. On Honeywell
VR8305Q gas valves, turn knob on gas valve
clockwise to OFF. Do not force.
5 - Close or replace the heat section access panel.
WARNING
Danger of explosion. Can cause injury or
death. Do not attempt to light manually. Unit
has a direct spark ignition system.
Burner Flame
WARNING
Danger of explosion and re. Can cause
injury or product or property damage.
Periodically inspect burner ame to ensure
proper unit operation.
The primary air is permanently set for normal operation.
The ame will be basically blue with some clear yellow
streaking in the end of the ame. Inspect the burner ame
periodically during the heating season using the inspec-
tion port provided on the burner access panel.
 Loading...