Page 9
13ACD SERIES
Removing Indoor Unit Metering Device
Remove the existing HCFC−22 refrigerant flow control
orifice or thermal expansion valve from the indoor coil.
REPLACEMENT PARTS
If replacement parts are necessary for the indoor unit,
order kit 69J46. The kit includes:
10 Brass nuts for liquid line assemblies
20 Teflon rings
10 Liquid line orifice housings
10 Liquid line assemblies
TEFLON RINGS (20)
BRASS NUTS (10)
LIQUID LINE ASSEMBLIES
(INCLUDES STRAINER) (10)
LIQUID LINE ORIFICE HOUSINGS (10)
LIQUID LINE
ASSEMBLY
COPPER
TUBE
PISTON
RETAINER
STRAINER
Figure 14. 69J46 Kit Components
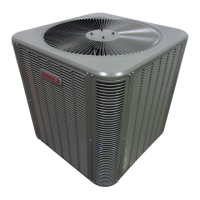
TYPICAL FIXED ORIFICE REMOVAL PROCEDURE
TEFLON RING
REMOVE AND DISCARD
VALVE STEM ASSEMBLY
(IF PRESENT)
FIXED
ORIFICE
(Uncased Coil Shown)
VALVE STEM
VALVE STEM CAP
BRASS NUT
LIQUID LINE ASSEMBLY
(INCLUDES STRAINER)
LIQUID LINE ORIFICE HOUSING
DISTRIBUTOR TUBES
DISTRIBUTOR
ASSEMBLY
Figure 15. Typical Fixed Orifice Removal
1. On fully cased coils, remove the coil access and
plumbing panels.
2. Remove any shipping clamps holding the liquid line
and distributor assembly.
3. Using two wrenches, disconnect liquid line from liquid
line orifice housing. Take care not to twist or damage
distributor tubes during this process.
4. Remove and discard fixed orifice, valve stem
assembly if present and Teflon ring as illustrated in
figure 15.
TYPICAL TXV REMOVAL PROCEDURE
TWO PIECE
PATCH PLATE
(UNCASED COIL
ONLY)
SUCTION
LINE
DISTRIBUTOR
ASSEMBLY
DISTRIBUTOR
TUBES
LIQUID
LINE
MALE EQUALIZER LINE
FITTING
SENSING
LINE
EQUALIZER
LINE
TXV
TEFLON
RING
(Uncased Coil Shown)
STUB END
TEFLON
RING
SENSING BULB
LIQUID LINE
ORIFICE HOUSING
LIQUID LINE ASSEMBLY
WITH BRASS NUT
Figure 16. Typical TXV Removal
1. On fully cased coils, remove the coil access and
plumbing panels.
2. Remove any shipping clamps holding the liquid line
and distributor assembly.
3. Disconnect the equalizer line from the TXV equalizer
line fitting on the suction line.
4. Remove the suction line sensing bulb as illustrated in
figure 16.
5. Disconnect the liquid line from the TXV at the liquid line
assembly.
6. Disconnect the TXV from the liquid line orifice housing.
Take care not to twist or damage distributor tubes
during this process.
7. Remove and discard TXV and the two Teflon rings as
illustrated in figure 16.
Installing New Indoor Unit Metering
Device
13ACD units can be configured for use in with HCFC−22
fixed orifice or TXV metering devices. This section
provides instructions on installing either a fixed orifice or
TXV refrigerant metering device.
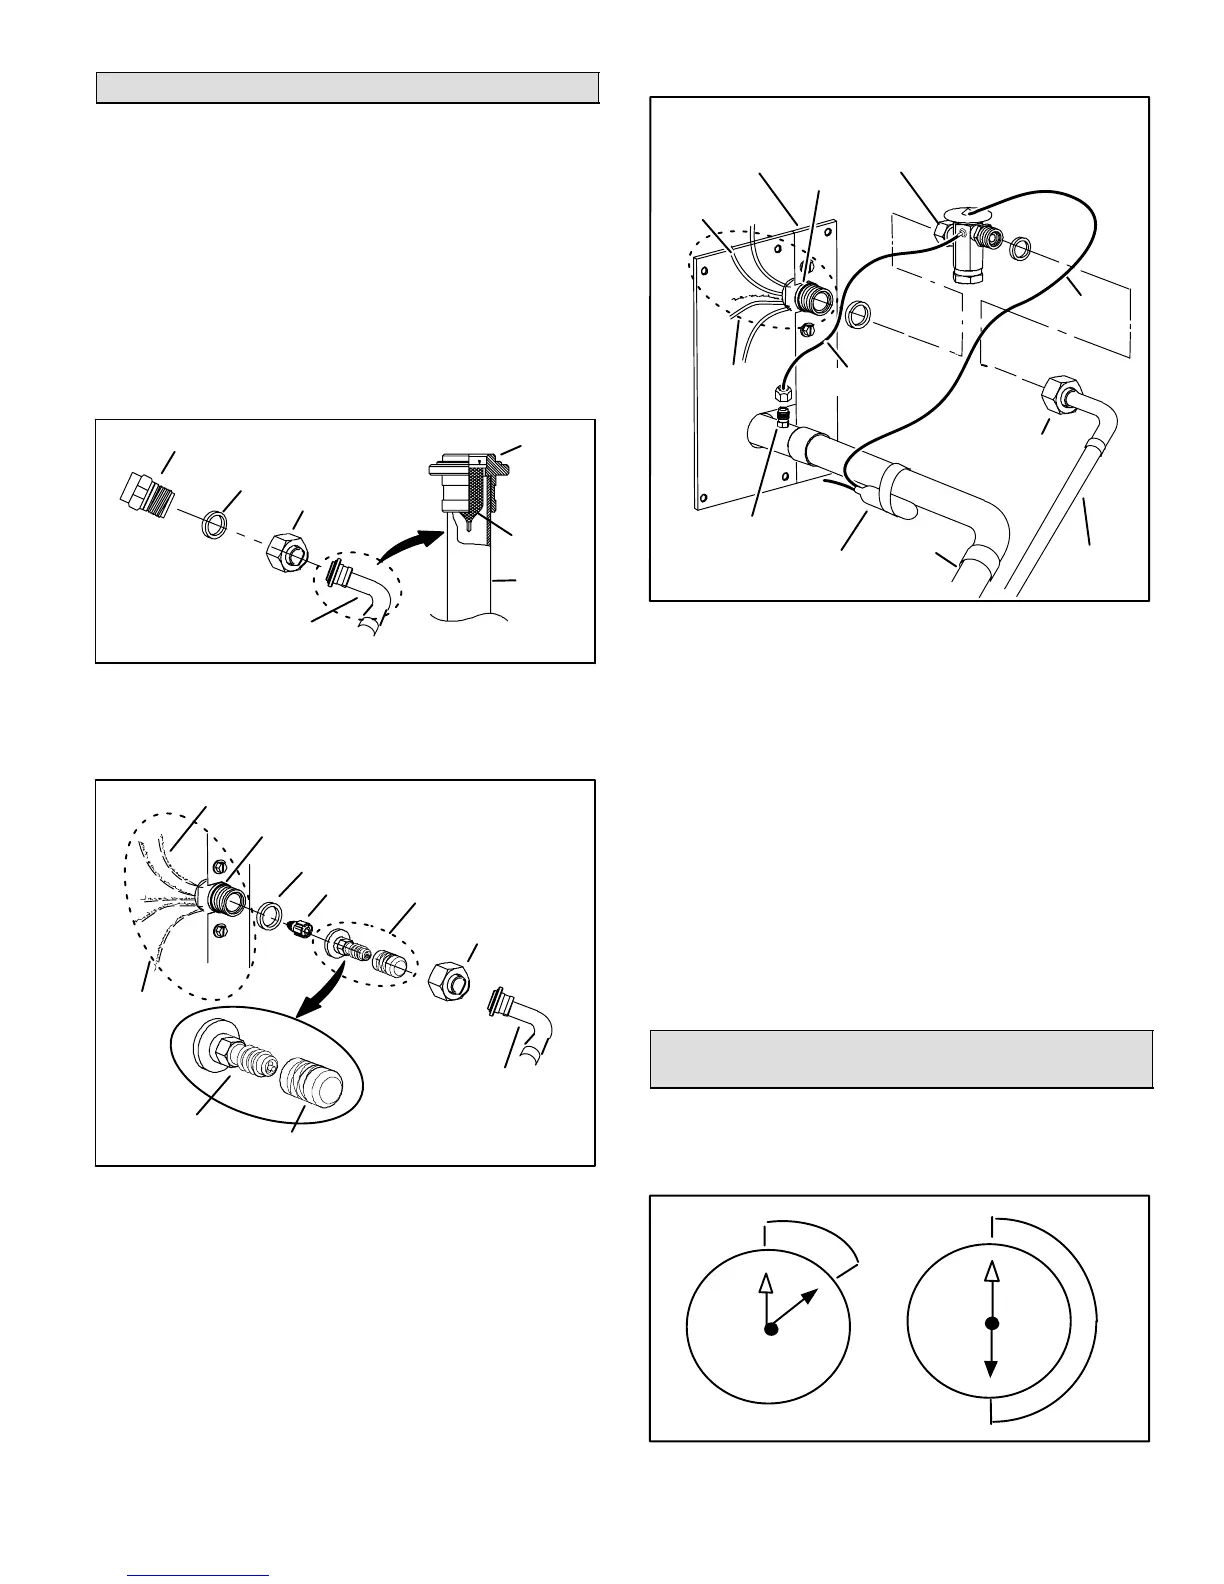
1
2
3
4
5
6
7
8
9
10
11
12
1/8 TURN
1
2
3
4
5
6
7
8
9
10
11
12
1/2 TURN
Figure 17. Tightening Distance

 Loading...