9
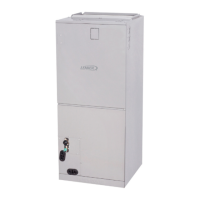
4. Use either a mechanical lifting device or a minimum of
two people to raise the unit and insert the threaded rods
into the suspension brackets on the unit chassis. Slide
a washer and then a nut onto each rod below each
suspension bracket. Use the leveling nut (beneath
suspension bracket) to adjust the unit to the correct
height. Remove the electrical tape holding the upper
washers and nuts in place and tighten each of the four
nuts above the brackets down onto the brackets. This
will ensure that the unit remains level.
INDOOR UNIT
LEVELING
NUT
⅜” THREADED
ROD
SUSPENSION
BRACKET
SUPPLY AIR
OPENING
FRONT VIEW
When unit is
level, tighten
nut to secure
position of
suspension
bracket on
rod.
Figure 7. Suspending Hardware
5. If necessary, install a eld-provided isolation grommet
as shown in “Figure 8. Isolation Grommet” to prevent
transmission of vibration from unit to structural ceiling.
6. If the unit is being installed in an application that includes
a sheet rock (plasterboard) ceiling, it is required that
an access panel be installed in a suitable location.
This will also allow access for future maintenance.
Access is required during the start up process to test
the condensate disposal system. See “Figure 13.
Condensate Drain Test” on page 10.
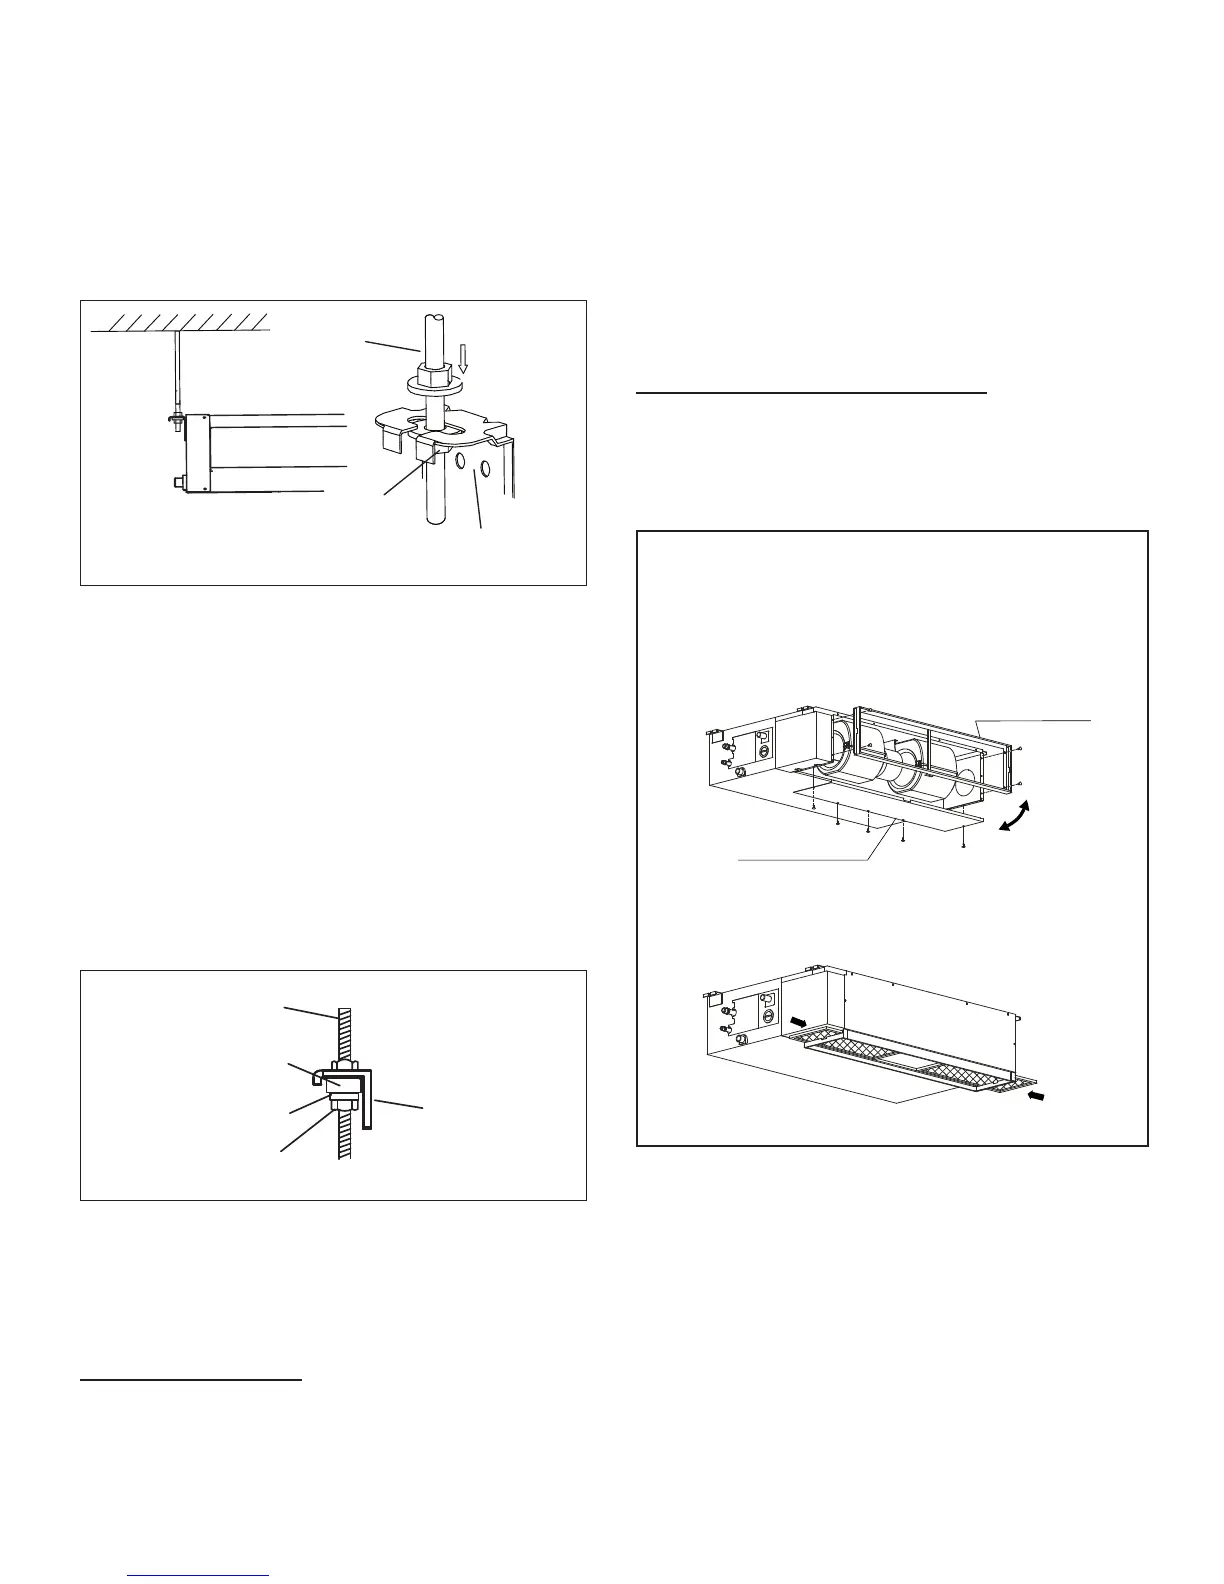
7. The unit is factory-congured for the supply air to be
delivered from the front and the return air lter at the
rear of the unit. The return air lter location can be
relocated in the eld for bottom return air lter access,
if more convenient. See “Figure 8. Isolation Grommet”.
LEVELING
NUT
⅜” THREADED
ROD
SUSPENSION
BRACKET
FIELD-PROVIDED
ISOLATION GROMMET
WASHER
Figure 8. Isolation Grommet
NOTE: No part of the suspended ceiling, or other supports
not directly associated with the indoor unit
installation, can be xed to, or touch the indoor
unit, in any form. Minimum clearances must be
observed at all times.
Installation Guidelines
• Provide separate support for the weight of the duct
system. Duct system must not be supported by the
indoor unit
• Use exible joints (canvas) at the point where the duct
connects to the unit on both ends. Material must meet
all local and national code requirements
• When unit is being installed in a location where even
the slightest noise would be a problem (meeting room
or other very quiet space), design duct system to avoid
transmission of vibration to the structure to the extent
possible
• Follow ACCA manual D guidelines for return air l-
ter grille sizing. The return air lter grille should have
a minimum surface area of 200 square inch per ton
(1290 cm
2
per 3.5kW)
Field-Relocation of Return Air Filter
Depending on installation requirements, the return air lter
may need to be relocated as a bottom return air. See
“Figure 9. Field-Relocation of Return Air Filter (Typical) -
Bottom Return Air” on page 9 for eld-relocating the
return air lter.
Remove the return air filter from its existing location at
the rear of the unit.
Remove the screws that secure the filter frame to the
rear of the unit and set the frame aside.
Remove the screws that secure the return air cover
plate to the bottom of the unit. Set the cover plate aside.
e
Side rail
Dentilation panel
1
2
RETURN AIR
FILTER FRAME
RETURN AIR
COVER PLATE
Re-install the return air filter in the repositioned filter
frame in the bottom of the unit. Refer to the arrows in the
illustration below.
Figure 9. Field-Relocation of Return Air Filter
(Typical) - Bottom Return Air
 Loading...