31
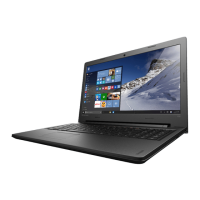
Lenovo ideapad 100-14IBY/100-15IBY
Removing and replacing an FRU
Thissectionpresentsexplodedgureswiththeinstructionstoindicatehowto
removeandreplacetheFRU.Makesuretoobservethefollowinggeneralrules:
1. Donotattempttoserviceanycomputerunlessyouhavebeentrainedand
certied.Anuntrainedpersonrunstheriskofdamagingparts.
2. BeforereplacinganyFRU,review“FRUreplacementnotices”onpage30.
3. BeginbyremovinganyFRUsthathavetoberemovedbeforethefailing
FRU.AnyofsuchFRUsarelistedatthetopofthepage.Removethemin
theorderinwhichtheyarelisted.
4. FollowthecorrectsequenceinthestepstoremovetheFRU,asgiveninthe
guresbythenumbersinsquarecallouts.
5. WhenturningascrewtoreplaceanFRU,turnitinthedirectionasgivenby
thearrowinthegure.
6. WhenremovingtheFRU,moveitinthedirectionasgivenbythearrowin
thegure.
7. ToputthenewFRUinplace,reversetheremovalproceduresandfollow
anyofthenotesthatpertaintoreplacement.Forinformationabout
connectingandarranginginternalcables,see“Locations”onpage65.
8. WhenreplacinganFRU,usethecorrectscrewasshownintheprocedures.
DANGER
Before removing any FRU, turn off the computer, unplug all power cords from
electrical outlets, remove the battery pack, and then disconnect any of the
interconnecting cables.
Attention:AfterreplacinganFRU,donotturnonthecomputeruntilyouhave
madesurethatallscrews,springs,andothersmallpartsareinplaceandnone
arelooseinsidethecomputer.Verifythisbyshakingthecomputergentlyand
listeningforrattlingsounds.Metallicpartsormetalakescancauseelectrical
shortcircuits.
Attention:Thesystemboardissensitiveto,andcanbedamaged by,
electrostaticdischarge.Beforetouching it,establishpersonalgroundingby
touchingagroundpointwithonehandorusinganelectrostaticdischarge(ESD)
strap(P/N6405959)toremovepotentialshockreasons.
Notes:
•
The following procedures about removing and replacing FRUs are the same for the
Lenovo ideapad 100-14IBY/100-15IBY.
•
The illustrations used in this section are of the Lenovo ideapad 100-15IBY, unless
otherwise stated.
 Loading...
