17
B efore s ervicing ask the customer what the trouble is.
C heck the adjustments. (P ower supply : 120V , R emoval of trans it bolts etc..)
C heck the troubles referring to the troubleshooting.
Decide service steps referring to disassembly instructions.
Then, service and repair.
After servicing, operate the appliance to s ee whether it works OK or NOT.
7. TR OUBLE S HOOT ING
7-1. B E F OR E S VC C HE C K ING
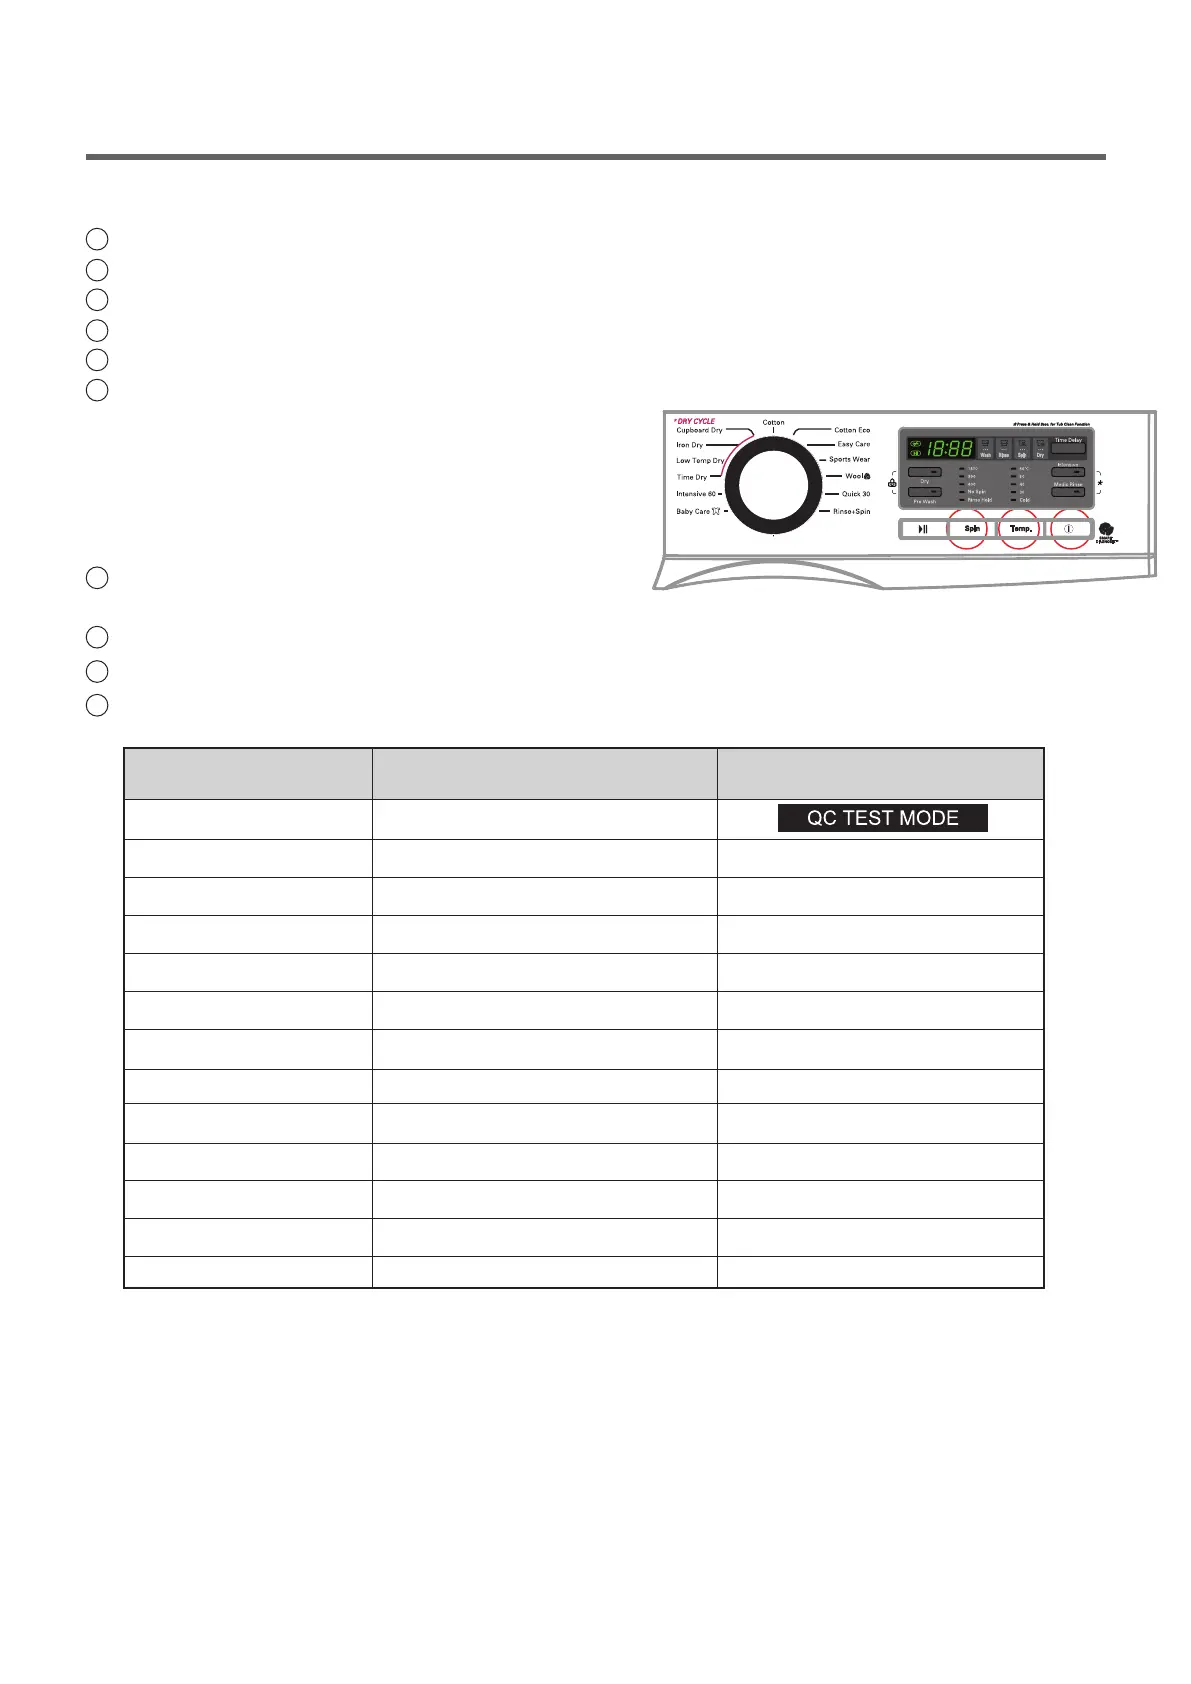
7-2. LOAD T E S T MODE
1
P ress and Hold ‘
S pin’ & ‘ T emp. ’ buttons
and then pres s ‘P ower’ button.
2
The washer must be empty and the controls mus t be in the off state.
3
P ress P ower with above two buttons pressed and then buzzer will sound.
4
P ress the S tart/P ause button repeatedly to cycle through the tes t modes
1
2
3
4
5
6
None
1 time
2 times
3 times
4 times
5 times
6 times
7 times
8 times
9 times
10 times
11 times
12 times
Turns on all lamps and locks the door.
Tumble clockwis e.
Low s peed S pin.
High speed S pin.
Inlet valve for prewas h turns on.
Inlet valve for main wash turns on.
Inlet valve for hot water turns on.
Inlet valve for Dry turns on.
Tumble counterclockwise.
Heater turns on for 3 sec.
Drain pump turns on.
Dry F an / Dry Heater turn on.
Off
rpm (42~50)
rpm (55~65)
rpm (125~155)
Water level frequency (25~65)
Water level frequency (25~65)
Water level frequency (25~65)
Water level frequency (25~65)
rpm (42~50)
Water temperature
Water level frequency (25~65)
Dry F an 6min. / Dry Heater 5min.
-
Number of times the
S tart/P ause button is pres s ed
C heck P oint
Display S tatus
 Loading...