3
WALL HOUSING INSTALLATION
Two types of wall housing enclosures are used in DMC1
intercom installations. Both types mount between two
standard 16” centered 2 x 4 wall studs.
DMC1H Wall Housing Installation
The DMC1H wall housing is for an intercom Master Station
installation without the optional CD/MP3 Player.
The DMC1H wall housing is for mounting:
• One DMC1 Master Station intercom unit
• One optional MC3 or MC8 chime module
• One TE5D power transformer for powering the Master
Station
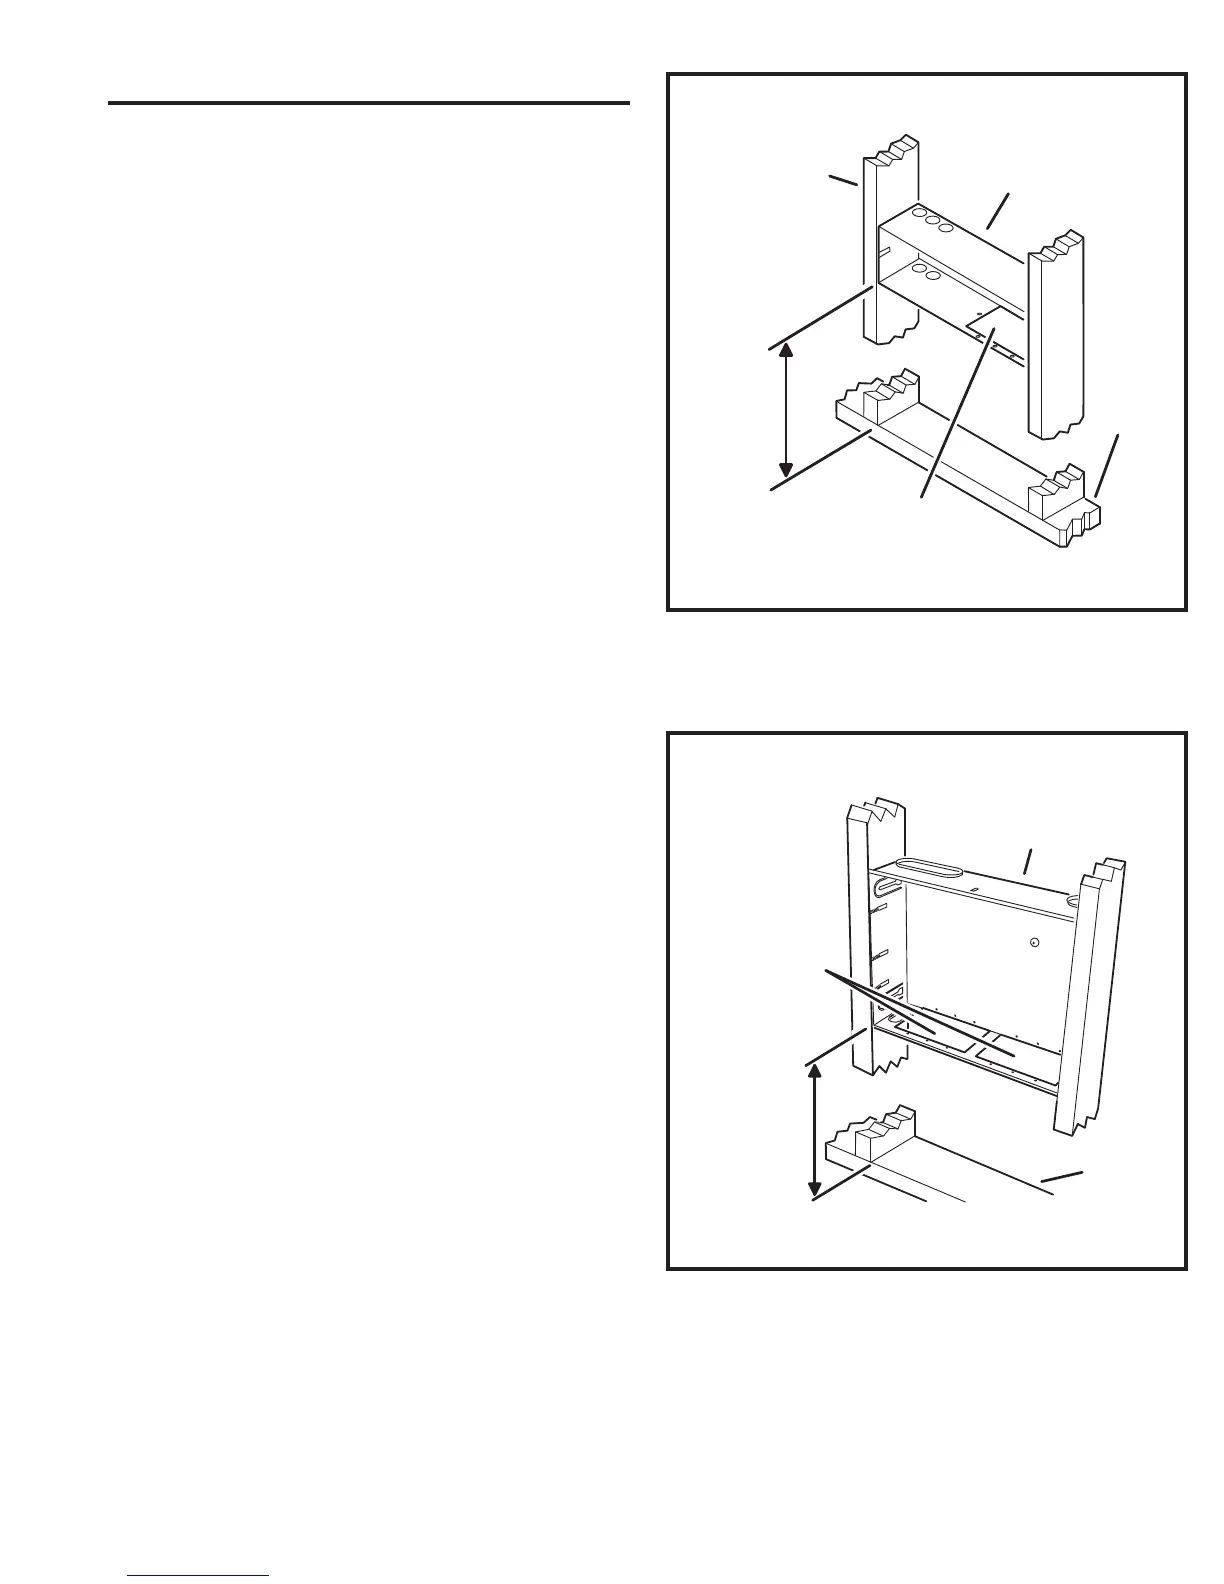
1. Determine a location for the wall housing.
2. Position the back side of the wall housing fl ush with the back of the
2 x 4 studs with the bottom edge approximately 59” above the fl oor.
Be sure the rectangular transformer mounting knockout is on the
bottom of the wall housing (see Figure 2).
3. Attach the wall housing to the studs with wood screws. If the studs
are spaced farther apart than 16”, use wood shims to make up the
difference. ALWAYS SECURE THE WALL HOUSING ON BOTH
SIDES.
4. Install the four 1-1/2” snap-in bushings into the round knockout holes.
DMC1HC Wall Housing Installation
The DMC1HC is for an intercom Master Station installation
with the optional CD/MP3 Player.
The DMC1HC wall housing is for mounting:
• One DMC1 Master Station intercom unit
• One DMCMP3 CD/MP3 Player
• One optional MC3 or MC8 chime module
• One TE5D power transformer for powering the Master
Station
• One TE2D power transformer for powering the CD/
MP3 Player
1. Determine a location for the wall housing.
2. Position the back side of the wall housing fl ush with the back of the
2 x 4 studs with the bottom edge approximately 52” above the fl oor.
Be sure the two rectangular transformer mounting knockouts are on
the bottom of the wall housing (see Figure 3).
3. Attach the wall housing to the studs with wood screws. If the studs
are spaced farther apart than 16”, use wood shims to make up the
difference. ALWAYS SECURE THE WALL HOUSING ON BOTH
SIDES.
59" ABOVE
FLOOR
PLATE
WALL
STUD
DMC1H
WALL HOUSING
FLOOR
PLATE
TRANSFORMER
KNOCKOUT
Figure 2. DMC1H Wall Housing Installation
52" ABOVE
FLOOR
PLATE
DMC1HC
WALL HOUSING
MOUNT
HOUSINGS
FLUSH WITH
BACK OF WALL
STUDS
FLOOR
PLATE
TRANSFORMER
KNOCKOUTS
Figure 3. DMC1HC Wall Housing Installation
 Loading...