Solera
®
Awning
Smart Arm
Installation and Owner’s Manual
(For Aftermarket Applications)
www.lci1.com 574-537-8900
Page 10
Solera® Awning Smart Arm Aftermarket Manual
Troubleshooting
Manual Override
In the event of power loss or motor failure, the awning can
be extended and retracted manually� Perform the following
procedure to manually retract the awning�
1. Remove the rubber grommet (Fig.19) from the drive head
assembly, exposing the manual override nut on the motor�
2. Using a ⁄” socket and cordless or electric drill or screw
gun, spin the manual override nut counterclockwise to
retract the awning (Fig.20)�
NOTE: Use caution when retracting the awning manually�
The use of a step stool or ladder may be required to
completely retract the awning�
3. When the awning is completely retracted, replace the
rubber grommet in the drive head assembly (Fig.19)�
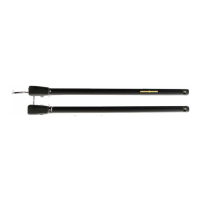
1. Extend the awning to the fully open position�
2. Choose the side of the awning for optimum shade or
convenient water runoff�
3. Pull downward on the joint of the pitch arm until desired
pitch is set (Fig.17A)� Belleville washers and bolt (Fig.17B)
allow for the joint to remain in the position set by the operator�
NOTE: The awning can be retracted without resetting the
pitch�
NOTE: If the pitch arm does not hold position, it can be
tightened by adjusting the bolt (Fig.17B) in the center of the
joint�
Some awnings are equipped with a 2-position pitch arm
(Fig.18)� The 2-position pitch arm can be set in the pitch
position or snapped into a straight position by pushing the
release button (Fig.18A) and sliding the sleeve (Fig.18B)�
NOTE: Do not push the joint of any pitch arm up past the
point where the two sections are in a straight line� This will put
tension on the gas strut, which can cause the strut to break�
rubber grommet
Fig.19
Fig.20
Fig.17
B
A
B
A
slide
Fig.18
 Loading...


