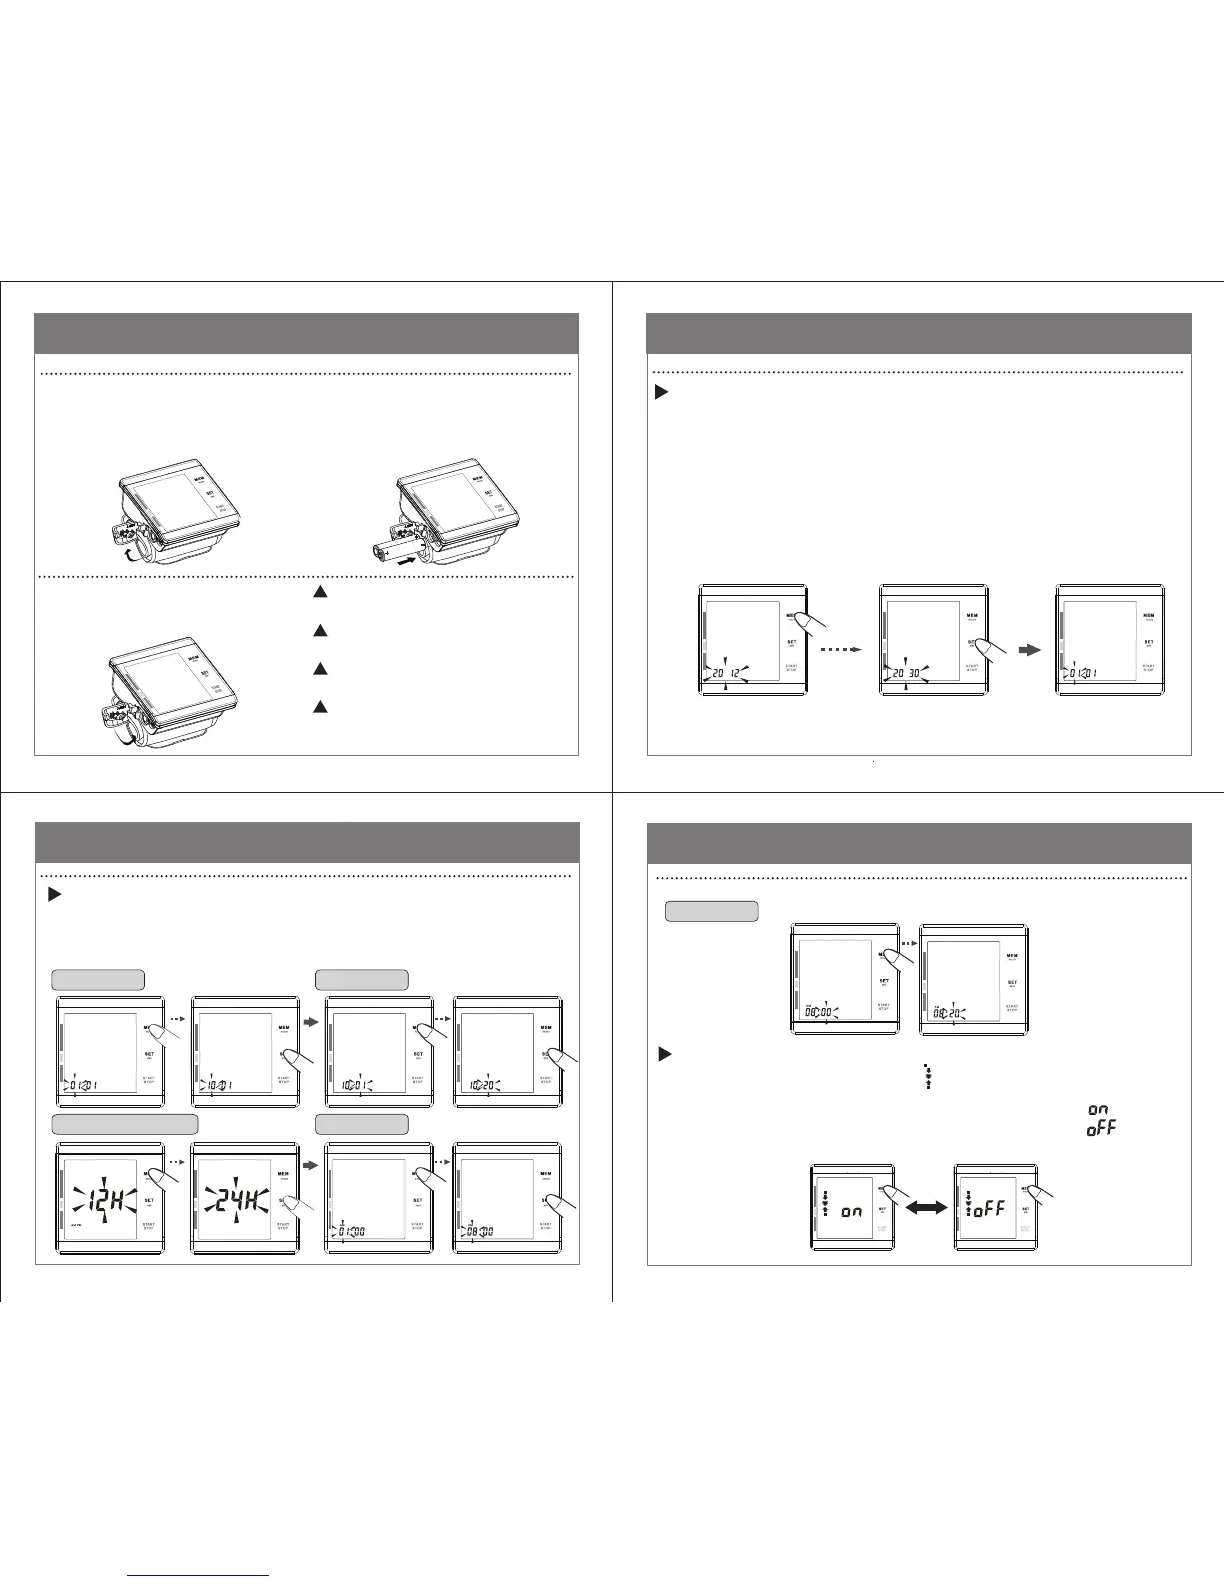
Hour Setting
time system conversion
The year can be set between 2012 and 2030.
After displaying 2030, the year will return to 2009.
3
The Positioning Sensor symbol “ ” will appear.
Press the “MEM” button to change the current setting.
If the positioning system is turned on, the LCD will display " ".
If the positioning system is turned off, the LCD will display " ".
Press the “SET” button and continue with step 4.
Day SettingMonth Setting
Minute Setting
1.2 The year appears and flashes after pressing the “SET” button
for 3~4 seconds while the unit is off. Press the “SET” button
again and continue with step 2.
Press the “MEM” button one time to increase one year, twice for
two years, etc. Keep the “MEM” button depressed and the
value quickly increases.
1.1
All information will appear on the display when the batteries are installed
for the first time. After 2 seconds the year flashes on the display.
Press the “SET” button and continue with step 2.
Press the “MEM” button to change the month, then press the “SET” button
and continue with next step. Then set the day, the time system conversion,
the hour and the minute by using the same method. Continue with step 3.
Adjusting Settings
Adjusting Settings
Adjusting Settings
10
12
11
1 To set year
2
To set positioning sensor
To set date and time
Battery Installation / Replacement
9
NOTICE: Use two identical 1.5V
alkaline batteries type AAA / LR03.
NOTICE: DO NOT use rechargeable
batteries.
NOTICE: Replace BOTH batteries
if the low battery symbol displays.
NOTICE: DO NOT leave low batteries
in the battery compartment! They may
leak and cause damage to the unit.
1
Remove the battery cover from
the battery compartment.
Use two identical 1.5V alkaline
batteries, type AAA / LR03.
2
Install the batteries so the + (positive)
and - (negative) battery polarities match
the polarities of the battery compartment
as indicated.
Replace the battery cover.
3
+
+
-
-

 Loading...