11 ENGLISH
Press the check button on the battery cartridge to indicate the remain-
ing battery capacity. The indicator lamps light up for a few seconds.
Indicator lamps Remaining
capacity
Lighted O Blinking
75% to 100%
50% to 75%
25% to 50%
0% to 25%
Charge the
battery.
The battery
may have
malfunctioned.
NOTE: Depending on the conditions of use and the
ambienttemperature,theindicationmaydierslightly
from the actual capacity.
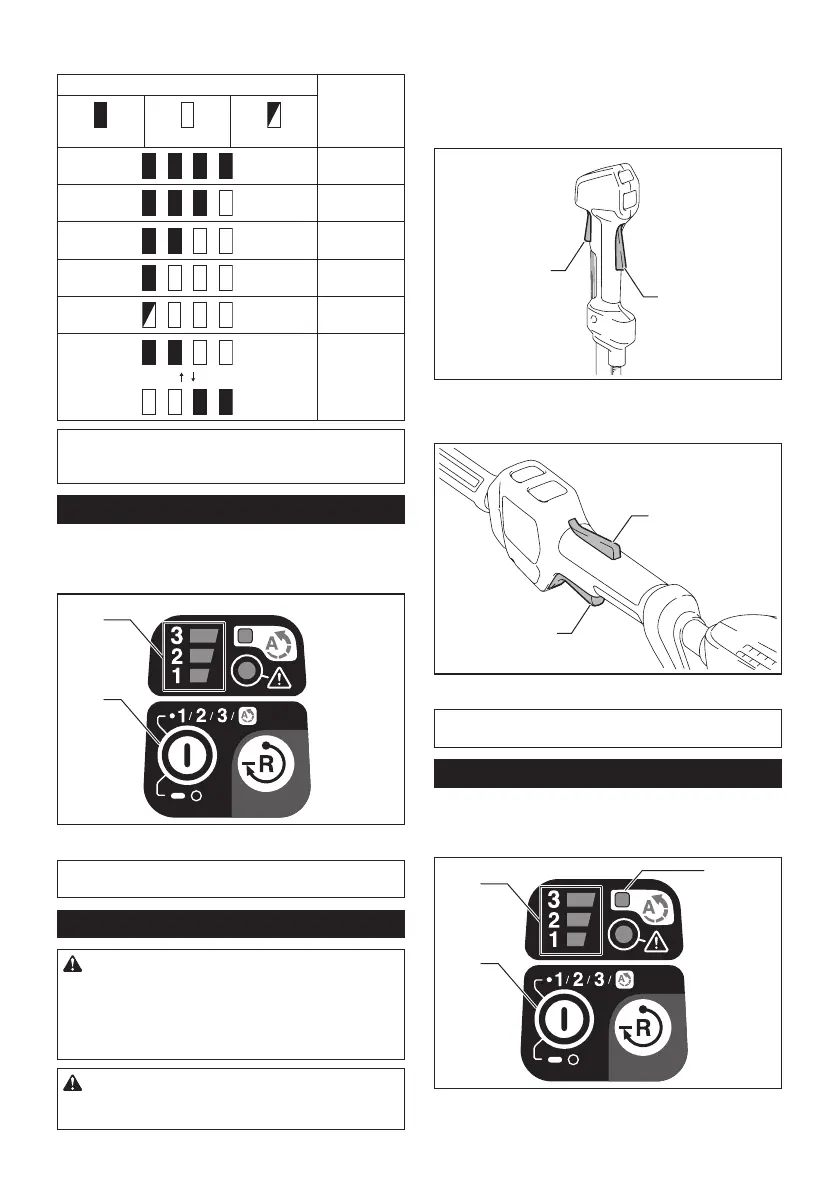
Main power switch
Tap the main power button to turn on the tool.
Toturnothetool,pressandholdthemainpower
buttonuntilthespeedindicatorgoeso.
2
1
►1. Speed indicator 2. Main power button
NOTE:Thetoolwillautomaticallyturnedoifitisleft
without any operations for a certain period of time.
Switch action
WARNING: Before installing the battery car-
tridge on the tool, always check to see that the
switch trigger actuates properly and returns to
the "OFF" position when released. Operating a tool
with a switch that does not actuate properly can lead
tolossofcontrolandseriouspersonalinjury.
CAUTION: Never put your nger on the
switch when carrying. The tool may start uninten-
tionallyandcauseinjury.
To prevent the switch trigger from being accidentally
pulled,alock-oleverisprovided.
Tostartthetool,graspthehandle(thelock-oleveris
released by the grasp) and then pull the switch trigger.
To stop the tool, release the switch trigger.
DUR190U and DUR191U
1
2
►1.Lock-olever2. Switch trigger
DUR190L and DUR191L
1
2
►1.Lock-olever2. Switch trigger
NOTE:Thetoolisautomaticallyturnedoafterthe
tool is left for a certain period without any operations.
Speed adjusting
You can select the tool speed by tapping the main
power button. Each time you tap the main power button,
the level of speed will change.
2
1
3
►1. Speed indicator 2. Main power button 3. ADT
indicator
 Loading...