11 ENGLISH
48°-bevel cutting
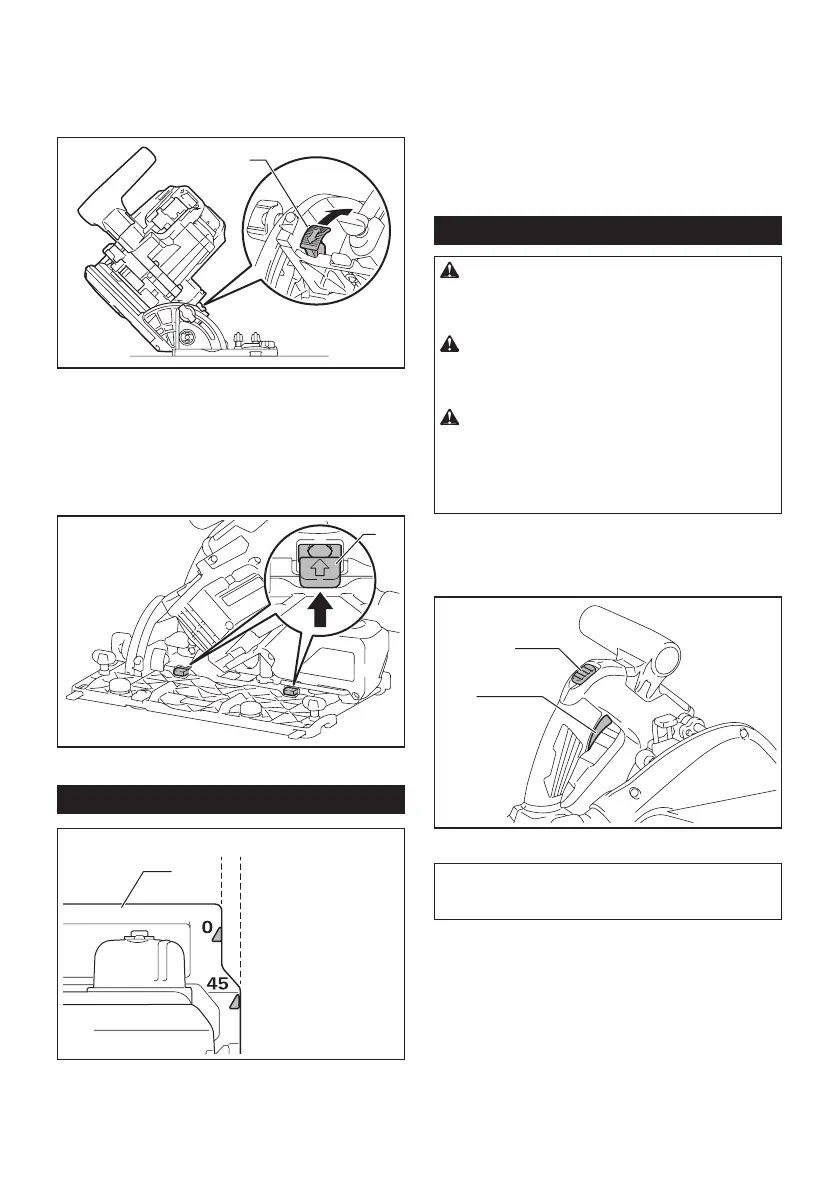
Toperform48°-bevelcutting,loosentheclamping
screws and fully tilt the lever toward the direction of the
arrowinthegure.Thensetthebevelangleto48°and
tighten the clamping screws.
1
►1. Lever
-1°-bevel cutting
Toperform-1°-bevelcutting,loosentheclamping
screws and press the levers toward the direction of the
arrowinthegure.Thensetthebevelangleto-1°and
tighten the clamping screws.
1
►1. Lever
Sighting
1
AB
►1. Base
Thecuttinglinevariesdependingonthecuttingangle
andwhetheryouusetheguiderail(optionalaccessory).
When using the tool without guide rail
Forstraightcuts,aligntheApositiononthefrontofthe
base with your cutting line. For 45° bevel cuts, align the
B position with it.
When using the tool with guide rail
For both straight cuts and 45° bevel cuts, always align
theApositiononthefrontofthebasewithyourcutting
line.
Switch action
WARNING: Before installing the battery car-
tridge into the tool, always check to see that the
switch trigger actuates properly and returns to
the "OFF" position when released.
WARNING: NEVER defeat the lock-off button
by taping down or some other means.Aswitchwith
a negated lock-off button may result in unintentional
operationandseriouspersonalinjury.
WARNING: NEVER use the tool if it runs when
you simply pull the switch trigger without press-
ing the lock-off button.Aswitchinneedofrepair
may result in unintentional operation and serious
personalinjury.ReturntooltoaMakitaservicecenter
for proper repairs BEFORE further usage.
Topreventtheswitchtriggerfrombeingaccidentally
pulled,alock-offbuttonisprovided.Tostartthetool,
depress the lock-off button and pull the switch trigger.
Release the switch trigger to stop.
2
1
►1. Switch trigger 2. Lock-off button
NOTICE: Do not pull the switch trigger hard
without pressing in the lock-off button.Thiscan
cause switch breakage.
 Loading...