17 ENGLISH
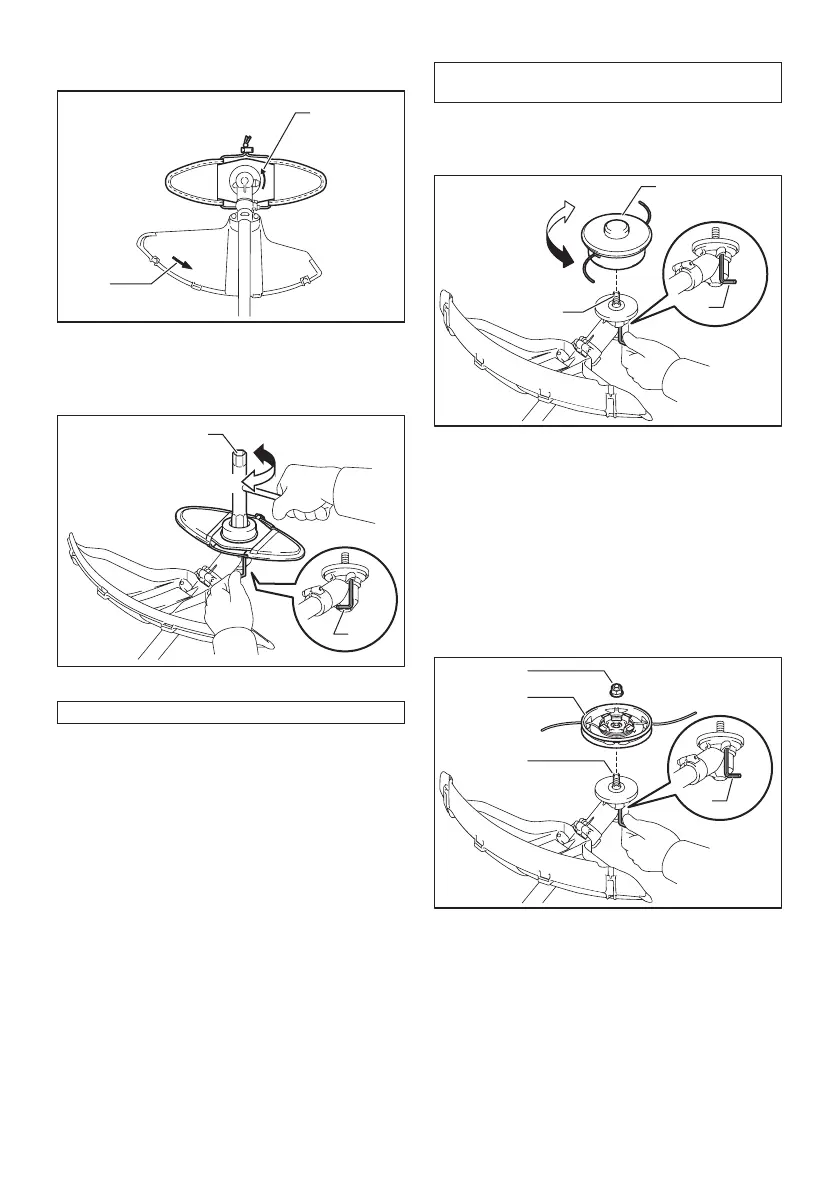
2. Mount the cutter blade onto the receive washer
so that the arrows on the cutter blade and protector are
pointing in the same direction.
1
1
►1. Arrow
3. Put the clamp washer and cup onto the cutter
blade and then tighten the nut securely by the box
wrench.
1
2
3
4
►1. Box wrench 2. Hex wrench 3. Loosen 4. Tighten
NOTE: Tightening torque : 20 - 30 N•m
4. Remove the hex wrench from the gear case.
To remove the cutter blade, follow the installation proce-
dures in reverse.
Nylon cutting head
NOTICE: Be sure to use genuine Makita nylon
cutting head.
There are two types of nylon cutting head; the bump &
feed type and the manual feed type.
Bump & feed type
4
5
3
1
2
►1. Nylon cutting head 2. Spindle 3. Hex wrench
4. Loosen 5. Tighten
1. Insert the hex wrench through the hole in the gear
case to lock the spindle. Rotate the spindle until the hex
wrench is fully inserted.
2. Place the nylon cutting head onto the spindle and
tighten it securely by hand.
3. Remove the hex wrench from the gear case.
To remove the nylon cutting head, follow the installation
procedures in reverse.
Manual feed type
4
1
3
2
►1. Nut 2. Nylon cutting head 3. Spindle 4. Hex
wrench
1. Insert the hex wrench through the hole in the gear
case to lock the spindle. Rotate the spindle until the hex
wrench is fully inserted.

 Loading...