[4] DISASSEMBLY/ASSEMBLY
[4]-1. V-belt 5-800, Cutting device (cont.)
Repair
P 5/ 19
Assemble their parts by reversing the disassembly procedure.
(1) Assemble one of Ball bearing 6203LLU to Cutting holder, then snap Retaining ring R-40 into the groove of
Cutting device to secure the bearing.
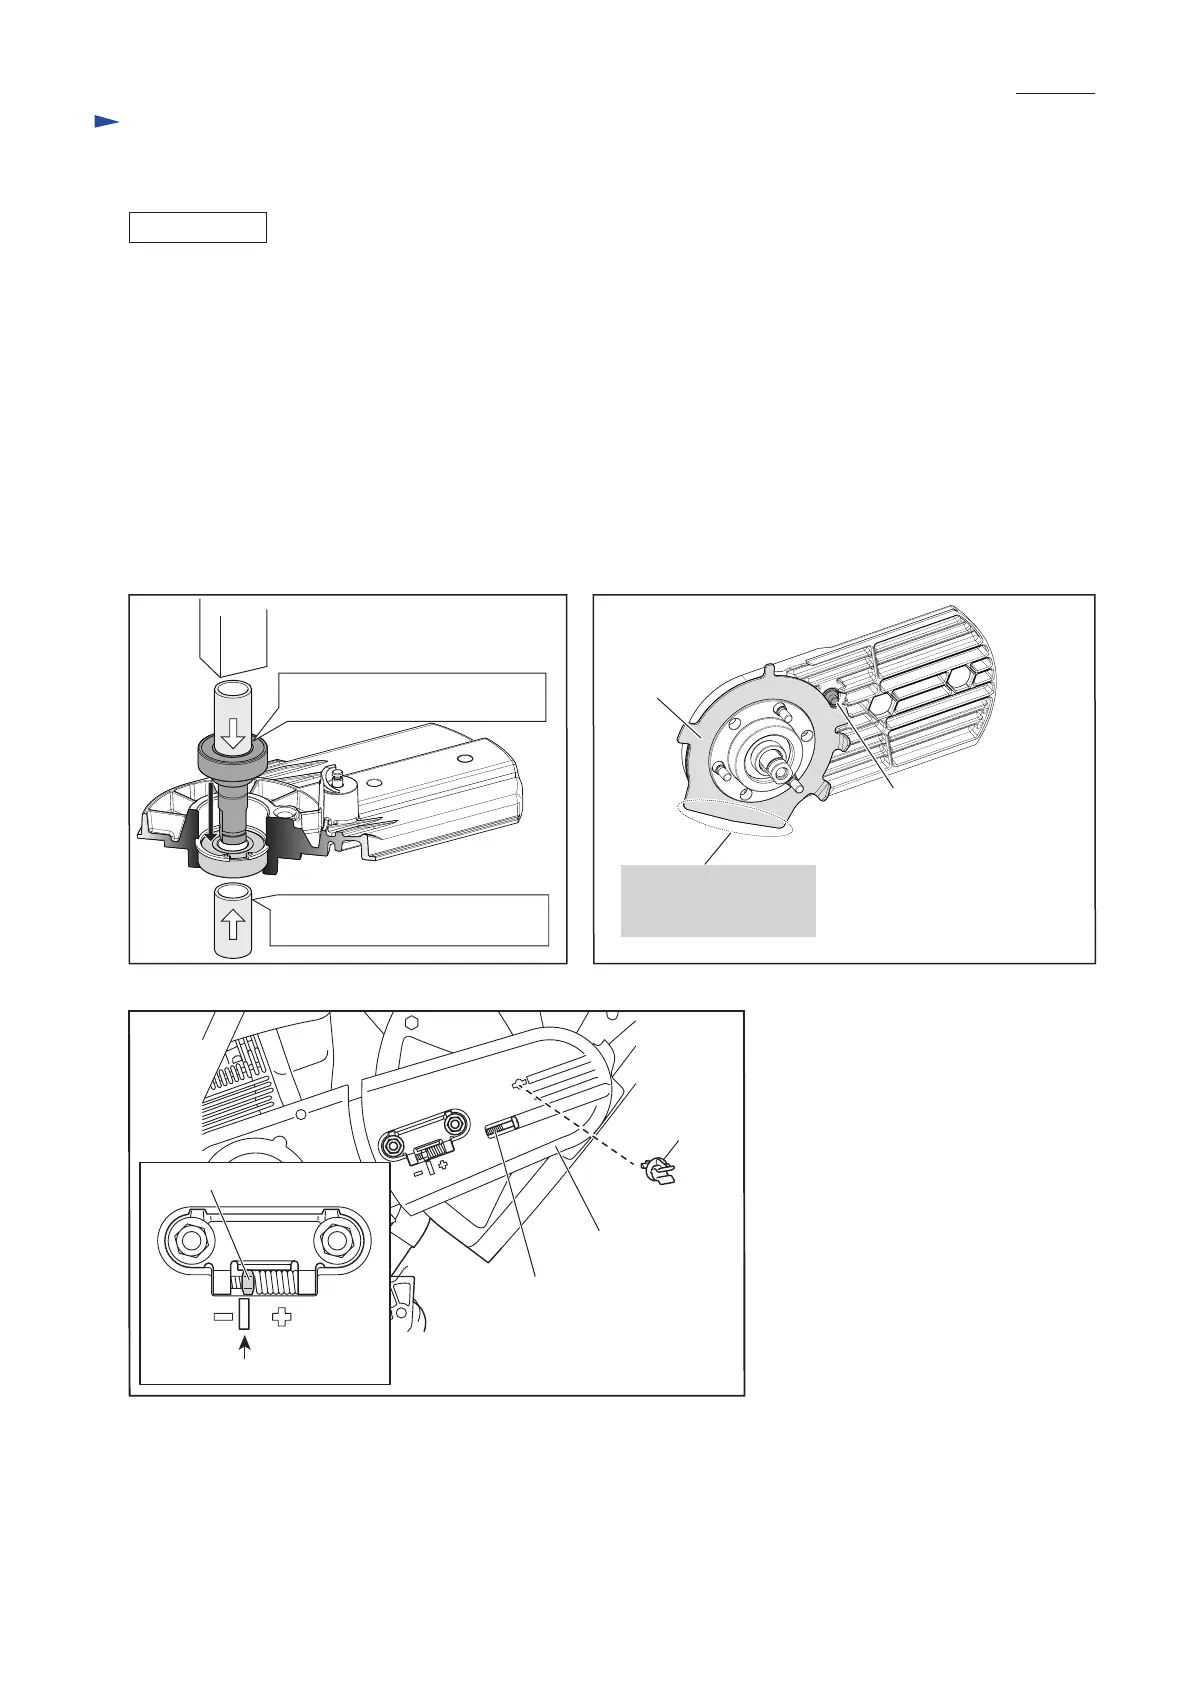
(2) Insert Spindle into the other Ball bearing 6203LLU, then assemble them to Cutting device until they stop.
Note: Use two 1R030 as drawn in Fig. 7 so that their inner retainers of Ball bearings 6203LLU can be held without load
to the other portions.
This retains the proper tensions to their inner retainers.
(3) Insert Lock shaft into the place of Cutting device, then set Sliding disc and Impact plate. Push Lock shaft from
Belt cover side toward Blade installation side until the top bumps against Impact plate. (Fig. 8)
(4) Belt tension must be adjusted by turning M6 Tension screw clockwise until M6 Hex nut is aligned to a line between
plus mark and minus mark. (Fig. 9.)
(5) Holder of Water supply set can be set to Belt cover by turning clockwise/ counterclockwise to 90° .
Fig. 7
ASSEMBLING
1R030 to hold the inner retainer
of Ball bearing 6203LLU
1R030 to hold the inner retainer
of Ball bearing 6203LLU
Fig. 8
Impact plate
[Belt cover side]
Lock shaft
[Blade installation side]
Fig. 9
M6 Square nut
Line
M6 Tension screw
Belt cover
Align the flat end of
Impact plate to that of
Hood complete.
Holder
 Loading...