[4] DISASSEMBLY/ASSEMBLY
[4]-4. Flywheel, Ignition coil (cont.)
Repair
P 9/ 19
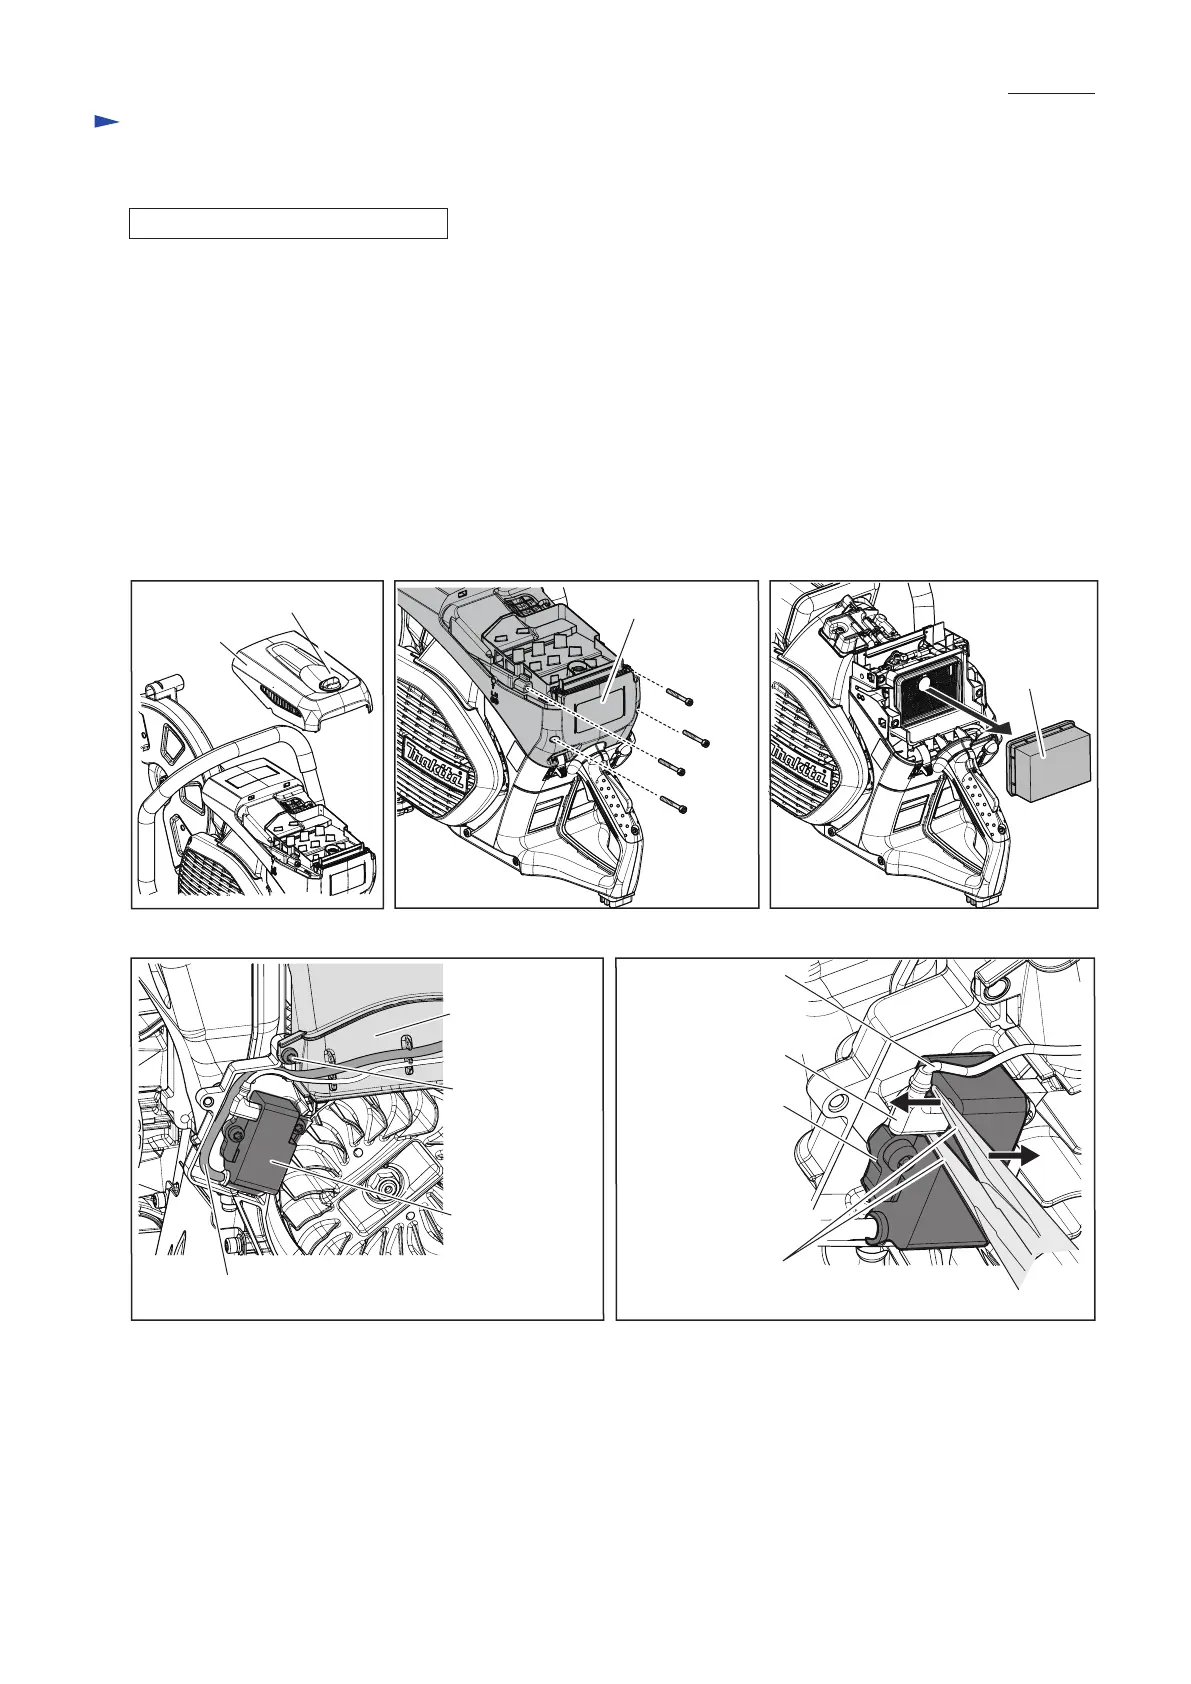
DISASSEMBLING IGNITION COIL
Fig. 27
Fig. 28 Fig. 29
Fig. 30 Fig. 31
(1) Loosen M6x15 Thumb screw, then remove Top cover. (Fig. 27)
(2) Loosen four M5x40 Hexalobular socket head bolts, then remove Filter cover complete (Fig. 28)
and Air filter. (Fig. 29)
(3) Loosen M5x16 Hexalobular socket head bolt, then remove Cylinder cover.
Remove Plug cord of Ignition coil assembly from Cylinder cover. (Fig. 30)
(4) Remove Flag terminal on Lead unit end from Ignition coil with care to the breaking of Lead unit.
Note: It is recommend to apply “the principle of leverage.” Without being forced to pull, put the long noses of Pliers
on the edge of Ignition coil and lever up the flag terminal. (Fig. 31)
(5) Loosen two M5x16 Hexalobular socket head bolts, and then remove Ignition coil. Refer to Fig. 26.
Important: Unless the disassembling is necessary for repair, do not touch the bolts of Ignition coil.
In case of disassembling them, the hard work “ADJUSTMENT THE GAP BETWEEN
IGNITION COIL AND FLYWHEEL” will be required.
M6x15 Thumb screw
Top cover
Filter cover
complete
Flag terminal
Lead unit
Cylinder cover
Plug cord of
Ignition coil assembly
Ignition coil
Ignition coil
Air filter
M5x40
Hexalobular
socket head
bolt (4 pcs.)
Long noses of Pliers
put on the edge of Ignition coil
M5x16
Hexalobular
socket head
bolt
 Loading...