Repair
P 9 / 16
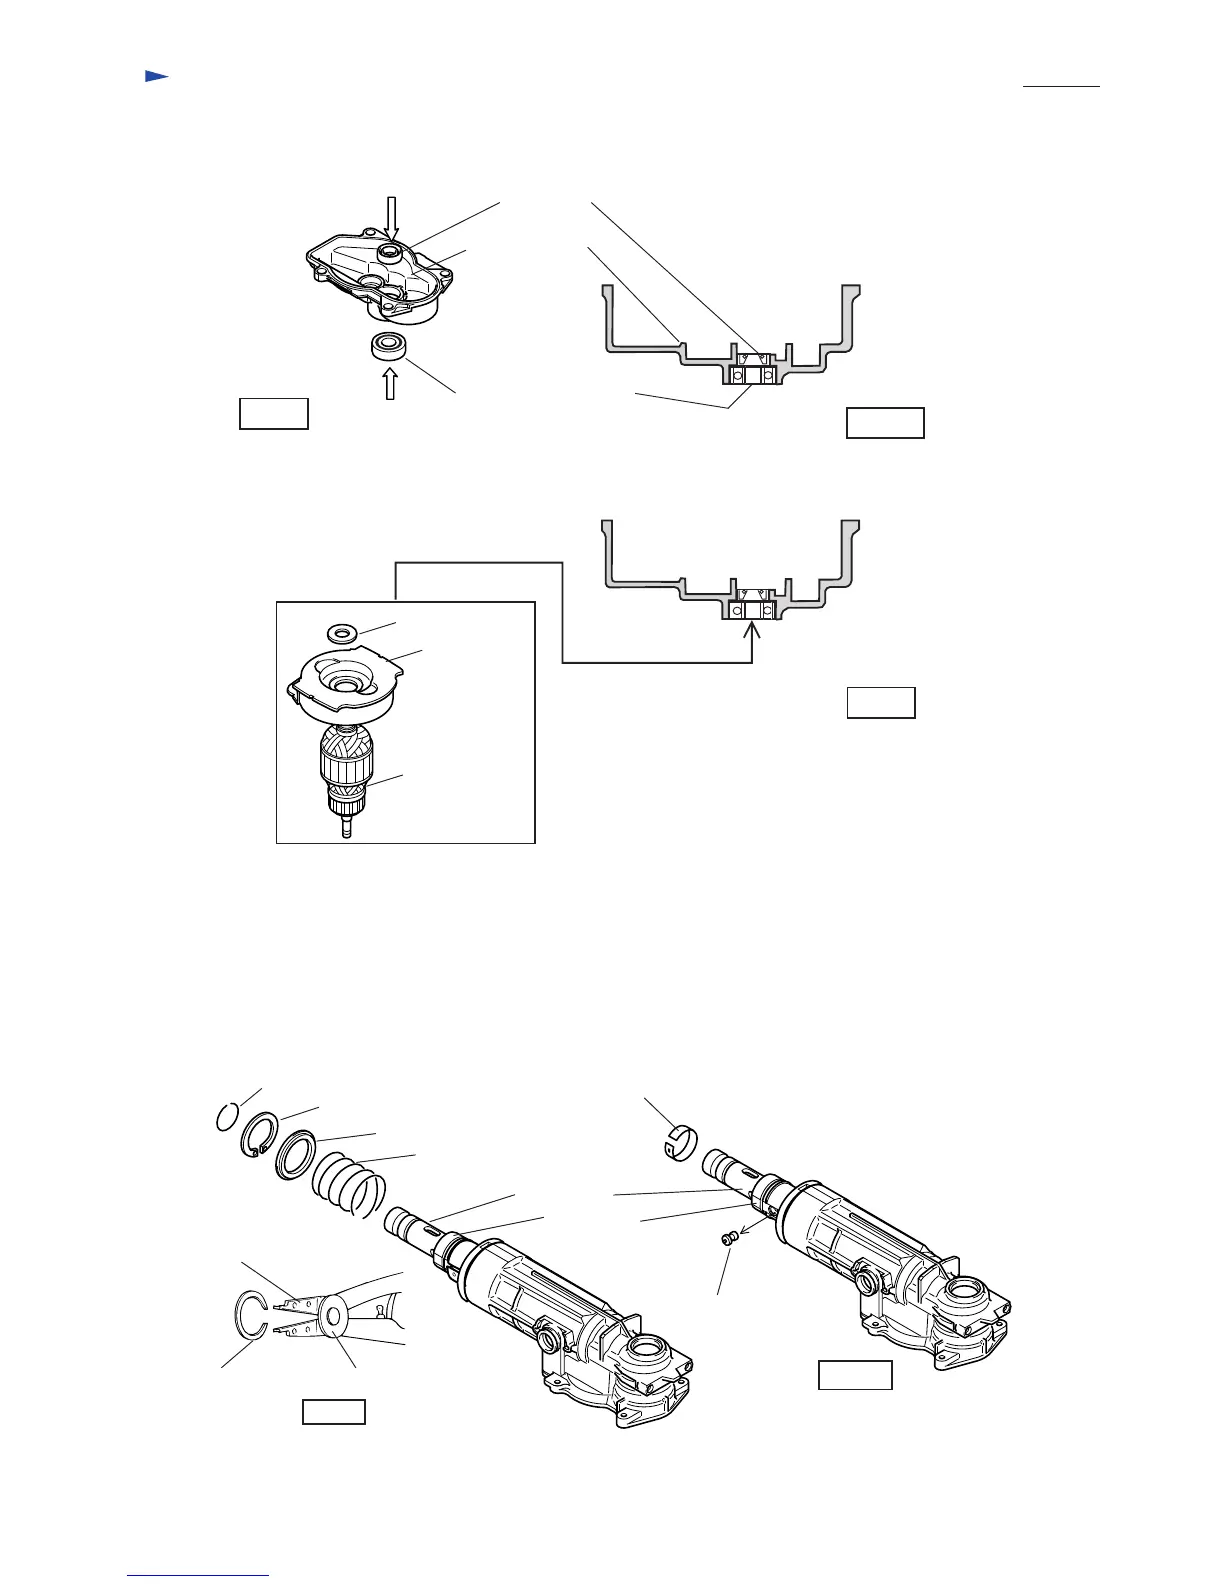
1) Assemble oil seal 15 and ball bearing 6202LLU to gear housing as illustrated in Fig. 12.
<4> Assembling armature
Oil seal 15
Ball bearing 6202LLU
Gear housing
Fig. 12
Fig. 12A
Press
Press
2) Assemble baffle plate and flat washer 15 to armature as illustrated in Fig. 13. And then, assemble the armature
to gear housing by pressing.
Flat washer 15
Baffle plate
Armature
<5> Disassembling chuck section
1) Disassemble tool holder cap, chuck cover and crank housing cover as illustrated in Fig.4, Fig. 5 and Fig. 5A at
page 6 and 7.
3) Disassemble shoulder pin 8 after removing leaf spring 37 from chuck ring as illustrated in Fig. 14A.
2) Disassemble ring spring 25 and retaining ring WR-40 with No.1R003 "retaining ring S plier"
equipped with No.1R212 "nail for ring spring" as illustrated in Fig. 14.
Then, washer 40 and compression spring 50 can be removed from tool holder.
Fig. 13
Ring spring 25
Retaining ring WR-40
Washer 40
Compression spring 50
Fig. 14
Tool holder
Chuck ring
Leaf spring 37
Shoulder pin 8
Fig. 14A
No.1R003
Retaining ring S plier
No.1R212
Nail for ring spring
Ring spring
 Loading...