21
22
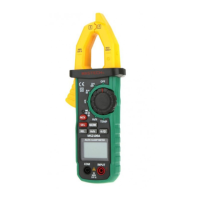
4.12 Frequency And Duty Ratio Measurement
Electric shock hazard.
Remove the probe from the meter before
measuring with current clamp.
Warning
(1) Place masuring switch nposition A. Choose
appropriate measuring range.
(2) Hold the trigger, open clamp head, clip one lead of
measurement circuit to be tested in the clamp.
(3) Press “Hz/%” key to switch to frequency
meauring state.
(4) Read the current value on the LCD display.
(5) Pressing “Hz/%” again can enter duty ratio
measuring state.
(6) Read the current value on the LCD display.
Note:
(1) Clamping two or more leads of circuit to be tested
simultaneously will give invalid readings
(2) Frequency measurement range is 40Hz~1kHz
If the frequency to be tested is less than 40Hz,
measuring frequency higher than 10 kHz is possible,
but accuracy is not guarantee
(3) Duty ratio measuring range is 10~95%.
(4) “ ” means that maximum input current is 600A
AC (RMS).
1) Clamp head measuring frequency
(through grade current):
2) Through grade voltage:
Electric shock hazard.
Pay special attention to avoid shock when
measuring high voltage.
Don't input voltage more than AC 600V RMS.
Warning
(1) Insert black probe to COM jack, insert red probe
to INPUT jack.
(2) Place transfer switch to position, press SEL to
enter AC voltage measurement state.
(3) Press “Hz/%” key to switch to frequency
measuring state.
(4) Connect the probe with signal or both ends of
load in parallel
(5) Read on the LCD.
(6) Pressing “Hz/%”again to enter duty ratio
measuring state and read data on the LCD.
V
(1) Frequency measurement range is 10Hz ~ 1kHz If
the frequency to be tested is less than 10Hz,LCD
will show “00.0”measuring frequency higher than
10 kHz is possible, but it accuracy is not guarantee
(2) Duty ratio measuring range is 10 ~ 95%.
(3) “ ”means that maximum input voltage is 600V
AC (RMS).
Note:

 Loading...