McQuay IM 777-4 5
Mechanical Installation
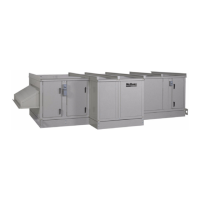
Figure 4: Leveling the Unit
Assembling Sections
If the unit is shipped in more than one shipping section, rig
each section into position separately. Shipping sections are
provided with a connection splice joint attached on the leaving
air side of the shipping section that seals against the frame
channel on the entering-air side of the adjoining. The splice
joint is insulated and provides an air-tight seal between two
sections once they are assembled together. Align the splice
joint to seat into the mating gasket to provide an air seal. If the
splice joint was bent during shipping or rigging, restore it to its
original position (Figure 8).
Shipping Sections
1 Caulk all assembly joints of the unit—Before joining the
sections, apply at least 1/4 inch diameter bead of sealant
to the mating faces of the cabinet. Use the splice joint as
a guide for applying the sealant (Figure 5).
Figure 5: Apply Sealant to Mating Faces
2
Pull sections together to fasten. Use straps and a ratchet
to help pull the sections together securely. Apply sealant
to any gaps that may admit moisture.
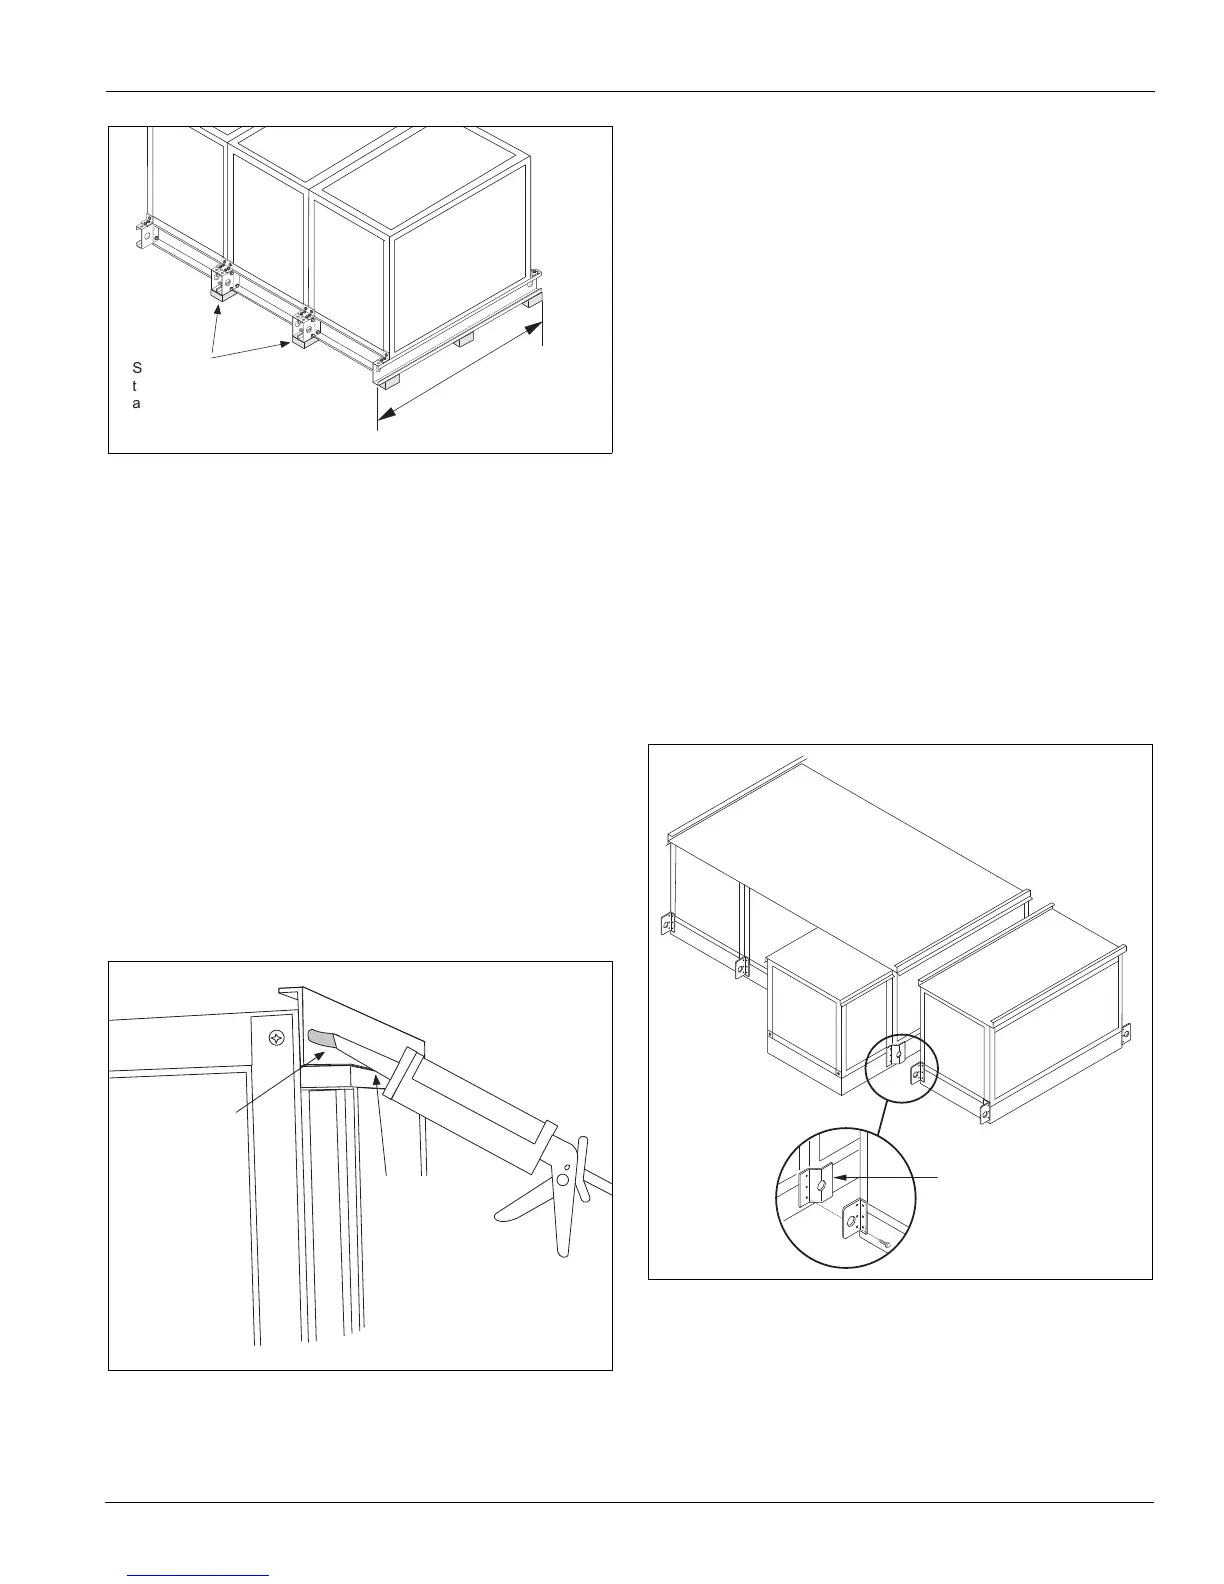
3 Fasten base rails together first using the 3/8"-16 × 5"
bolts located in the splice kit provided with the unit
(Figure 7).
a To fasten two shipping sections together, four bolts
are needed (two on each side of the unit). The bolts
are run from one base rail into the other and fastened
with a nut. Complete each section bottom and top
before attaching additional sections.
b If desired, shipping sections for non curb-ready units
can be fastened together internally. To fasten
internally, run field-provided #10 sheet metal screws
or drill screws (4" long, maximum) through the
interior frame channel of one unit into the splice joint
of the neighboring section.
c Handle units with curb-ready bases and vestibules so
the lifting bracket can be removed after the unit is
placed on the curbing.
Note: Remove the lifting bracket that projects inward over
the curbing. Save the self tapping screws. When the
adjacent section is placed in position, use self
tapping screw to secure the bases together.
Figure 6: Remove Vestibule Lifting Bracket
S h i m t o p r e v e n t
d i s t o r t i o n i f w i d t h
i s o v e r 1 0 8 "
S h i m s e c t i o n s u n t i l
t h e y a r e s t r a i g h t
a n d l e v e l
1 / 4 " d i a m e t e r
b e a d c e n t e r e d
i n f a c e o f
c l e a r a n c e
U s e S p l i c e
J o i n t a s a
g u i d e
R e m o v a b l e
L i f t i n g B r a c k e t
 Loading...