operaTIon
IOM 1210-1 • MAGNITUDE
®
MODEL WMC CHILLERS 48 www.DaikinApplied.com
The Controller
The controller is located in the control panel (see Figure 3 on
page 5) adjacent to the OITS (see Figure 1 on page 4).
Unit, compressor, evaporator, and condenser information is
viewable on it, and all setpoints can be accessed from it. It
is encouraged to use the controller to change setpoints only
when the OITS is unavailable. The controller LCD screens
read only in IP units of measure (inch-pounds and degrees
Fahrenheit). SI units of measure can be selected with the
appropriate controller setpoint screen but will appear only on
the OITS.
Keypad
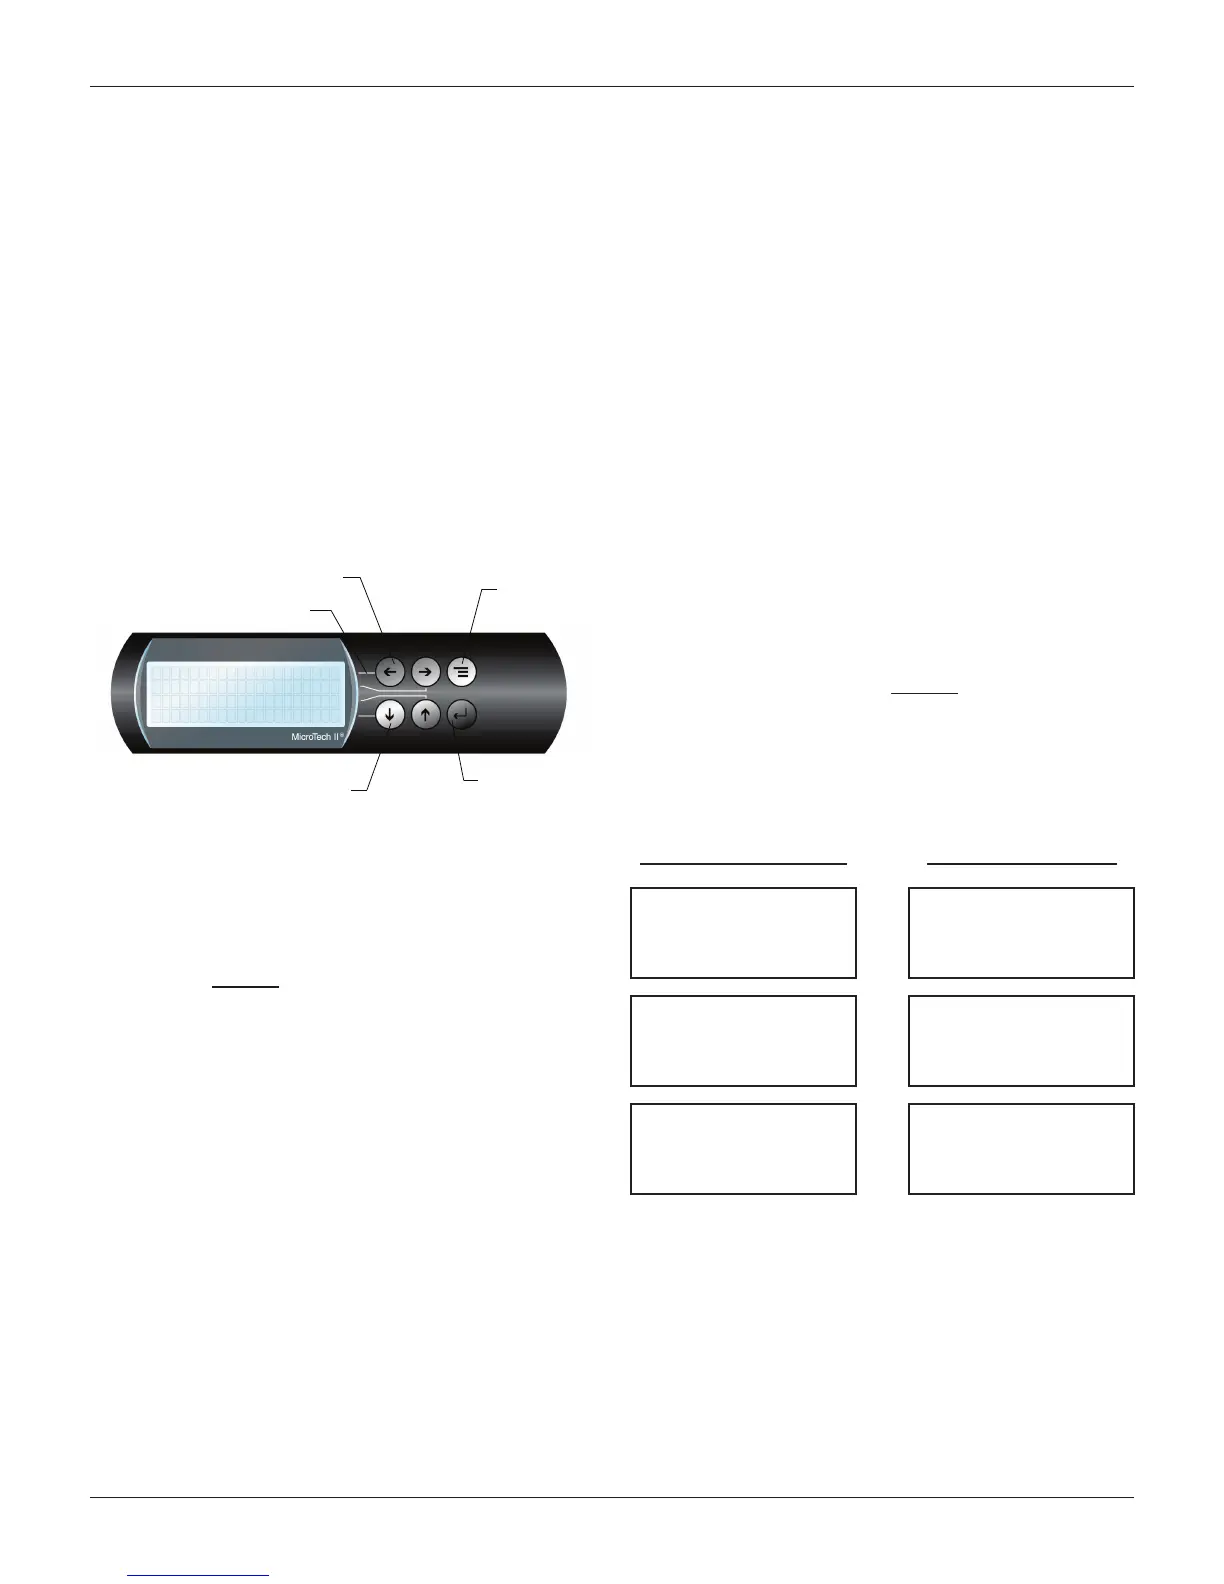
A 4-line by 20-character/line liquid crystal display and 6-button
keypad is mounted on the controller, as shown in Figure 53.
Figure 53: Controller Keypad
The four arrow keys (UP, DOWN, LEFT, RIGHT) have three
modes of use:
1. Select a specic data screen in the menu matrix using
dynamic labels such as ALARM, VIEW, SET, etc. This
mode is entered by pressing the MENU key. For ease
of use, a pathway connects the appropriate button to
its respective label on the screen. See "Menu Structure
(Hierarchical)" on page 48 for more information.
2. Scroll between data screens in the direction indicated
by the arrows. See "Menu Structure (Scrolled)" on page
49 for more information.
3. Change eld values in the setpoint programming mode.
See "Editing Fields on the Controller" on page 52 for
more information.
Navigating
The controller menus are arranged in a matrix of screens
across a top horizontal row. Some of these top-level screens
have sub-screens located under them.
There are two ways to navigate the menu matrix: Hierarchical
and Scrolled.
Menu Structure (Hierarchical)
The hierarchical menu structure allows the operator to use
shortcuts in order to navigate to any particular menu screen.
Each menu screen can have up to four lines of information.
The following steps outline screen navigation using the
hierarchical method.
1. Press the MENU key to go to the top level of the
hierarchy. The display will show ALARM, VIEW,
and SET as shown in Figure 53. COMMISSION
is normally displayed under SET and is used by
McQuay International technicians at chiller startup.
For more information on commissioning, contact a
McQuay International service representative.
2. Once ALARM, VIEW, and SET are shown on the
display, select one of these choices by pressing the
key connected to it via the pathway shown in Figure
53. For example, use the LEFT arrow to select ALARM,
the RIGHT arrow to select VIEW, and the UP arrow to
select SET. Depending on the selection made at the top
level, a second level of screens will appear. Second level
screens along with their top level selection are shown
below. The item selected is presented in bold.
Top Level Menu Selection 2nd Level Menu Screen
< ALARM
< VIEW
< SET
< COMMISSION
→
ALARM < ACTIVE
< LOG
<
<
< ALARM
< VIEW
< SET
< COMMISSION
→
VIEW < COMPRESSOR
< UNIT
< EVAPORATOR
< CONDENSER
< ALARM
< VIEW
< SET
< COMMISSION
→
SET < ALARM LIMITS
< UNIT SPs
< COMPRESSOR SPs
< TOWER SPs
3. Continue choosing menu screens until the data screens
are reached. Some second level selections, such as
VIEW → EVAPORATOR, will go directly to a data screen
from the second level screen.
EI
V
MRAL
A
<
<
<
TE
S
W
MENU Key
Key-to-Screen Pathway
Red Alarm Light Behind
ARROW Keys (4)
ENTER Key with
Green Run Light
Behind
N
O
I
SS
I
M
OC
<
M
 Loading...