200/225/250/275 VERADO 4-STROKE
Page 48 / 51 90-10238051
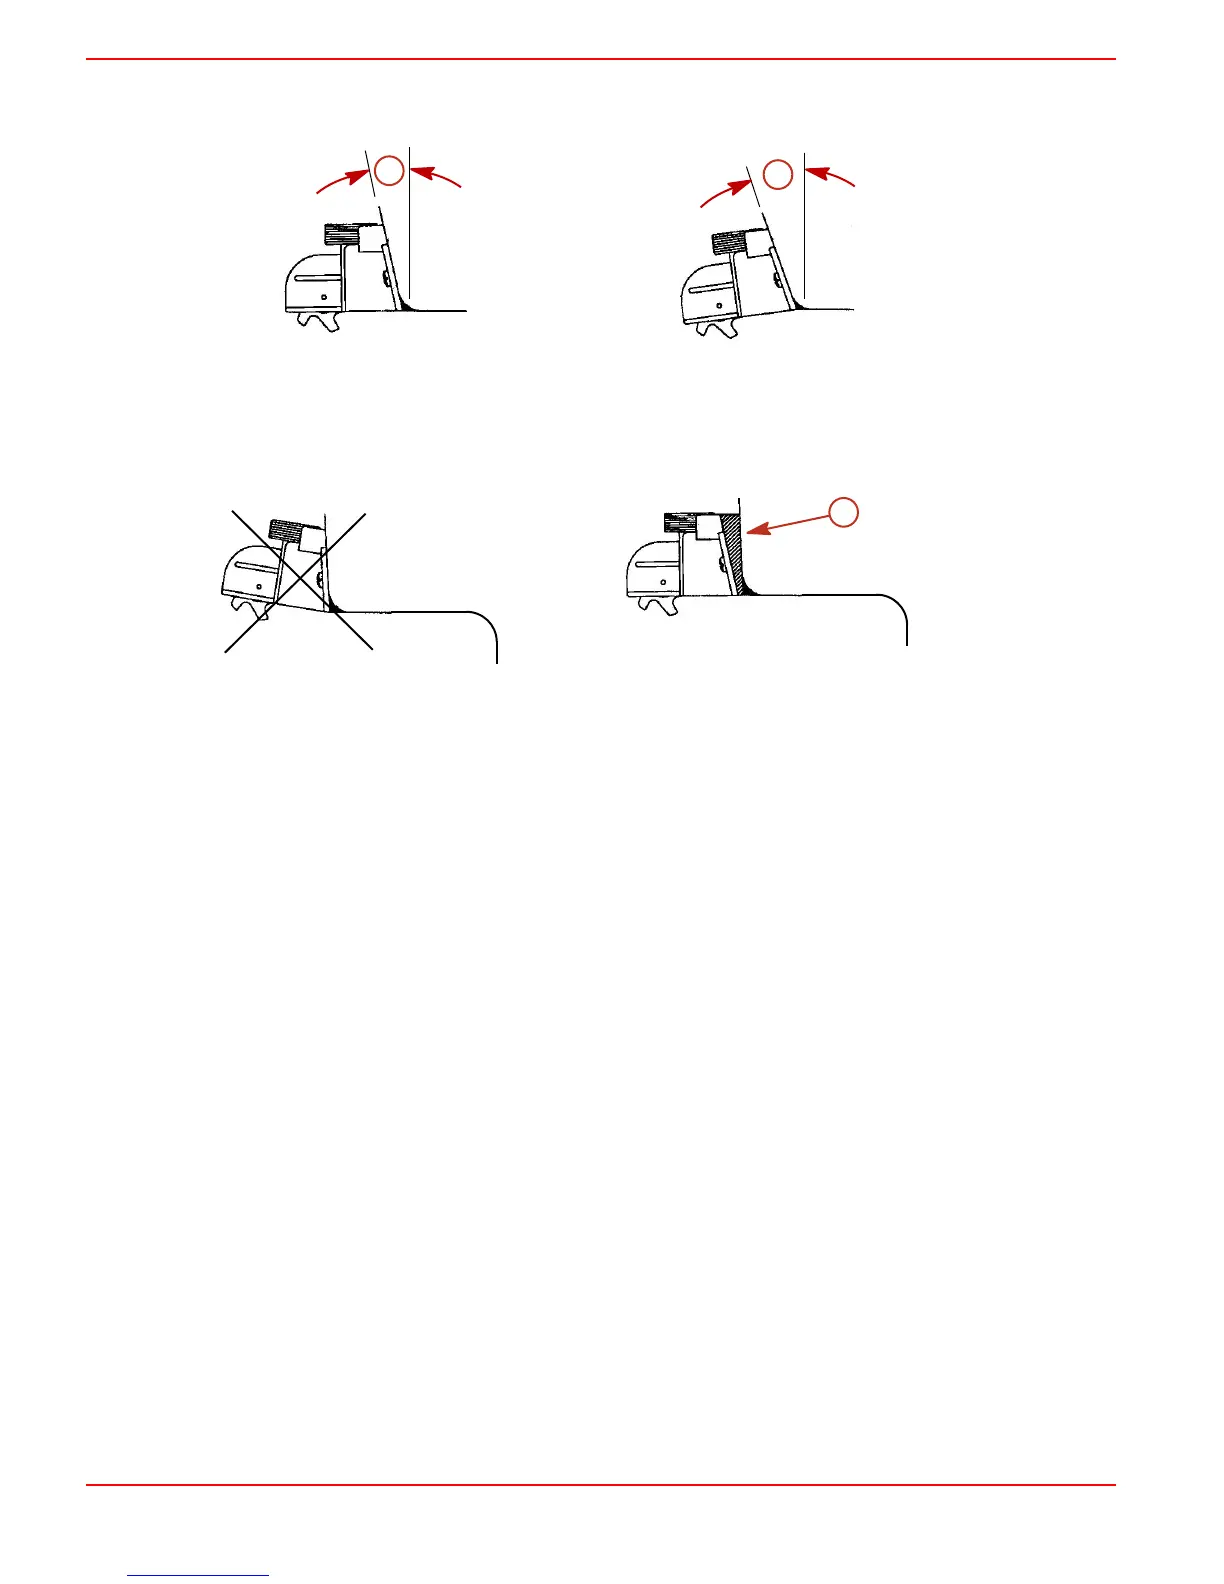
Transom Angle Requirements
Standard 13° to 20° transoms - No special adjustment required.
a - 13° transom angle b - 20° transom angle
Stepped or undercut transom with 3 angles - A small shim of tapered plastic, metal or
wood must be fabricated and installed as shown. Mount the paddle wheel on the step for
best performance.
a - Shim
Installing Bracket
1. Cut out the template. At the location selected, tape the template to the transom. Make
sure the black dotted line on the template is aligned with the transom bottom edge,
as shown.
NOTE: The mounting template provided is located on the last page of this instruction
sheet.
2. Using a #28 or 9/64 in. bit, drill two 22 mm (7/8 in.) deep holes where indicated on
the template. To prevent drilling too deeply, wrap masking tape around the drill bit
22 mm (7/8 in.) from the point end of drill bit.
NOTE: In fiberglass hulls, first chamfer the gelcoat using a 6 mm (1/4 in.) drill; drilling
about 15 mm (1/16 in.) deep to prevent surface cracks.
3. To prevent water seepage into the transom, apply a marine sealer (such as RTV) to
the two #10 screws provided. Using the washer provided, attach and tighten the
bracket to the hull making sure the bracket is flush with the underside of the hull.
 Loading...