MAINTENANCE
74 eng
4. Attach a water hose to the flushing attachment. Turn on the
water and adjust the flow so water is leaking around the
rubber cups or nose cone cup to ensure the engine receives
an adequate supply of cooling water.
5. Start the engine and run it at idle speed in neutral shift
position.
6. Adjust water flow so excess water continues leaking out
from around the rubber cups or nose cone cup to ensure the
engine is receiving an adequate supply of cooling water.
7. Check for water coming out of the water pump indicator
hole. Continue flushing for three to five minutes, carefully
monitoring water supply at all times.
8. Stop the engine, turn off the water, and remove the flushing
attachment. Reinstall the propeller.
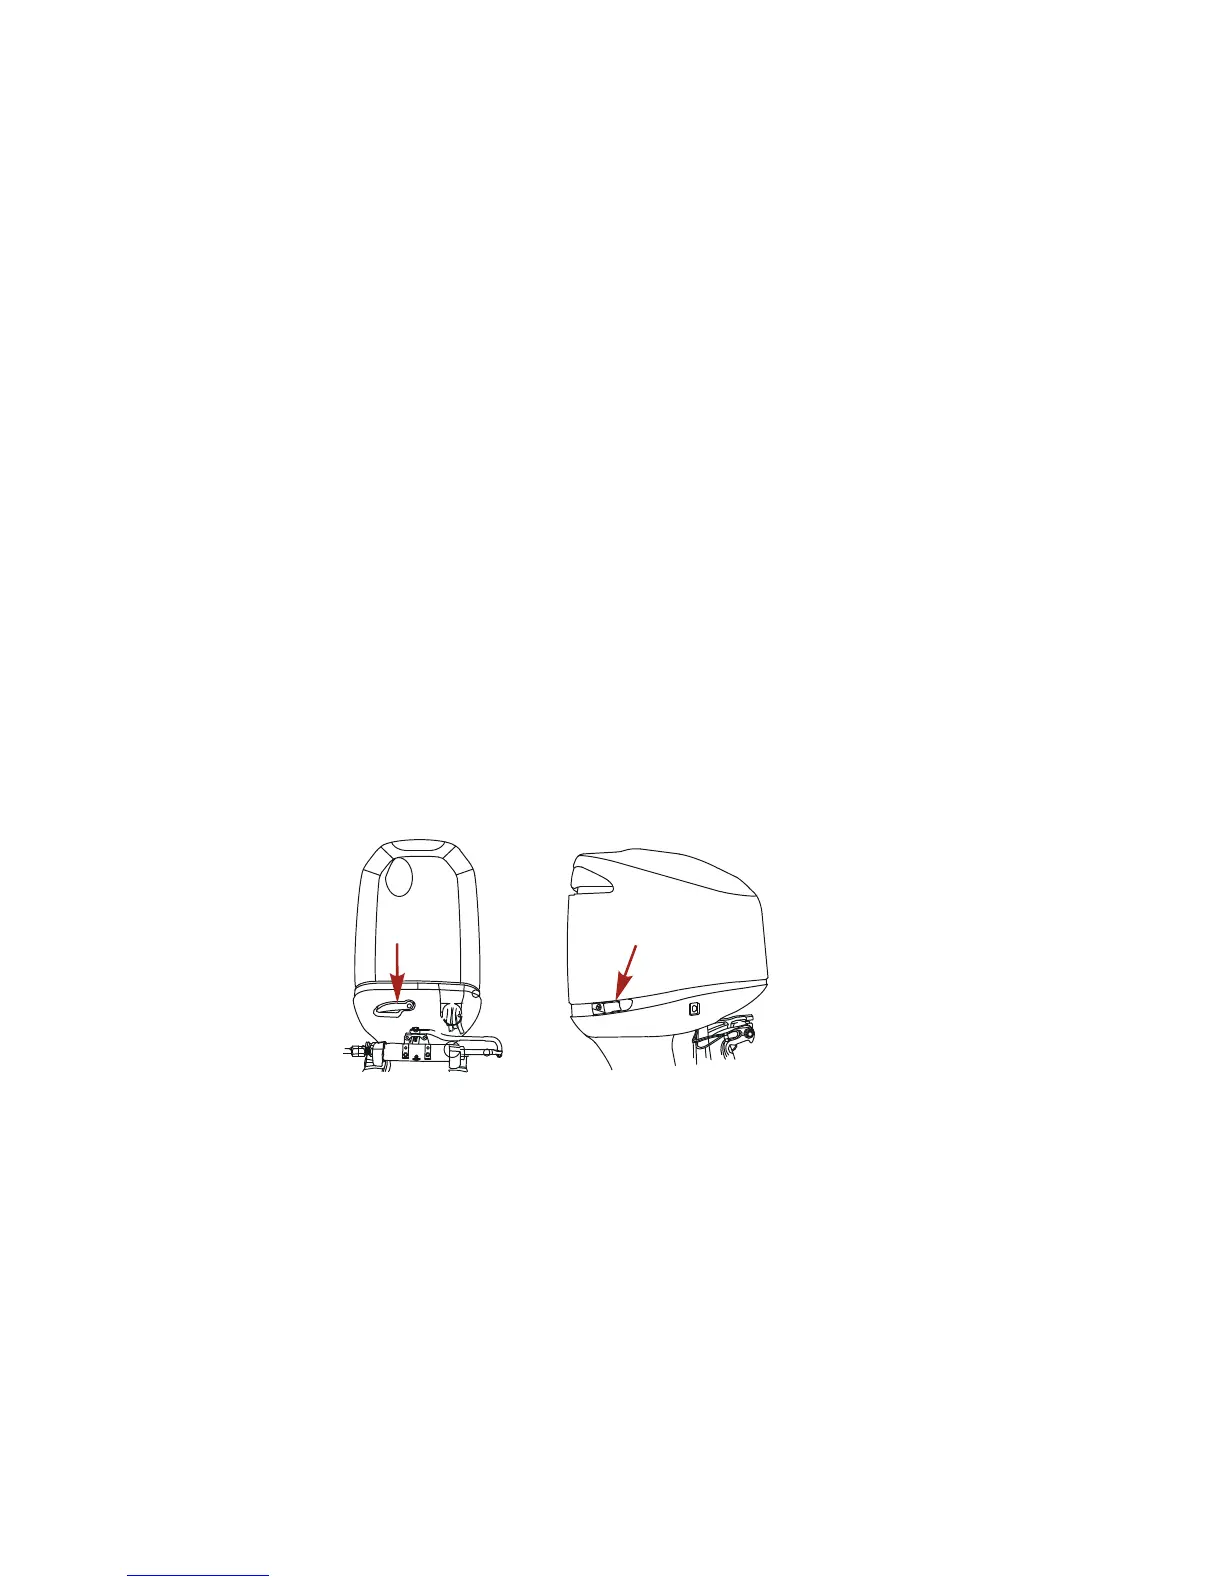
Top Cowl Removal and Installation
REMOVAL
Release the front and side cowl latches. Lift the top cowl from
the outboard.
INSTALLATION
Position the top cowl over the engine. Make sure the bottom
rubber seal fits properly and lock the front and side latches.
Cleaning Care for Top Cowl
IMPORTANT: Dry wiping (wiping the plastic surface when it is
dry) will result in minor surface scratches. Always wet the
surface before cleaning. Follow the cleaning and waxing
procedure.
 Loading...