18
90-10212R40
GB
gof64
6
a a
b
b
of
OPERATION
ofg24
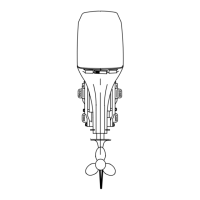
STARTING THE ENGINE – REMOTE CONTROL MODELS
6 Position the remote control neutral fast idle speed feature as follows:
MODELS WITH CARBURETORS
Cold Engine – Move the neutral fast idle speed feature to the fully closed
position (a).
Warm
Engine – Advance the neutral fast idle speed feature on the remote
control to the maximum fast idle speed position (b). After engine has started,
immediately reduce idle speed to normal.
Flooded
Engine – Advance the neutral fast idle speed feature to the maximum
fast idle speed position (b) and continue to crank the engine for starting.
Immediately reduce engine speed after engine starts.
Note: Cold Engine – air temperature is below 40° F (4° C) – After starting the
engine, slowly advance the neutral fast idle speed feature to increase idle speed
until engine is warmed up.
MODELS WITH ELECTRONIC FUEL INJECTION (EFI)
Move the neutral fast idle speed feature to the fully closed position (a).
Starting Flooded Engine – Advance the neutral fast idle speed feature to the
maximum fast idle speed position and continue to crank the engine for starting.
Immediately reduce engine speed after engine starts.
gof64
7
8
ofg25
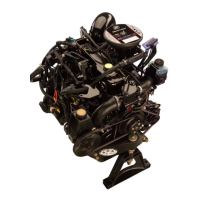
STARTING THE ENGINE – REMOTE CONTROL MODELS
7 Turn ignition key to the START position. If engine fails to start in ten seconds,
return key to ON position, wait 30 seconds and try again.
8 After engine starts, check for a steady stream of water flowing out of the water
pump indicator hole.
IMPORTANT: If no water is coming out of the water pump indicator hole,
stop engine and check cooling water intake for obstruction. No obstruction
may indicate a water pump failure or blockage in the cooling system. These
conditions will cause the engine to overheat. Have the outboard checked by
your dealer. Operating the engine while overheated will cause engine
damage.
Warming Up Engine
Before beginning operation, allow the engine to warm up at idling speed for 3
minutes.
gof65
1
5
N
2
4
3
off20
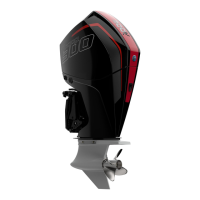
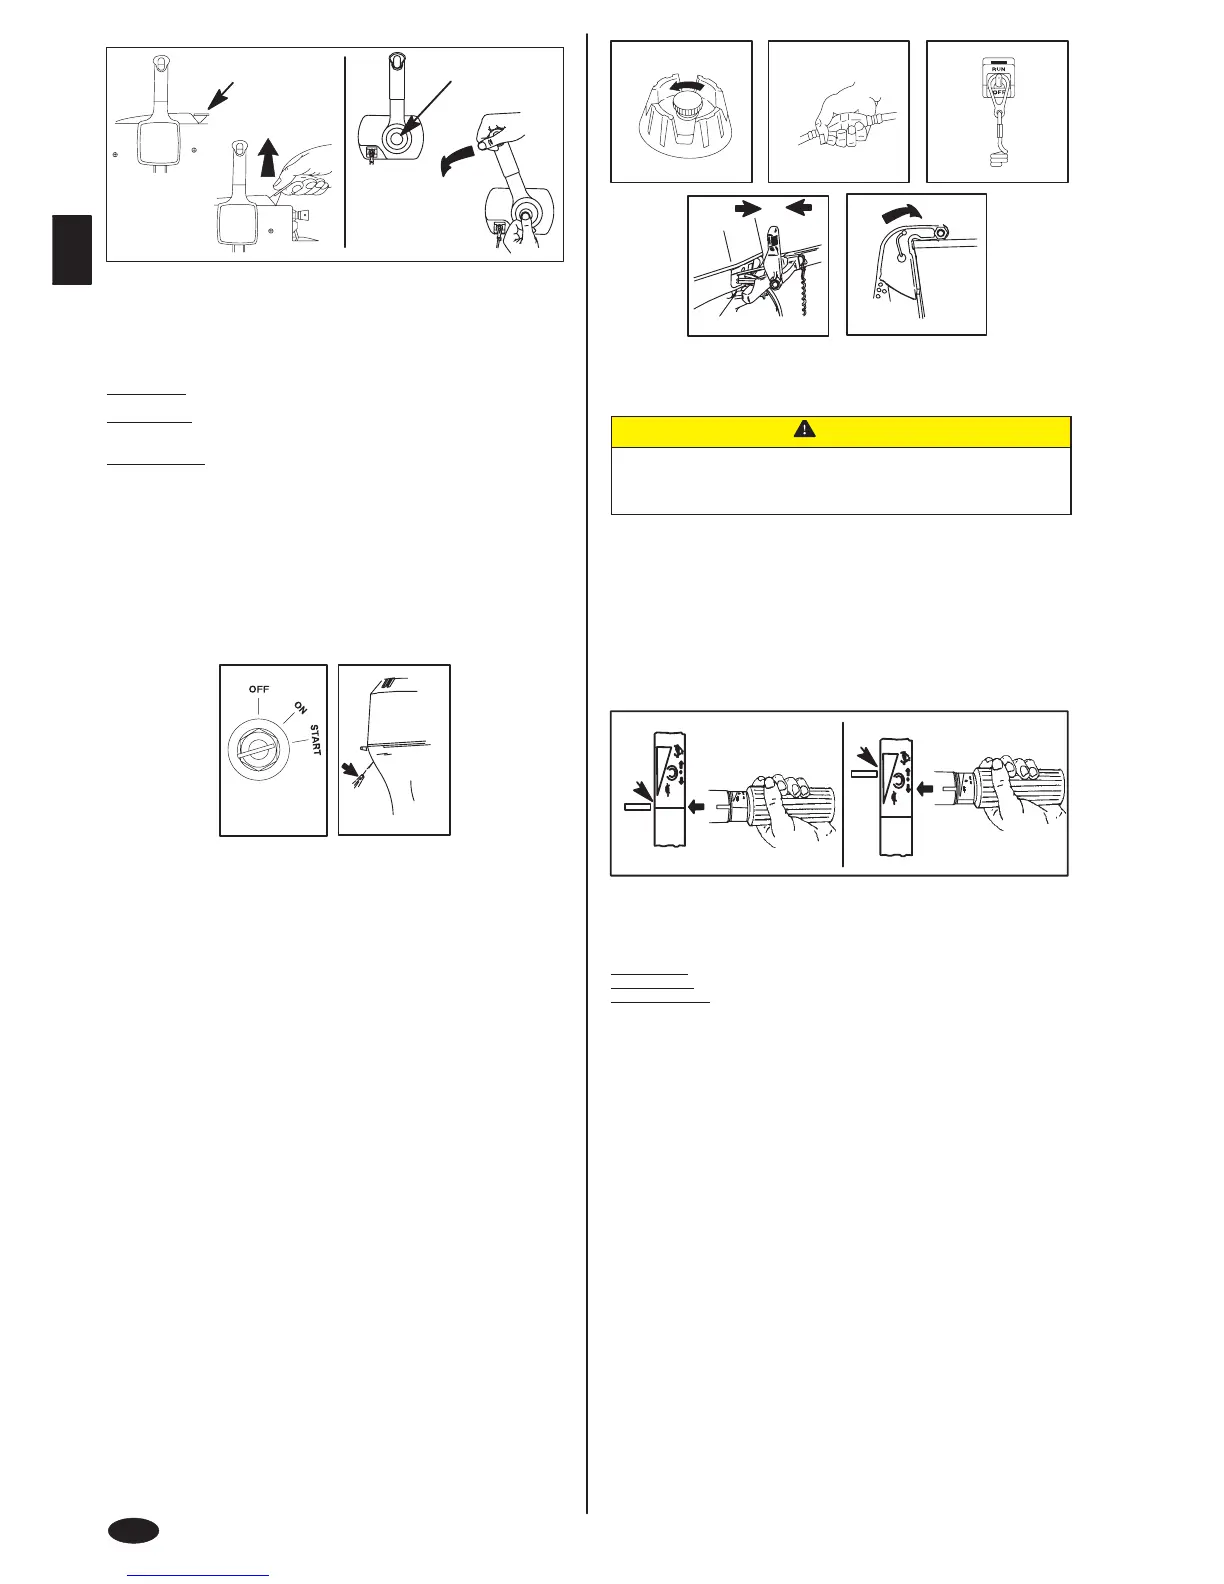
STARTING THE ENGINE – TILLER HANDLE MODELS
Before starting, read the Pre-Starting Check List, Special Operating Instructions,
and Engine Break-in Procedure on the first three pages in the Operation Section.
CAUTION
Never start or run your outboard (even momentarily) without water circu-
lating through all the cooling water intake holes in the gear case to pre-
vent damage to the water pump (running dry) or overheating of the en-
gine.
1 Open fuel tank vent screw (in filler cap) on manual venting type fuel tanks.
2 Squeeze the fuel line primer bulb several times until it feels firm.
IMPORTANT: To prevent engine flooding, do not squeeze the primer bulb
after engine has warmed up.
3 Set the lanyard stop switch to RUN position. Read the Lanyard Stop Switch
safety explanation and Warning in the General Information Section.
4 Shift outboard to neutral (N) position.
5 Models without power trim – Position the lilt lock lever to the Lock position.
gof66
6
a
b
0%100
START
START
0%100
START
START
off26
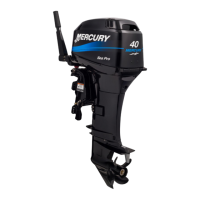
STARTING THE ENGINE – TILLER HANDLE MODELS
6
Position the throttle grip as follow:
MODELS WITH CARBURETORS
Cold Engine – Set the throttle grip to start position (a).
Warm Engine
– Set the throttle grip to position (b).
Flooded Engine
– Set the throttle grip to position (b).
Note: Cold Engine – air temperature is below 40° F (4° C), After starting the
engine, slowly advance throttle speed until engine is warmed up.
MODELS WITH ELECTRONIC FUEL INJECTION (EFI)
Set the throttle grip to start position (a).
Starting Flooded Engine – Set the throttle grip to position (b).
 Loading...