7-2
7.3 Disassembling the Main Unit
NOTE
The recorder can be disassembled separately.
To disassemble the equipment, place the equipment on a work surface free from foreign material, avoiding
damaging the antiglare screen, touchscreen and the knob. Be careful not to break the two cotter pins on the
front ends of rear housing.
All operations should be performed by qualified service personnel only. Make sure to put on insulating
gloves during service operations.
Operations relating to optional parts may not apply to your equipment.
7.3.1 Separating the Front and Rear Half of the Monitor
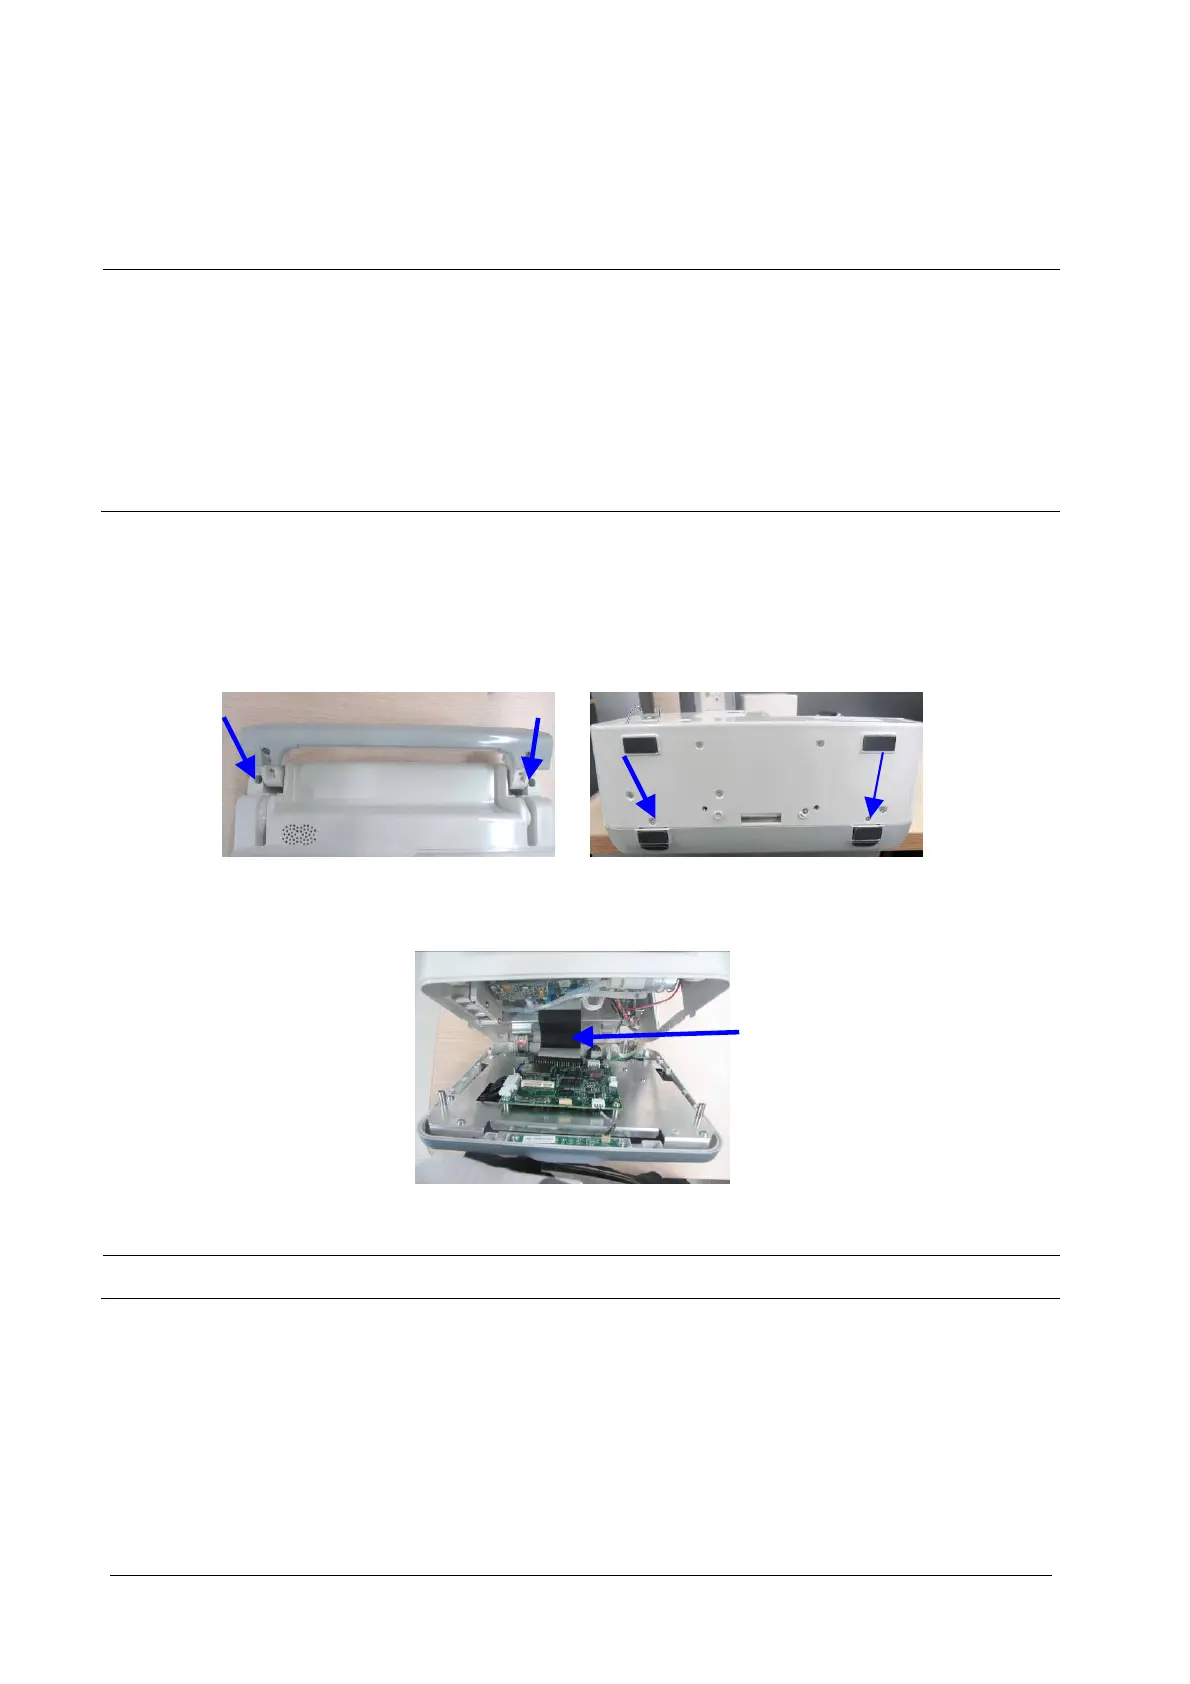
1. Lay the monitor on a flat platform with the knob overhanging as shown below. Then unscrew the two M3×10
screws on the rear panel and the two M3×6 screws on the bottom of the monitor.
2. Stand the monitor and separate the front housing assembly and rear housing assembly with caution. Disconnect
the cable between the main board and keypad board and then take off the front panel.
NOTE
When reassembling the equipment, be sure to check if the front housing waterproof strip is correctly placed.
Cable between the main
board and keypad board
 Loading...