-
77
-
(2) Installation of outdoor unit
(a) Make sure that sufficient space for installation and service is secured.
(b) Fix the leg sections of the unit on a firm base which will not play.
Attach cushion pads, etc. between the unit and the mounting fixtures not to transmit vibration to the building.
(c) Attach a drain elbow, etc. under the drain port of the bottom plate to guide drain water.
(Drain elbow should not be used where days when temperature drops below 0°C continue for several days. Draining may be
disturbed by frozen water.)
(d) When installing the unit at a higher place or where it could be toppled with strong winds, secure the unit firmly with
foundation bolts, wire, etc.
5.3 Installation of outdoor unit
(1) Selection of installation location
(Please install with the customer’s consent in a location that follows the conditions listed below.)
(a) Where the following installation space is available, and where air does not gather.
(b) Where rain and sunlight do not directly hit the unit, and where there is enough air circulation.
(c) Also, where the unit cannot be buried by snow.
A location which can sustain the weight of the unit, and where noises and vibrations are not enhanced.
(d) Where blasts of cold or hot air and noise do not bother the neighbors.
(e) Where the unit does not receive heat radiation from other heat sources.
(f) Where there are no obstructions (animals, plants, etc.) to the suction inlet and blowing outlet.
(g) Where water may drain out.
(h) Please avoid the following locations.
1) Where there is constant exposure to harsh winds such as the top floors of a building. Also, locations with exposure to
salty air.
2) Where there are oil splashes, vapor, and smoke.
3) Where there are possibilities of flammable gas leaks.
(i) Do not install the unit near the seaside, or where there is possibillty of chlorine gas generation.
(j) Installation space (on a flat surface)
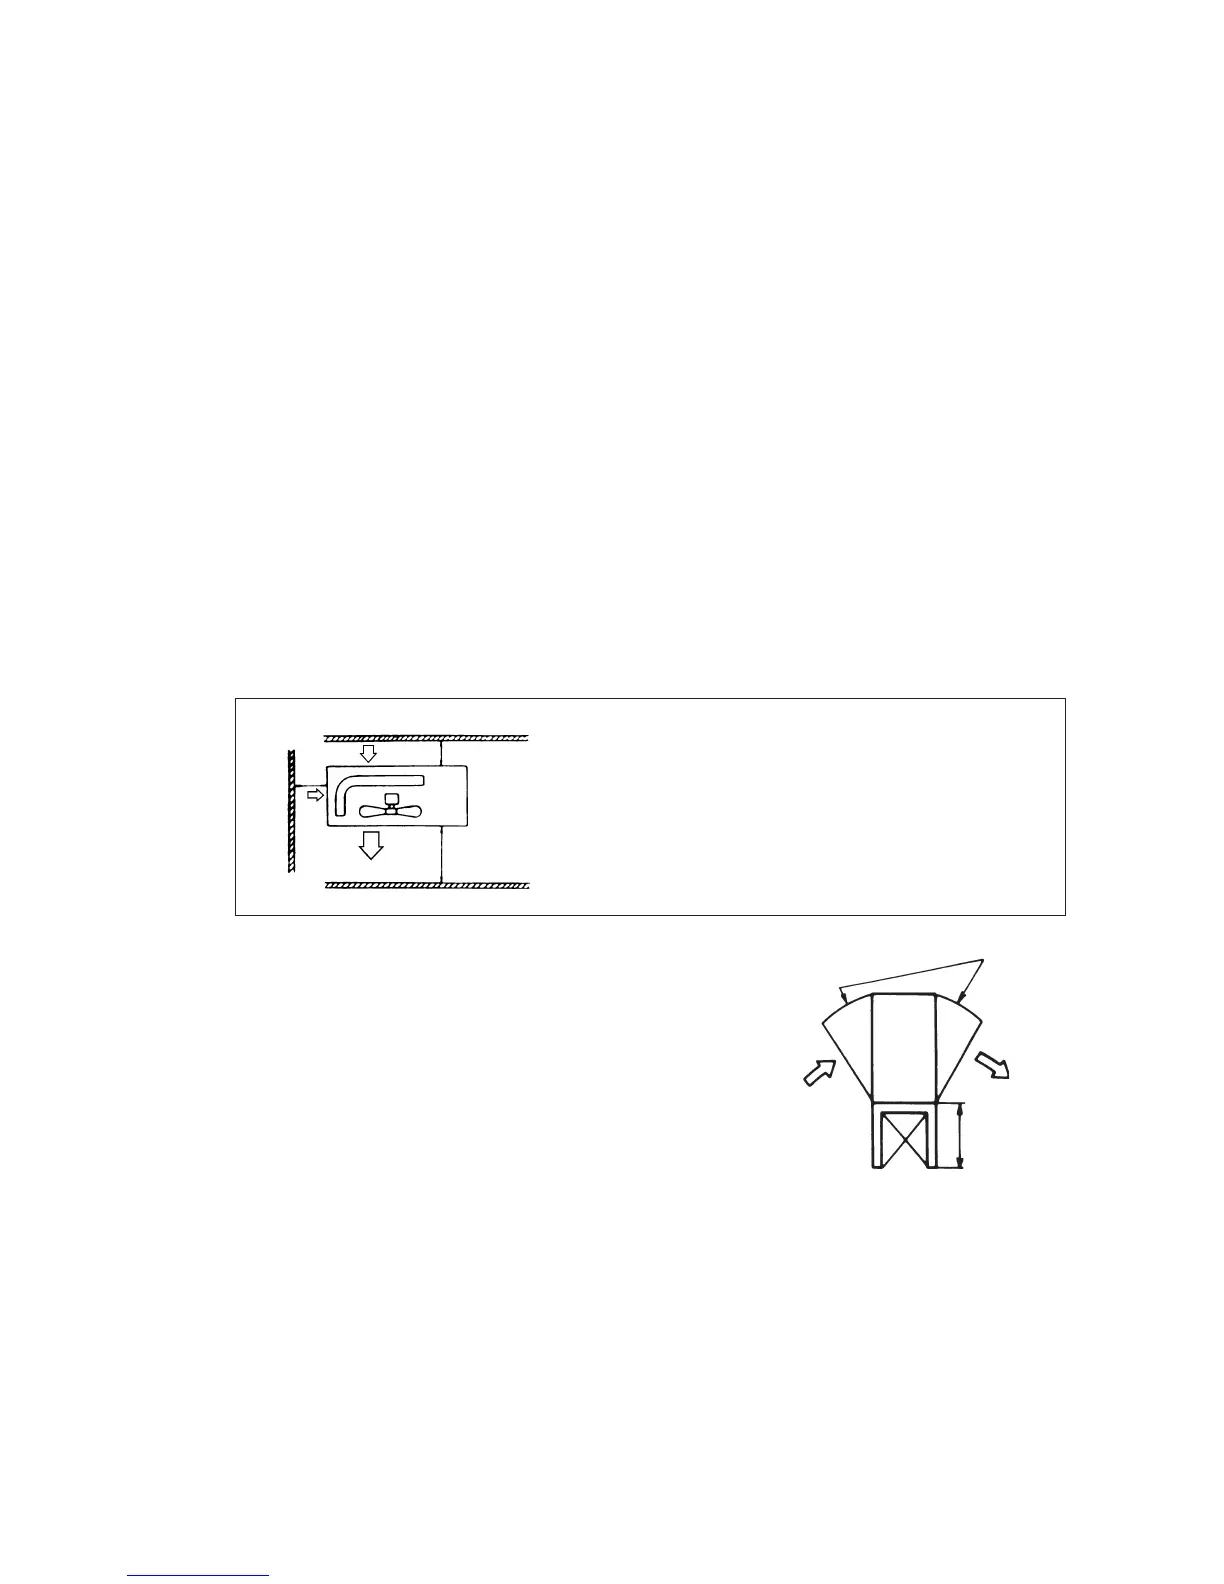
(k) In heating operation, snow deposit on the heat-exchanger of outdoor unit must be
prevented for keeping the normal performance capacity.
(i) Snow-hood on outdoor unit as in drawing, will reduce the frequency of de-
frost operation.
When installing the snow hood, take care so that the air outlet of the snow
hood will not face directly into the most windy direction.
(ii) Design the base higher than possible snow deposit.
Snow hood
Height:
Must be over
the possible
snow deposit
height
Air inlet
Air inlet
Air
Outlet
100
100
600
No obstacles
(Service space
for electrical
parts)
Unit : mm
Notes (1) Blowing out port and suction port on the back side of the unit can be
installed at a distance of 10cm from walls.
In case the barrier is 1.2m or above in height, or is overhead, the
sufficient space between the unit and wall shall be secured.
(2) When the unit is installed, the space of the following dimension and
above shall be secured.
(
)
 Loading...