Motortronics
- 9 -
XLS Series Solid State Soft Starter 39 - 1250A
5.1 Introduction
It is best to operate the motor at its full load starting condition to
achieve the proper time, torque and ramp settings. Note that the
potentiometers have a turning range of 3/4 revolution. Forcing the
potentiometer beyond this range will damage the unit. Initial settings
are set to accommodate most motor conditions. TRY INITIAL
SETTINGS FIRST.
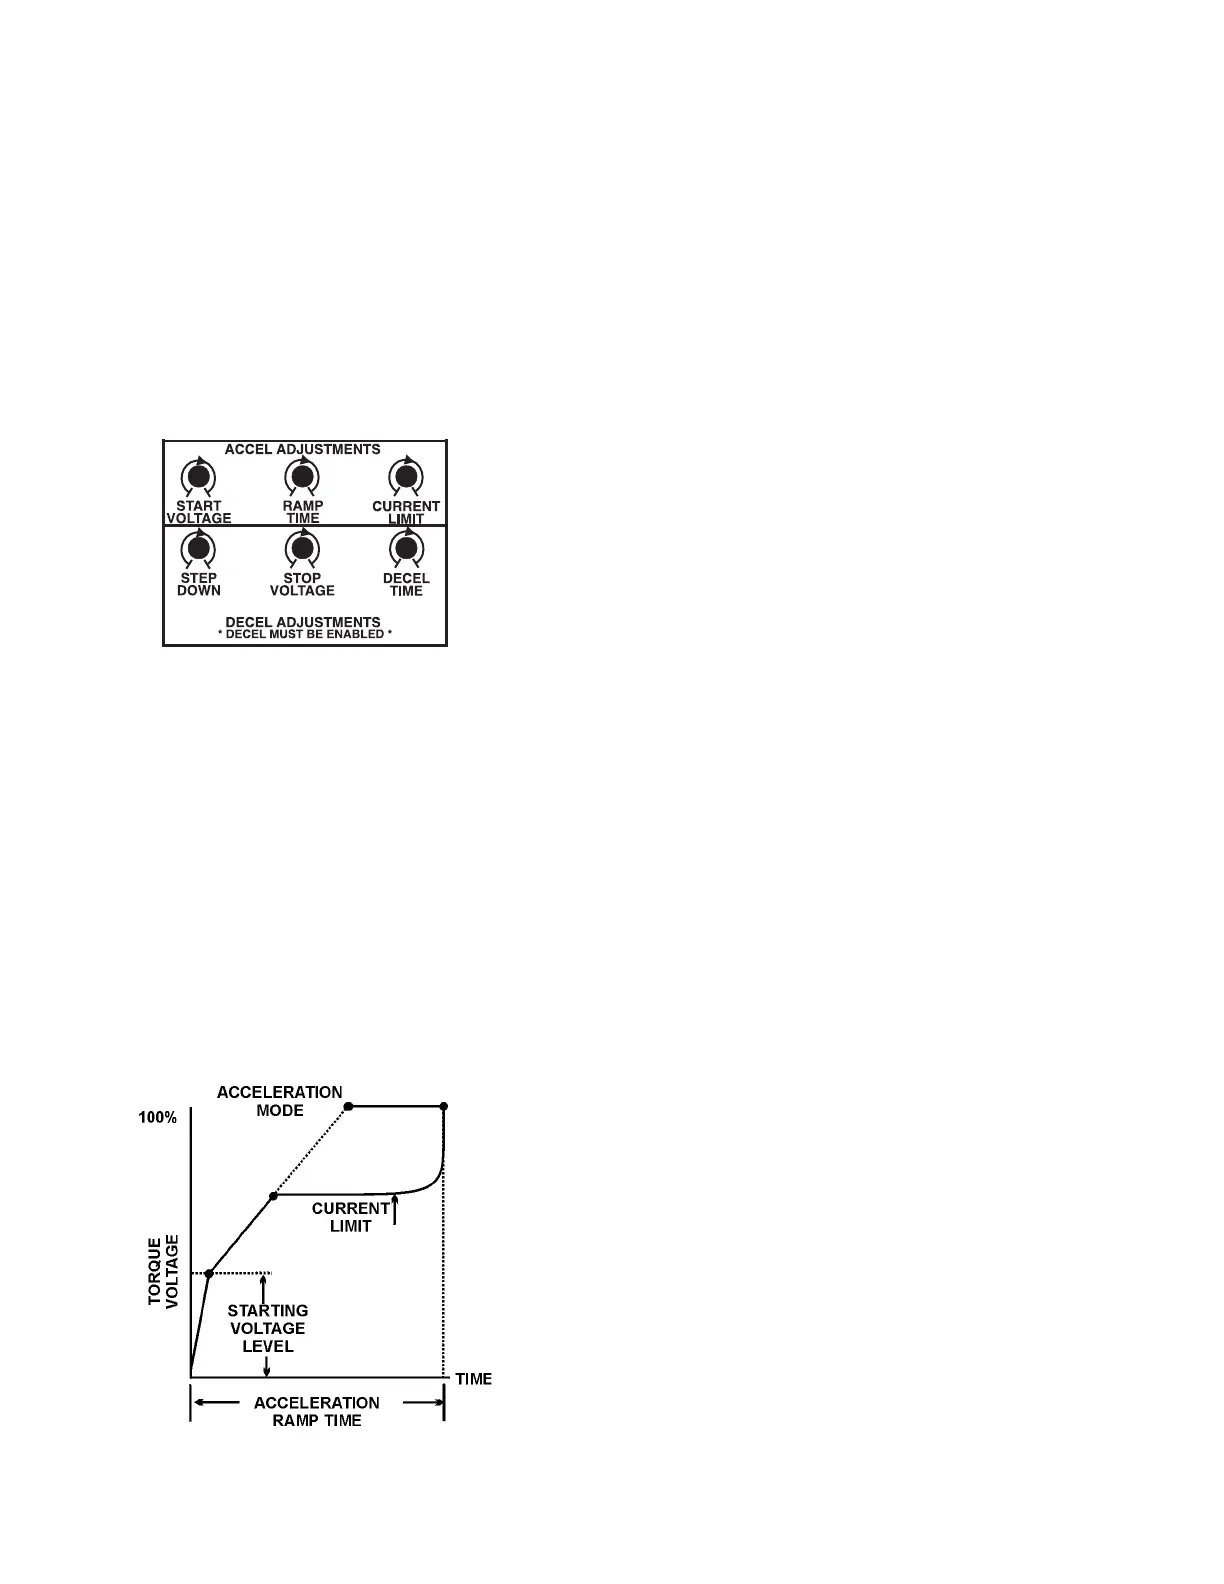
5.2 Acceleration Adjustments
The unit is set at the factory with typical starting characteristics that
perform well in most applications. When the system is ready to start,
try the initial unit settings. If the motor does not come up to speed,
increase the current limit setting. If the motor does not start to turn as
soon as desired, raise the starting voltage adjustment. The unit has
three accel adjustments. Adjustment description and procedures are
described as follows:
5.2.1 Starting Voltage Adjustment/Rotation Check
Factory Setting = 60% of line voltage
Range = 0% - 100% of line voltage
Starting voltage adjustment changes the initial starting voltage level to
the motor. Start voltage is increased by rotating the starting voltage
potentiometer clockwise. Turn dip switch 3 to the “OFF” position,
disabling the ramp function and allowing starting voltage adjustment.
This will permit adjustment of the starting voltage without activating
the ramp. Turn the starting voltage potentiometer FCCW (fully counter-
clockwise). Apply power to the XLS and give the start command.
Observe that the motor does not rotate. Slowly increase the start
voltage by turning the potentiometer in a clockwise direction until the
motor begins to rotate. When the motor begins to rotate, give a stop
command and remove both line and control voltage. Reset dip switch
3 for the “ON” position to re-enable the ramp function. The minimum
effective starting voltage is now set. Do not leave dip switch 3 in
the off position!
Note:
Use this time to check the direction of rotation without full
speed operation.
5.2.2 Ramp Time Adjustment
Factory Setting = 10 sec.
Range = 0 - 60 sec.
Ramp time adjustment changes the amount of time it takes to reach
the current limit point or full voltage if the current limit point was not
reached. Acceleration time (ramp) can be increased by rotating the
ramp time potentiometer in a clockwise direction. The ramp time
adjustment is made after the starting torque has been set. Set the
ramp time potentiometer by slowly rotating it until the desired ramp
time is reached. The unit should be stopped and restarted to see if the
desired acceleration time has been achieved
Note:
Refer to your motor manual for the maximum number of starts
allowed by the manufacturer and do not exceed the recommended
number.
Detail of Operator Interface Module
Chapter 5 - Adjustments
 Loading...