© National Instruments | 1-25
NI cDAQ-9181/9184/9188/9191 User Manual
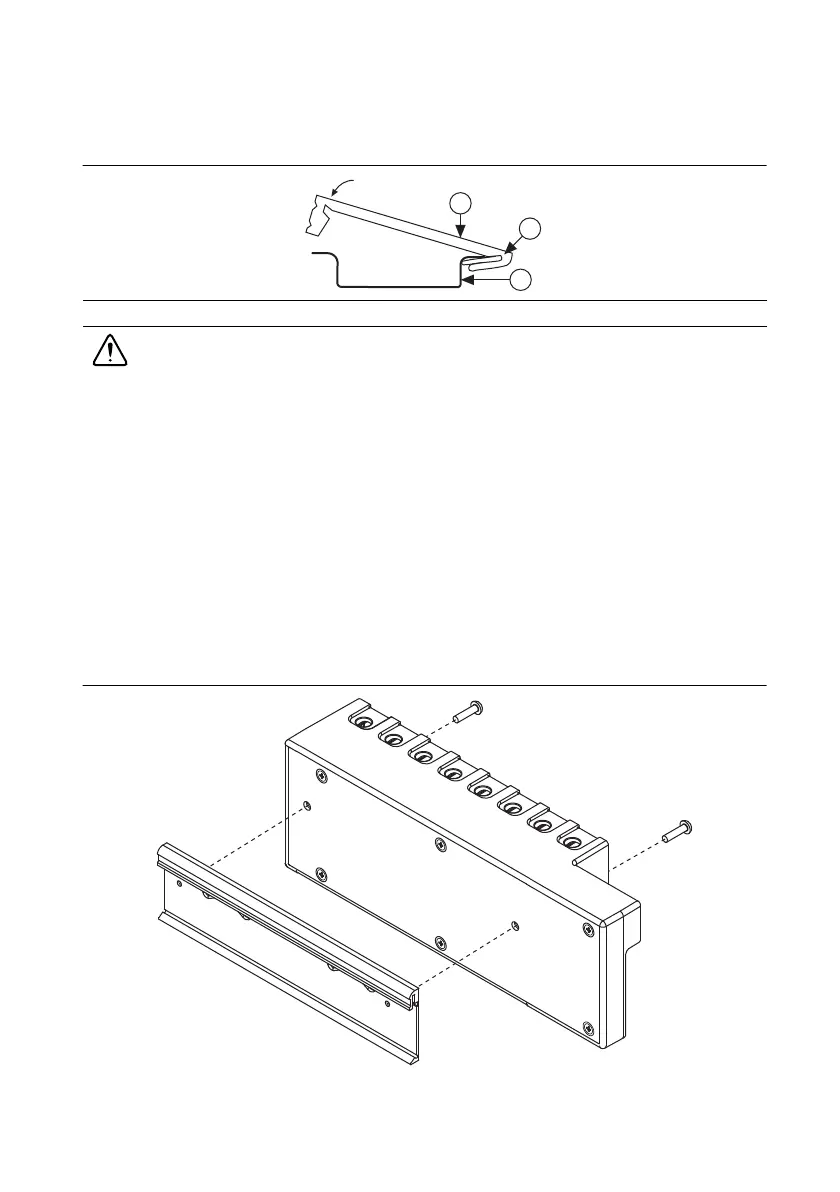
Clip the chassis onto the DIN rail with the larger lip of the DIN rail clip positioned up, as shown
in Figure 1-18.
Figure 1-18. DIN Rail Clip Parts Locator Diagram
Caution Remove the module before removing the chassis from the DIN rail.
cDAQ-9184/9188
Use the NI 9912 DIN rail kit to mount the cDAQ-9184 chassis on a DIN rail. Use the NI 9915
DIN rail kit with the cDAQ-9188 chassis on a DIN rail.
Each DIN rail mounting kit contains one clip for mounting the chassis on a standard 35 mm
DIN rail. To mount the chassis on a DIN rail, fasten the DIN rail clip to the chassis using a
number 2 Phillips screwdriver and two screws included in the kit. The cDAQ-9184 uses
two M4 × 22 screws. The cDAQ-9188 uses two M4 × 17 screws.
Make sure the DIN rail kit is installed as shown in Figure 1-19. Clip the chassis onto the DIN
rail with the larger lip of the DIN clip positioned up, as shown in Figure 1-18. When the DIN rail
kit is properly installed, the cDAQ chassis is centered on the DIN rail.
Figure 1-19. cDAQ-9184/9188 DIN Rail Installation
1 DIN Rail Clip 2DIN Rail Spring 3 DIN Rail
1
2
3
 Loading...