English-6
Quick Start
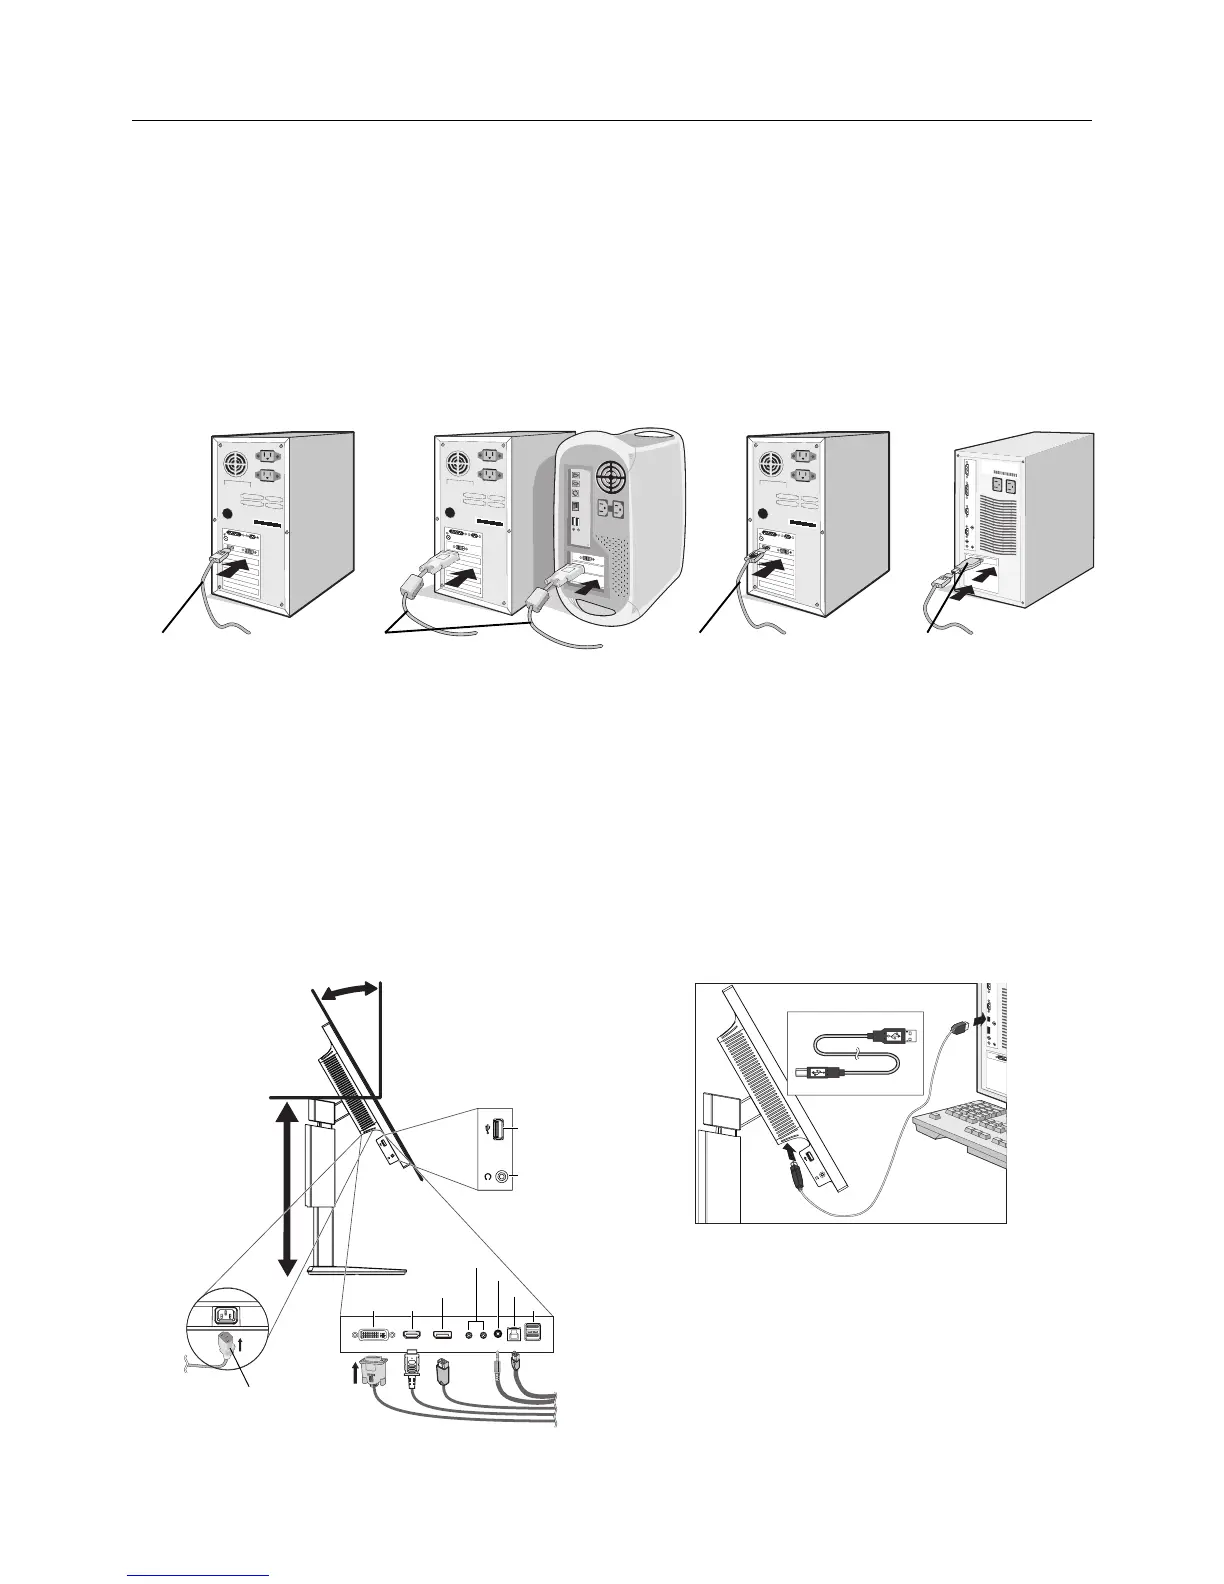
To connect the LCD monitor to your system, follow these instructions:
NOTE: Make sure to read “Recommended Use” (page 3) before installation.
1. Turn off the power of your computer.
2. For a PC with DisplayPort output: Connect the DisplayPort cable to the connector of the display card in your system
(Figure A.1).
For a MAC with Thunderbolt output: Connect a Mini DisplayPort to DisplayPort adapter (not included) to the computer,
and then attach the included DisplayPort cable to the adapter and to the display (Figure A.4).
For a PC or MAC with DVI digital output: Connect the DVI cable to the connector of the display card in your system
(Figure A.2). Tighten all screws.
NOTE: Some Macintosh systems do not require any Macintosh cable adapter.
For a PC with HDMI output: Connect the HDMI cable to the connector of the display card in your system (Figure A.3).
Figure A.1
(not included)
NOTE: 1. Please use a High Speed HDMI cable with HDMI logo.
2. When removing the DisplayPort cable, hold down the top button to release the lock.
3. Please use a DisplayPort Certifi ed DisplayPort cable.
3. Place hands on each side of the monitor to tilt the LCD panel 30-degree angle and lift up to the highest position.
4. Connect all cables to the appropriate connectors (Figure C.1). When using the USB cable, connect the B type connector
to the USB upstream port on the right back side of the monitor and the A type connector to the downstream port on the
computer (Figure C.1a). If using the cable from a USB device, plug into one of the downstream ports of the monitor.
NOTE: Incorrect cable connections may cause abnormal operation, damage display quality/components of LCD module and/
or shorten the module’s life.
NOTE: Use an audio cable without a built-in resistor. Using an audio cable with a built-in resistor turns down the sound.
Figure C.1a
A Type
B Type
A Type
B Type
 Loading...