Page 6 of 6
Network without DHCP server
1. Connect your switch to your existing network.
2. Power on your switch by plugging in the power cord.
3. The default IP is 192.168.0.239.
4. Install the Smartwizard Discovery program on your PC.
5. Start the Smartwizard Discovery utility. Chapter 4 has detailed instructions on the Smartwizard
Discovery utility.
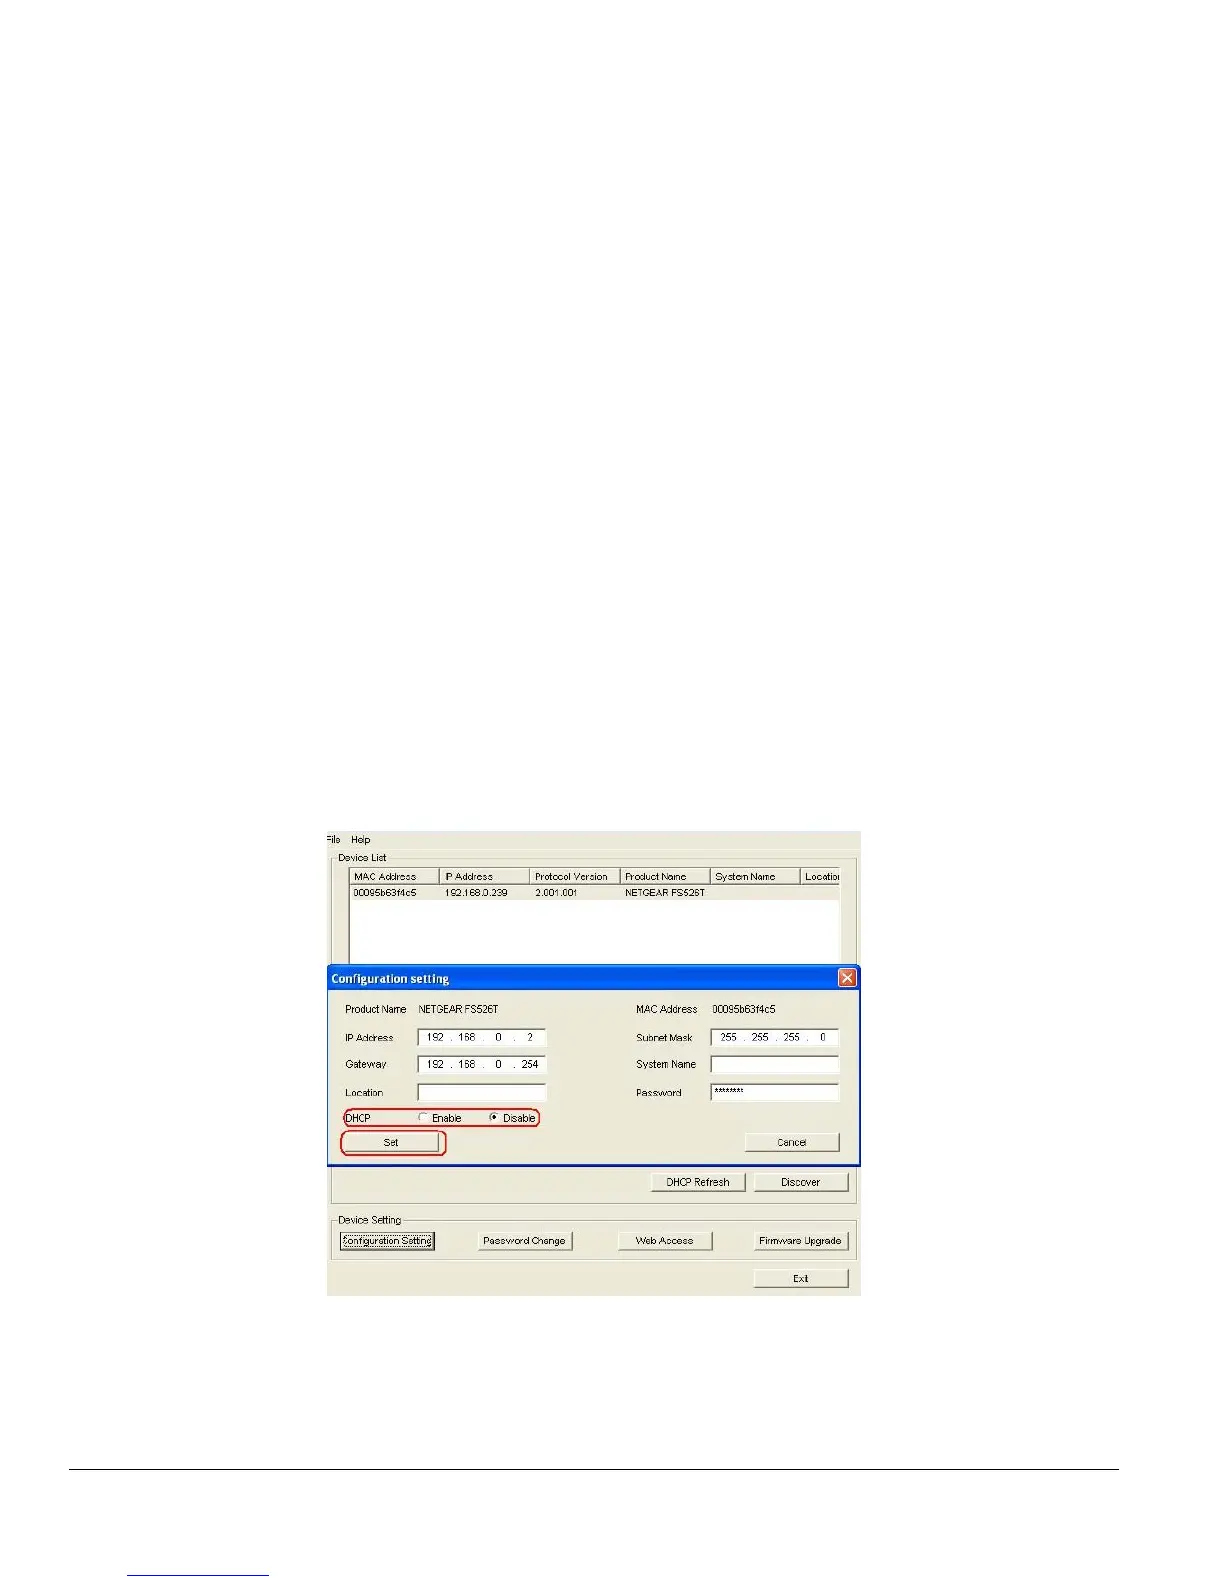
6. Click Discover on the Smartwizard Discovery main screen to find your switch. You should see a
something similar to Figure 2-1.
7. Click on Configuration Setting (See figure 2-4).
8. Choose Disable on DHCP.
9. Enter your IP address, Gateway and Subnet, and then type your password and click “Set”. Please
make sure your PC and your switch are in the same subnet.
Note: You can always assign a Static IP address to your switch no matter if your network has a
DHCP server or not.
10. Select your switch by clicking on it. Then click on Web Access.
11. Start managing your switch via your web browser. The default password is ‘password’. For a
detailed description on web management access, please refer to Chapter 5.
Smartwizard Discovery > Configuration Setting > Assign Static IP
Figure 2-4. Manually setting IP address
 Loading...