Mounting
NOTE
All electrical connections must be carried out
by an authorised electrician.
Electrical installation and wiring must be car-
ried out in accordance with the stipulations in
force.
NOTE
On the communication board (AA23), the
brown cable (signal) is connected to X1:1.
The blue cable is connected to X1:2.
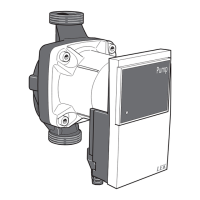
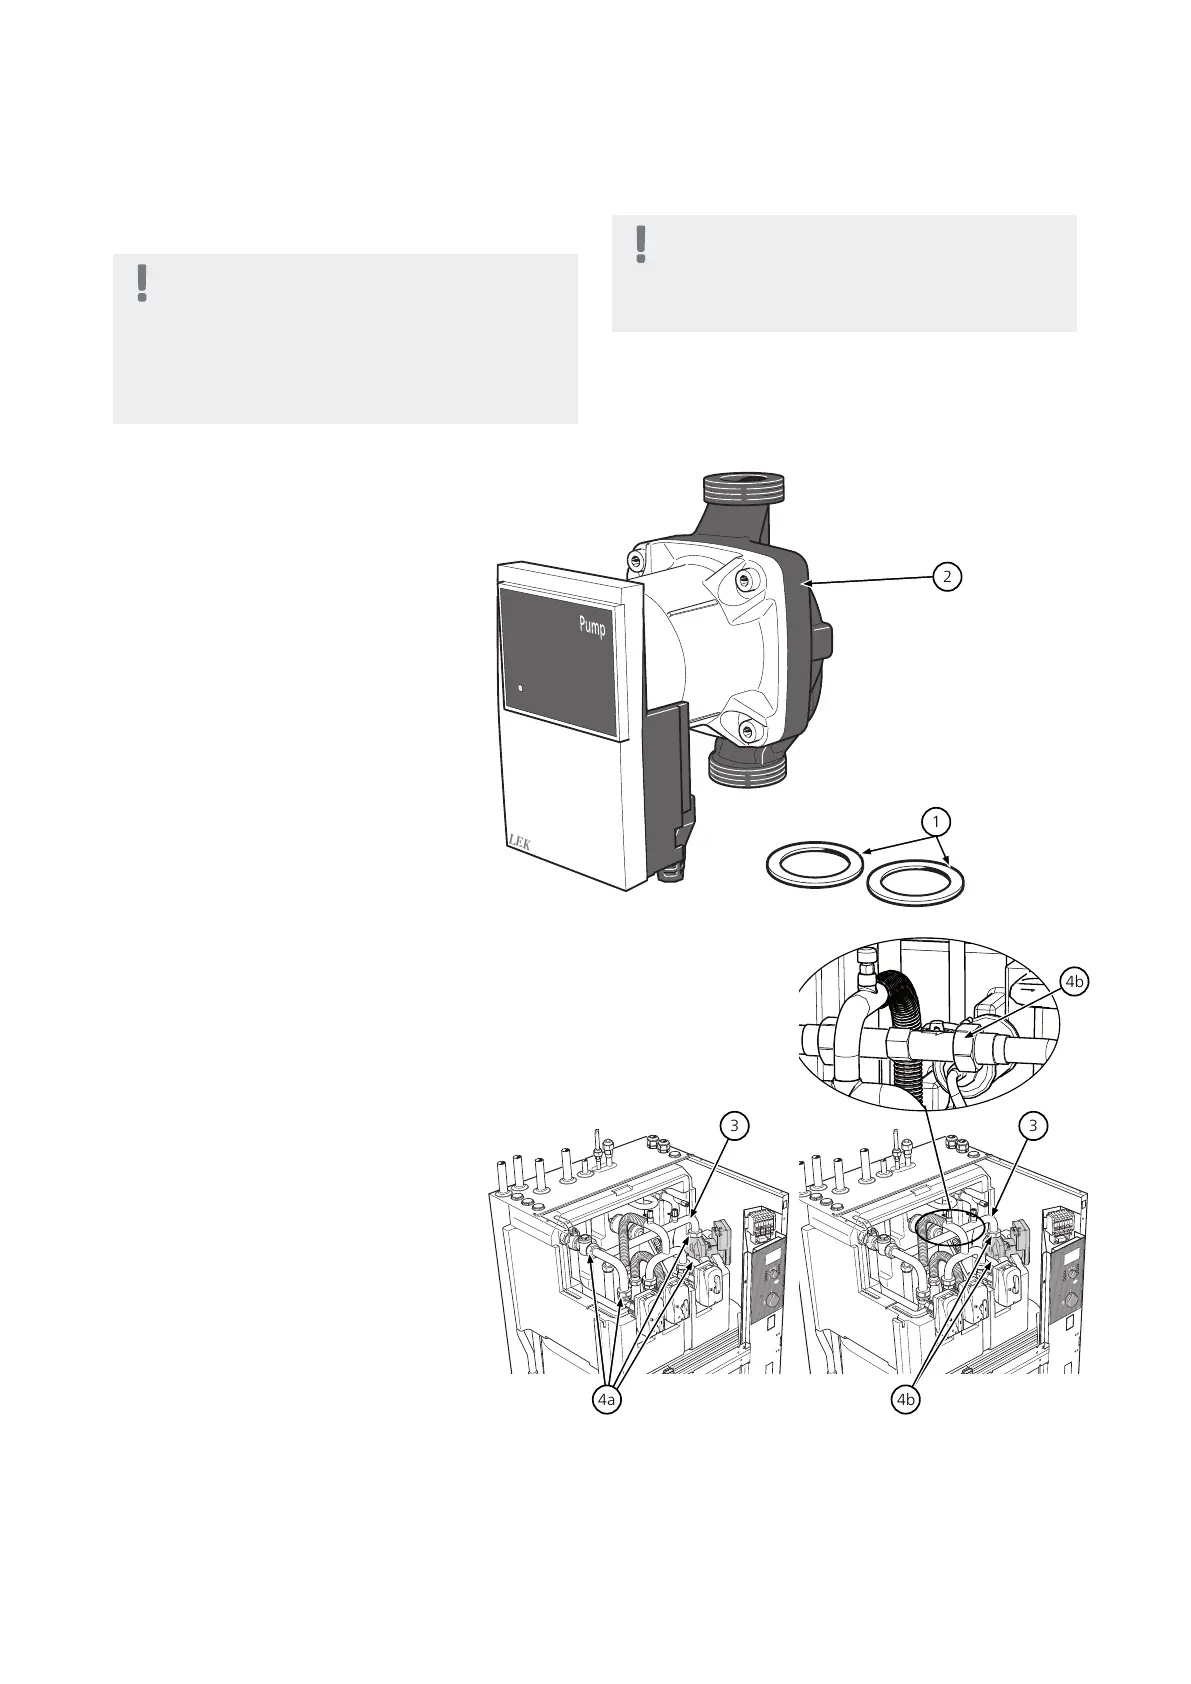
1. Replace the gaskets, use the ones
supplied with the replacement
pump.
Install the replacement pump. Note
that the outlet opening points
downwards.
2.
GM20
XL4 XL3 XL2 XL1 XL15 XL13 XL14 PF4 PF1
UB1
UB2
EP2
X1
GP1
SF1
FA2
FA1
BT30
FD1
XL8
BT24
XL9
EB1
HQ1
QM30
QM31
QN11
AA22
AA22-R26
AA22-R25
AA22-R24
AA21
AA23
BT6
BT19
QM1
PF3
LEK
Reinstall the pipe to the pump.3.
If an energy meter is not installed,
tighten all nuts, see (4a).
If an energy meter is installed,
tighten all nuts, see (4b).
4.
21| GB
 Loading...