90
Adjusting Da
Adjusting Da
te and
te and
T
T
ime and Imprinting Da
ime and Imprinting Da
ta
ta
• The F80D and F80S allow you to imprint Year/Month/Day,
Day/Hour/Minute (24-hour clock), Month/Day/Year or Day/Month/Year
on your picture (in any exposure mode).
ADJUST button
Data imprint LCD panel
MODE button
SELECT button
ADJUST button
Data imprint LCD panel
MODE button
SELECT button
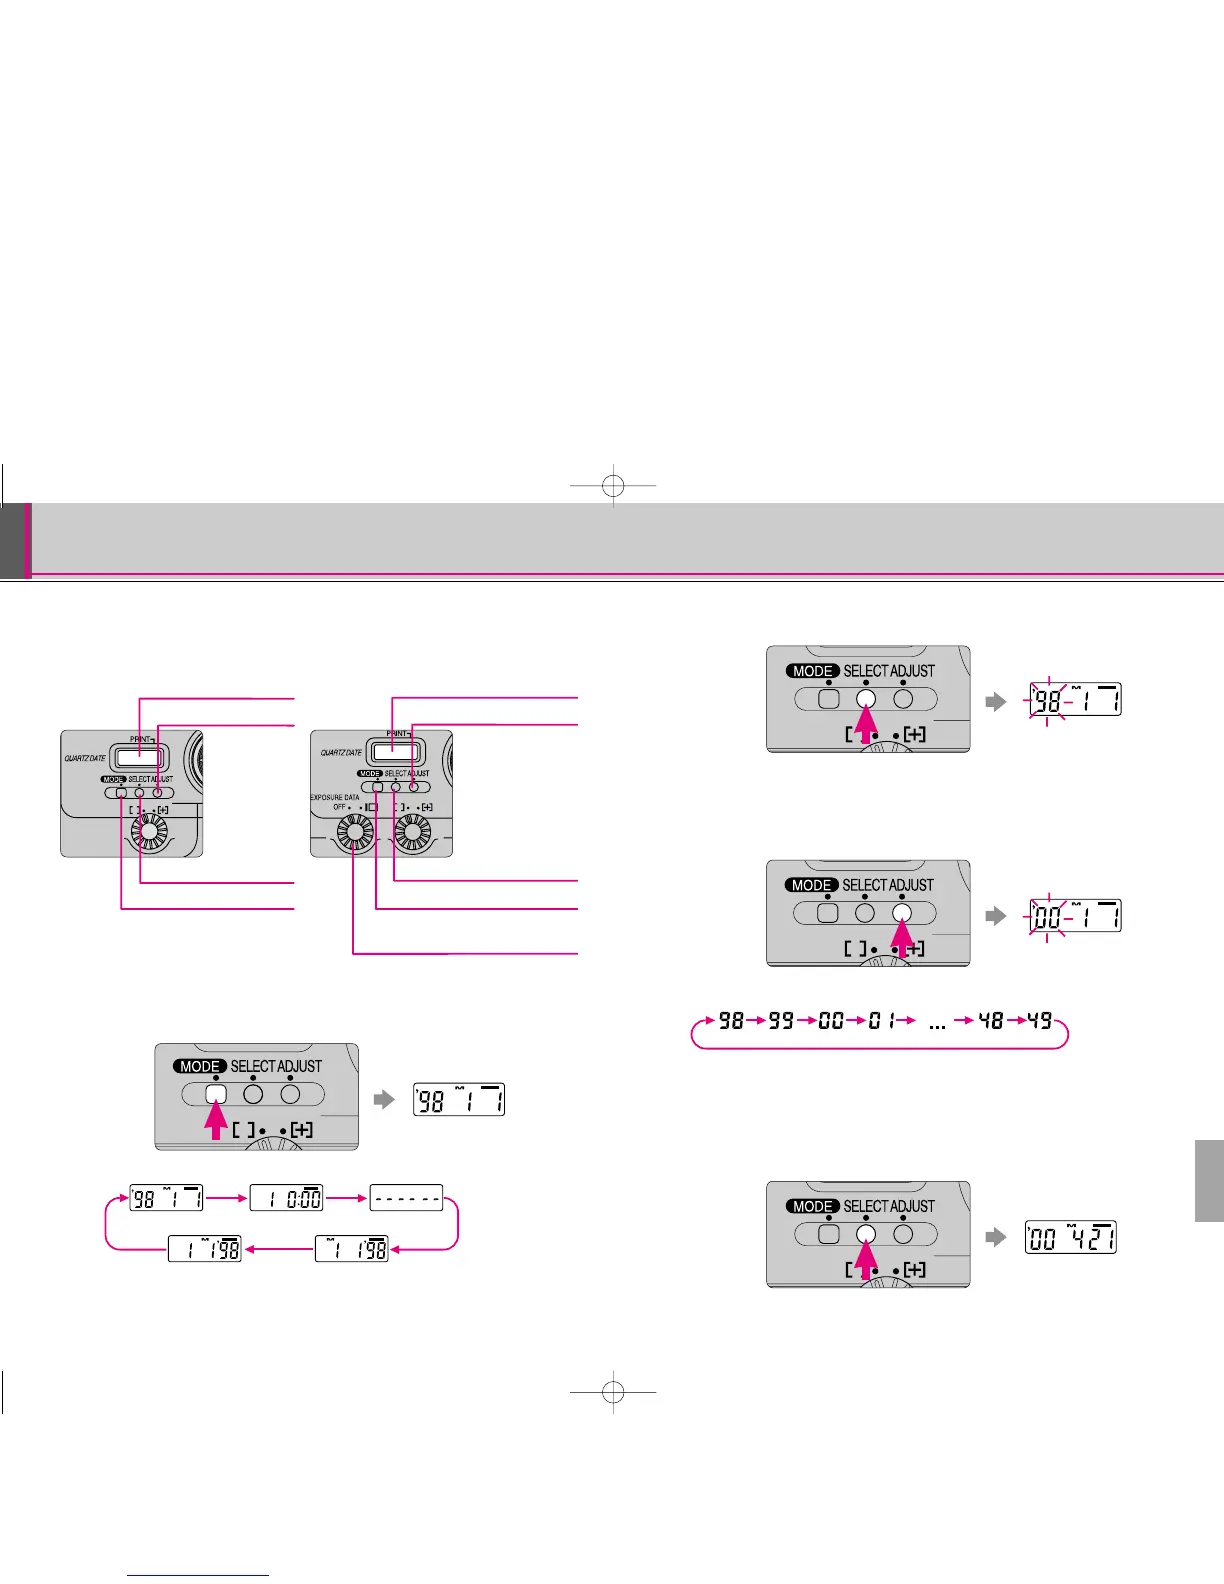
• Adjusting date and time (Example: year 2000, April 21, 15:30; shows
the operation with F80D; same operation with F80S)
1
Push MODE button to select one of the date displays.
• Each time you push the MODE button the display changes as follows:
• To set date choose display other than Day/Hour/Minute. With
Day/Hour/Minute display, only time can be set.
Year/Month/Day Day/Hour/Minute No imprint
Day/Month/Year Month/Day/Year
2
Push SELECT button so year section starts blinking.
• Each time you push the SELECT button the blinking section moves in the
order of year, month and day. ’ indicates the year section (last two digits)
and
M
indicates the month section. (
M
is not imprinted on the picture.)
3
Push ADJUST button to set the year to “00”.
• Each time you push the ADJUST button the year section changes as
follows (between 1998 to 2049):
• To change the numerical indication rapidly, hold the ADJUST button down
for more than 1 sec.
4
Set the month and day following steps 2 and 3. When
the setting is complete, push the SELECT button so
the newly adjusted date display appears without
blinking.
• Push the SELECT button until the date display stops blinking. When the
data imprint indicator
—
appears in the data imprint LCD panel,
date setting is complete.
91
Shooting data imprint dial
F80D F80S
Data Back
F80 (E)-Thailand 02.12.27 5:21 PM Page 90
 Loading...