44 - FORM NO. 56043088 / Advenger
™
/ BR 600S, 650S, 700S, 800S
SQUEEGEE SYSTEM
1 Park the machine on a fl at, even surface and lower the squeegee. Then drive the machine
forward enough to have the squeegee blades fold over to the rear.
2 Loosen the Lock Wing Nut (J) (hand tightened). This secures the squeegee mount
angle from easily vibrating out of adjustment.
3 Turn the Adjustment Knob (K) to tilt the tool forward or backwards, until the
rear squeegee wiping blade touches the fl oor evenly across its entire
width.
4 Re-tighten by hand the Lock Wing Nut (J).
SQUEEGEE MAINTENANCE
If the squeegee leaves narrow streaks or water, the blades may be dirty or damaged. Remove the squeegee, rinse it under warm water and inspect
the blades. Reverse or replace the blades if they are cut, torn, wavy or worn.
To Reverse or Replace the Rear Squeegee Wiping Blade...
1 See Figure 3. Raise the squeegee tool off the fl oor, then unsnap the Center Latch
(G) on the squeegee tool.
2 Remove the Tension Straps (H).
3 Slip the rear blade off the alignment pins.
4 The squeegee blade has 4 working edges. Turn the blade so a clean, undamaged edge points toward the front of the machine. Replace the blade if all 4 edges
are nicked, torn or worn to a large radius.
5 Install the blade, following the steps in reverse order and adjust the squeegee tilt.
To Reverse or Replace the Front Squeegee Blade...
1 Raise the squeegee tool off the fl oor, then loosen the (2) Thumb Nuts (I) on top of the squeegee and remove the squeegee tool from the mount.
2 Remove both rear Tension Straps fi rst.
3 Remove all the wing nuts that hold the front blade in place, then remove tension strap and blade.
4 The squeegee blade has 4 working edges. Turn the blade so a clean, undamaged edge points toward the front of the machine. Replace the blade if all 4 edges
are nicked, torn or worn to a large radius.
5 Install the blade, following the steps in reverse order and adjust the squeegee tilt.
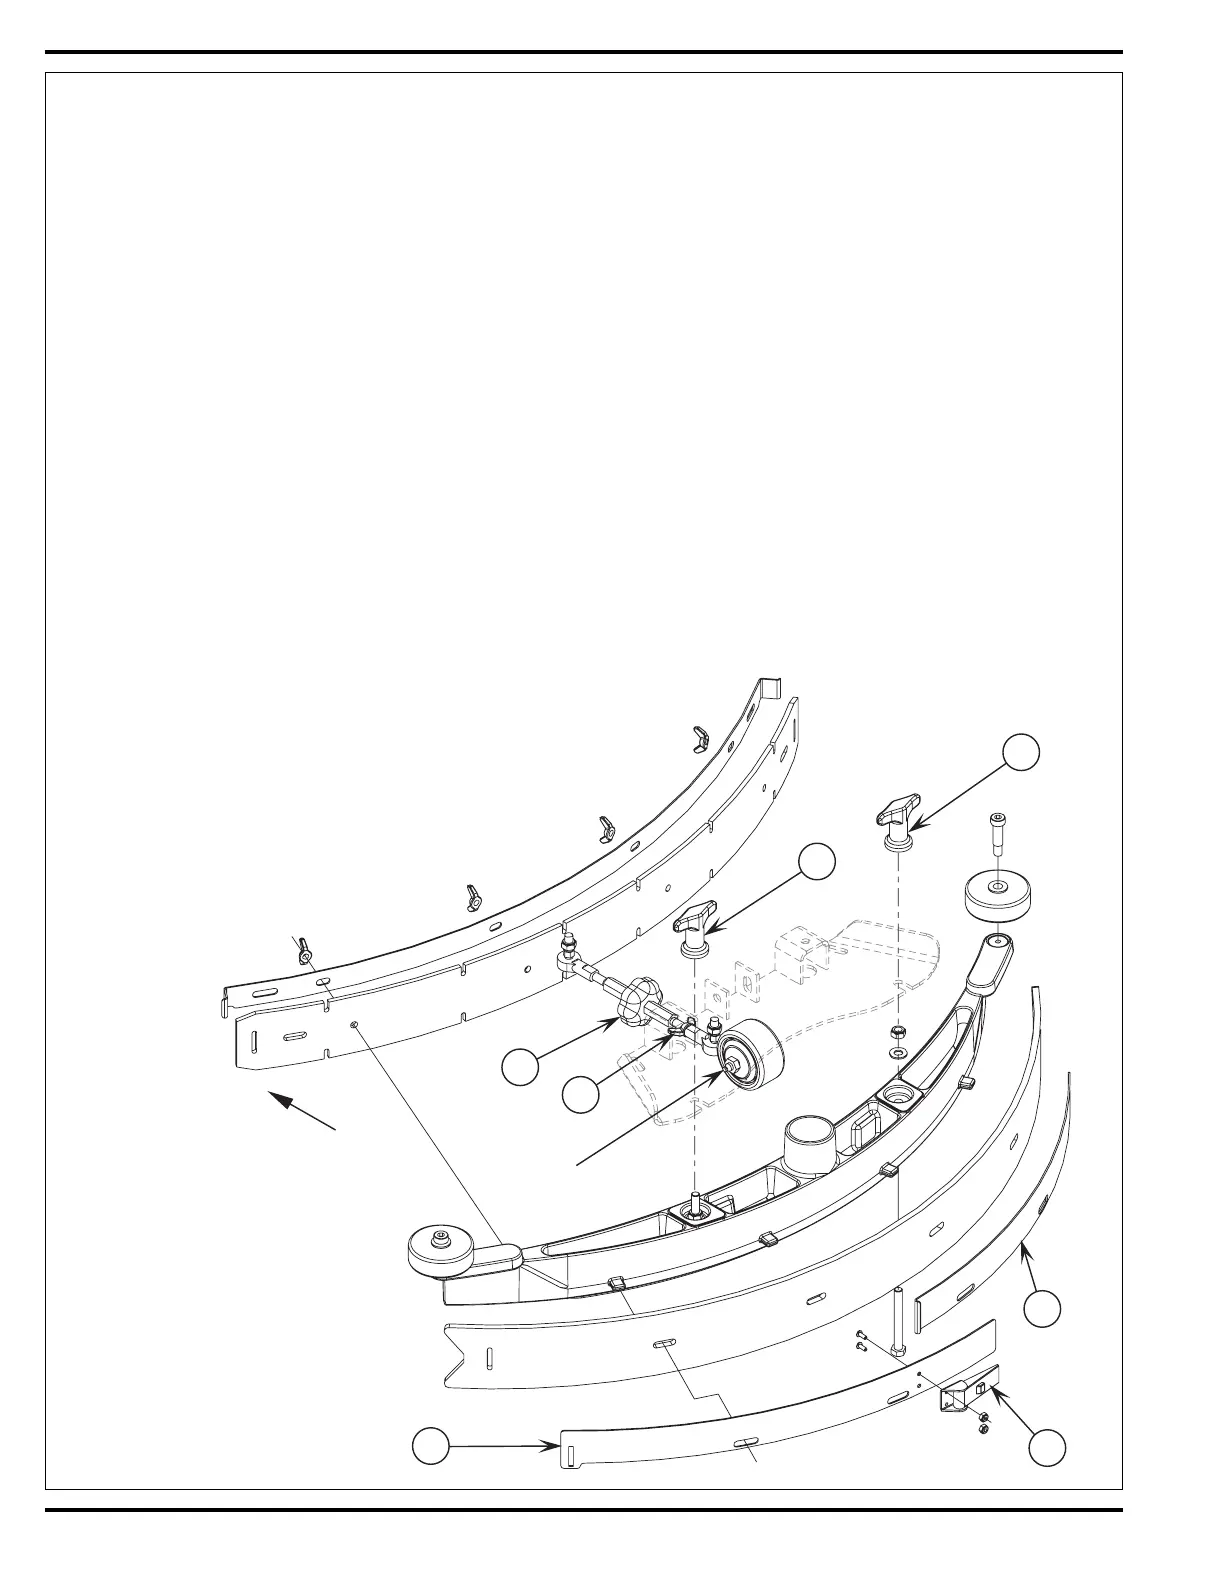
FIGURE 3
SQUEEGEE ADJUSTMENT
There is just one squeegee tool adjustment possible, angle.
Adjusting the Squeegee Angle
Adjust the squeegee angle whenever a blade is reversed or replaced, or if the squeegee is not wiping the fl oor dry.
G
FRONT
H
H
I
I
J
K
Grease
fitting
 Loading...