ingersollrandproducts.com 15
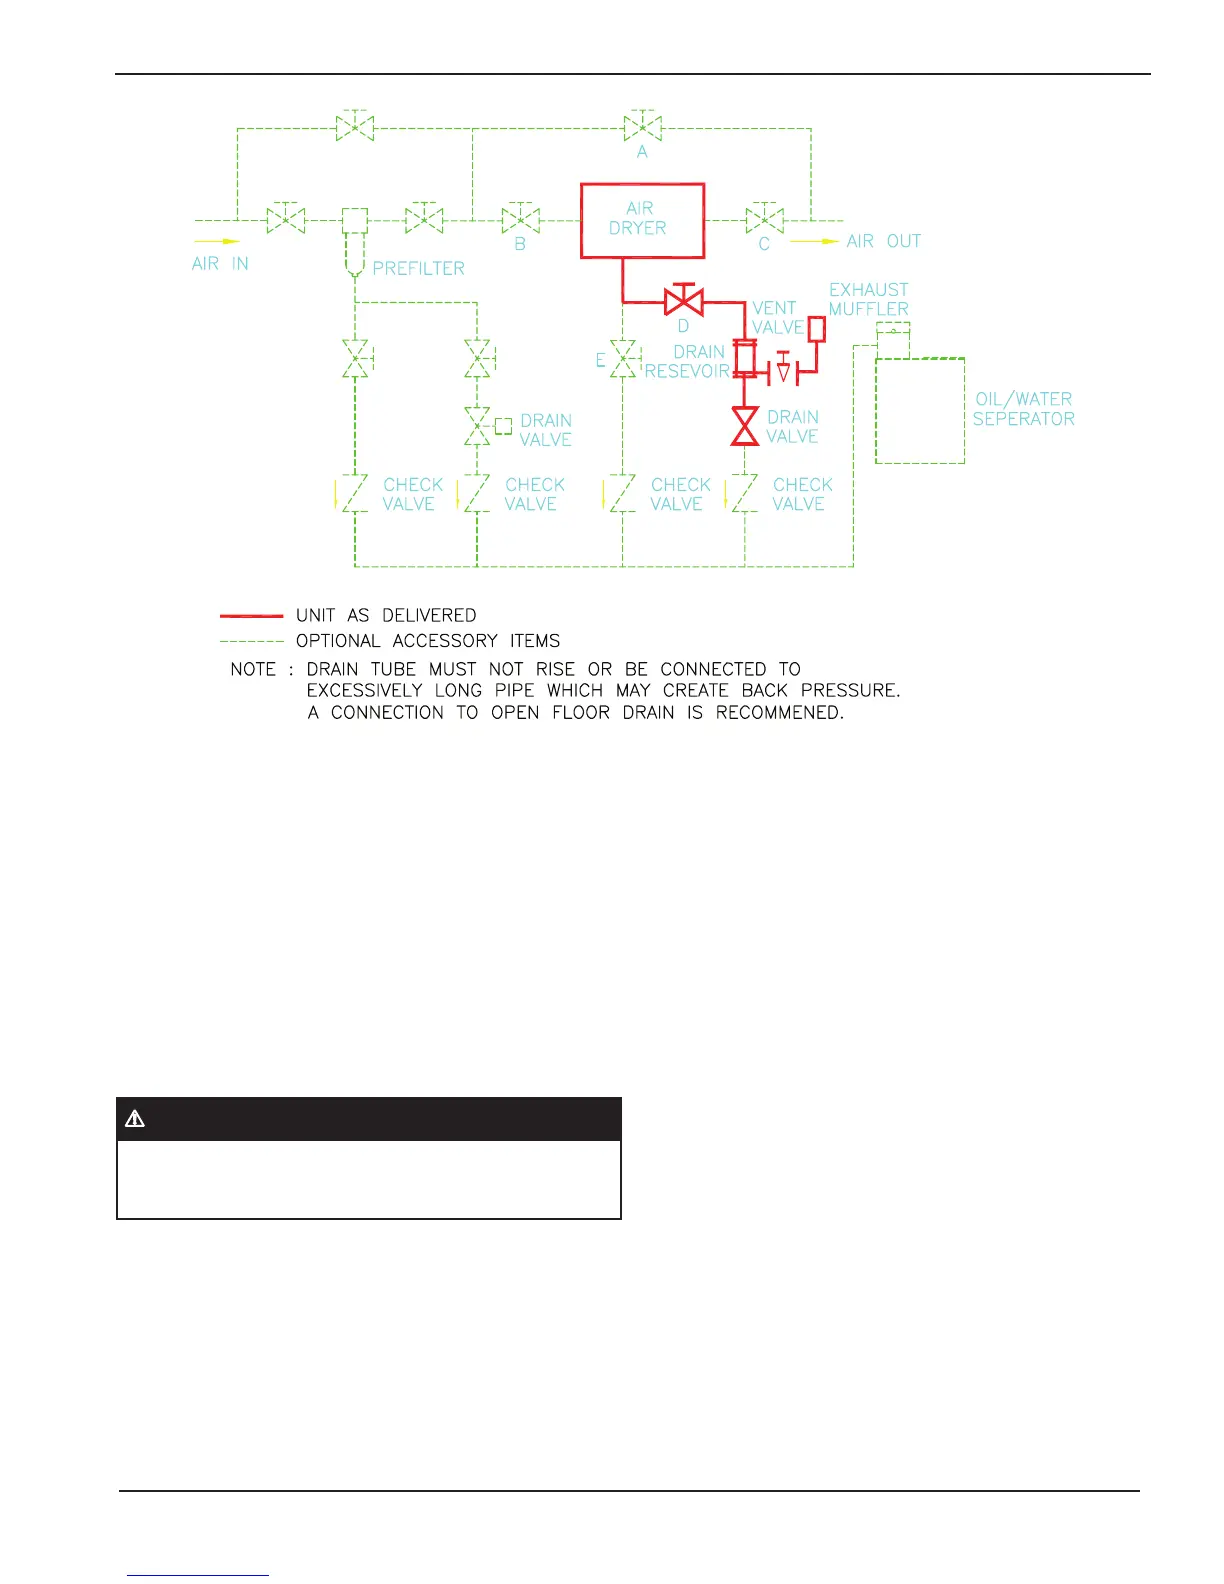
FIGURE 3 TYPICAL PIPING ARRANGEMENT
8.5 ELECTRICAL CONNECTION
Equipment is available in various electrical congurations.
All customer connections can be made at the terminal
connections located in the customer electrical connection
box on the rear of the dryer. (Refer to General Arrangement
and appropriate Wiring Diagrams.)
A suitable fused disconnect switch or circuit breaker, in
accordance with national and local code requirements, is
recommended for all Ingersoll Rand equipment. Refer
to the Engineering Specications Section for voltage
requirements and load.
Never wire directly or connect any additional wires to
the compressor junction box. This will cause severe
system malfunction.
8.5.1 START SETTINGS
Ingersoll Rand dryers can be congured for three variations
of start modes: Manual Mode, Automatic Mode and Remote
Mode. Refer to Section 10 for instructions on how to change
the dryer’s start settings. The instructions below describe the
methods to congure the dryer for a particular Start Mode.
A) Manual Mode (Factory Default) - No modication
required to operate dryer in Manual Mode. Once
power is applied, dryer can be started or stopped by
depressing the local ON / OFF pushbuttons located
on the front panel.
B) Auto Restart Mode - Auto Restart Mode permits the
dryer to start after a brief delay once power is applied
to the dryer. Note that the dryer’s touch pad will still
aect dryer operation. Depressing the OFF button
will de-energize the refrigeration compressor and all
other electrical components. After the OFF button has
been depressed, the user must depress the ON button
to permit the dryer to operate.
C) Remote Mode - Remote Mode allows the dryer to be
turned ON or OFF via a remote switch supplied by
the customer. This mode will work regardless of the
setting for Auto Restart. The dryer must be powered
on for this feature to take eect. To enable this
feature:
Install N.O. remote switch as indicated on the
appropriate wiring diagram.
Customer-supplied contact should be rated at 1A
at 24V. To operate dryer, close switch or contact and
allow dryer to start after an initial delay. The local On
/ OFF pushbuttons may also be used at any time after
contact closure.
•
•
8.0 INSTALLATION AND INITIAL STARTUP
120.26A D4290NCHPW400F Installation Operation and Maintenance Manual
 Loading...