DAA2 & DAX — P/N 53265:A1 8/24/2011 25
DAA2 Installation DAA2 Digital Audio Amplifiers
• In a cabinet adjacent to the cabinet that holds a DAA2, with connections in conduit.
CHS-BH1 Battery Chassis
This chassis will hold two 12AH batteries, and will mount on the left side of the DAA2 chassis, so
that the DAA2 and batteries are contained in a single cabinet row.
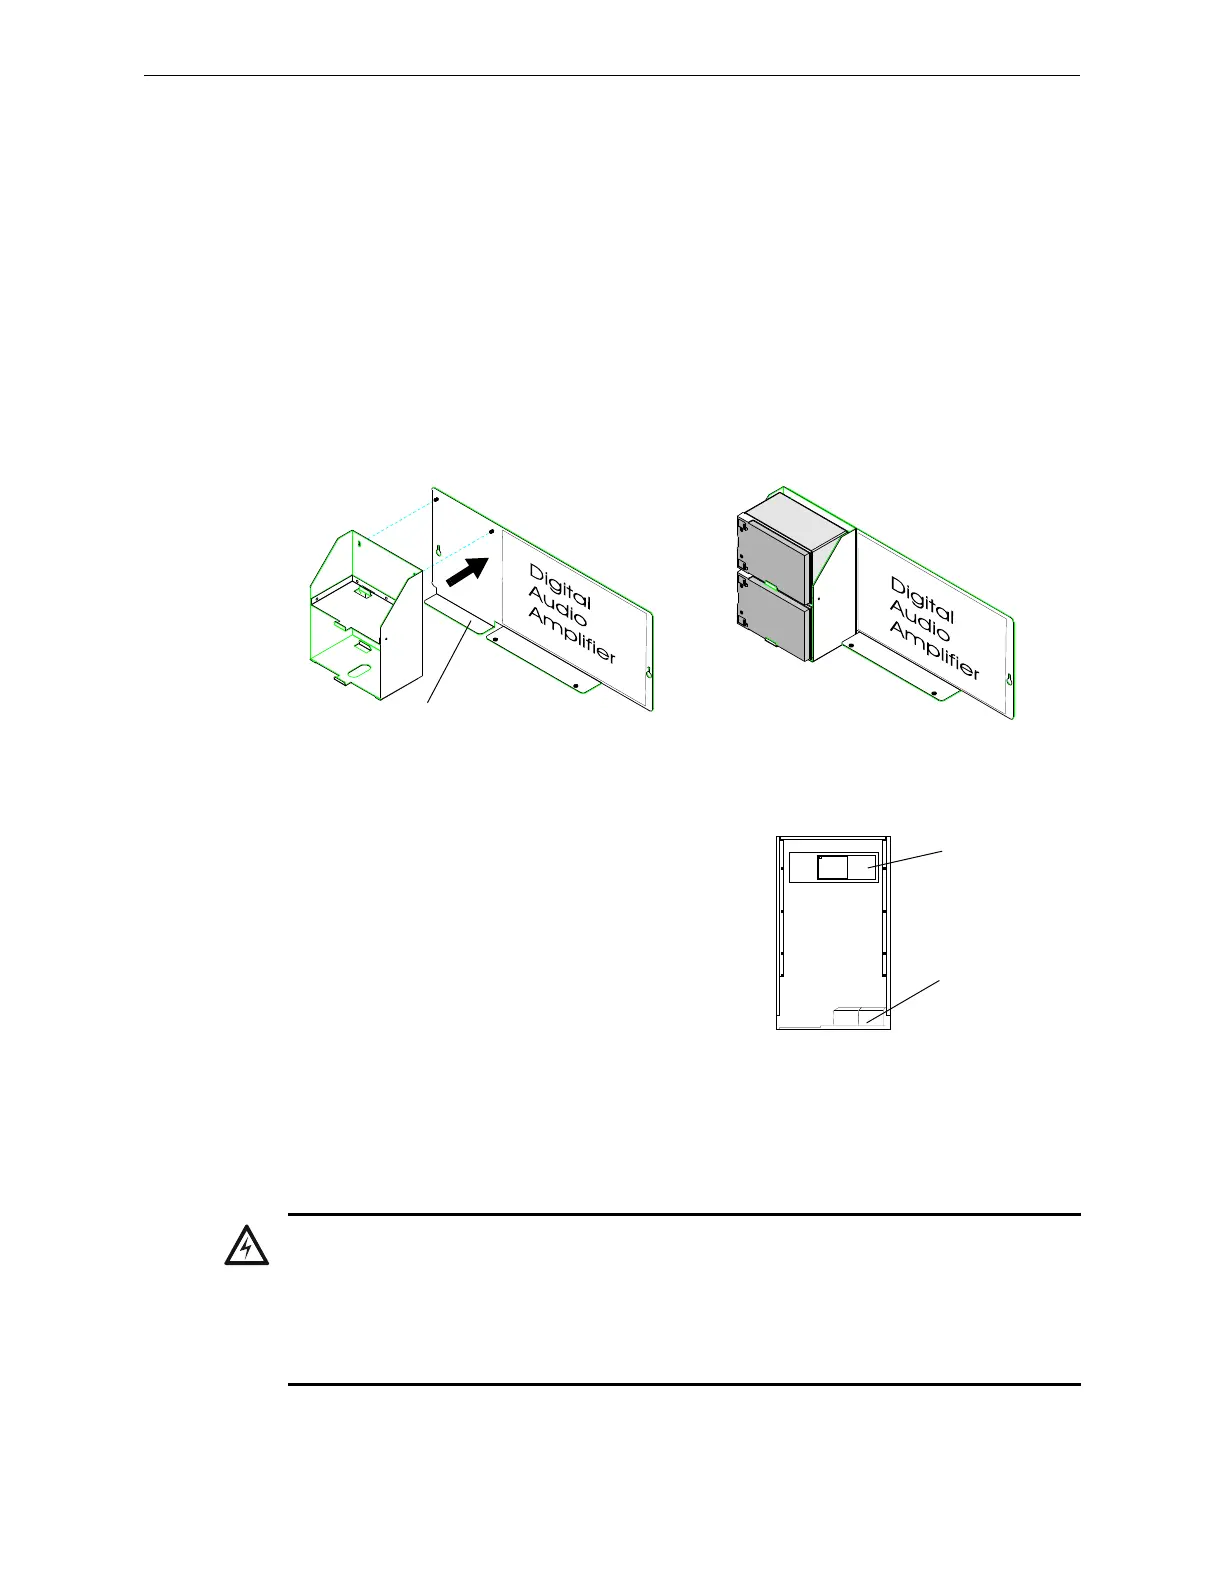
To mount the CHS-BH1 onto the DAA2 chassis: Place battery holder against DAA2 chassis,
resting on support as shown in Figure 2.6. Align chassis standoffs with holes. Fasten with the two
8/32” hex nuts supplied.
Place the batteries on their sides in their trays before wiring. Refer to “Batteries” on page 26 for
wiring instructions.
Within the CAB-4 Enclosure
If the batteries will not be housed in a CHS-BH1, place
the batteries in the bottom of the cabinet, as shown in
Figure 2.7. Refer to “Batteries” on page 26 for wiring
instructions.
Outside the DAA2 Enclosure
Batteries may be installed outside the DAA2 enclosure.
The battery cables must be in conduit between the
enclosures for the batteries and the DAA2. Refer to
“Batteries” on page 26 for wiring instructions.
2.2.3 Wiring
AC Power
The DAA2 power supply requires connection to a separate dedicated AC branch circuit. Follow
these guidelines when connecting the AC branch circuit:
CHS-BHtoDAAchassisa.wmf
CHS-BHwbattsa.wmf
Place battery holder against DAA2 chassis, resting
on support. Align chassis standoffs with holes.
Fasten with the two washers (P/N 43123) and 8-32
KEPS hex nuts (P/N 36047) supplied.
Place batteries in the trays.
Support
Figure 2.6 Mounting the CHS-BH1
CAB4DwDAAbats.wmf
DAA2 in top row
of CAB-D4
Figure 2.7 Battery Installation
Within the Cabinet
Batteries for
DAA2
WARNING: High Voltages Present.
Use extreme caution when working with the DAA2. High voltage and AC line-connected circuits are
present. Turn off and remove all power sources. To reduce the risk of electric shock, make sure to
properly ground the DAA2.
Close the hinged cover for TB1 after wiring but before energizing.
 Loading...