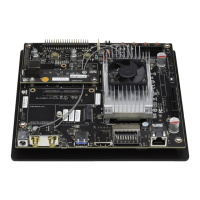
Jetson TX1 Developer Kit
User Guide
Jetson | Copyright © 2014 NVIDIA Corporation. All rights reserved. Page 5 of 27
Flashing the Boot Loader and Kernel
This section describes the steps required to flash and boot the target Tegra device. It also
provides usage information for the
flash.sh helper script.
Flash Procedure
First, flash the board with the boot loader and kernel, and, optionally, flash the rootfs to
internal eMMC.
Prerequisites
The following directories must be present:
• /bootloader—boot loader plus flashing tools (NvFlash, CFG, BCTs, etc.)
• /kernel—a kernel zImage /vmlinux.uimg, DTB files, and kernel modules
• /rootfs—the root file system that you download (This directory starts empty and you
populate it with the sample file system.)
• /nv_tegra—NVIDIA
®
Tegra
®
user space binaries and sample applications
You must also have the USB cable connected to the recovery port prior to running the
commands listed in the procedure. For more information, see the Requirements
topic in
this section.
To flash the boot loader and kernel
1. Put the target board into reset/recovery mode. Do so by first powering on the board
and then holding the recovery button, and then pressing the reset button as
described in the Quick Start Guide for the board.
2. Run the
flash.sh script that is in the top level directory of this release. The script
must be supplied with the target board (
jetson-TX1) for the root file system:
$ sudo ./flash.sh <platform> <rootdev>
• If the root file system will be on a USB disk, execute the script as follows:
$ sudo ./flash.sh <platform> sda1
Note: If a SATA device is connected, that device enumerates as sda1.
• If the root file system will be on an SD card, execute the script as follows:
$ sudo ./flash.sh <platform> mmcblk1p1
• If the root file system will be on the internal eMMC, execute the script as follows:
$ sudo ./flash.sh <platform> mmcblk0p1
Where <platform> is jetson-TX1.
The above examples are for u-boot. For fastboot, add the following argument:

 Loading...