32
10-2 Detailed Assembly Procedures
Fig. 35
Fig. 36
Fig. 37
Fig. 38
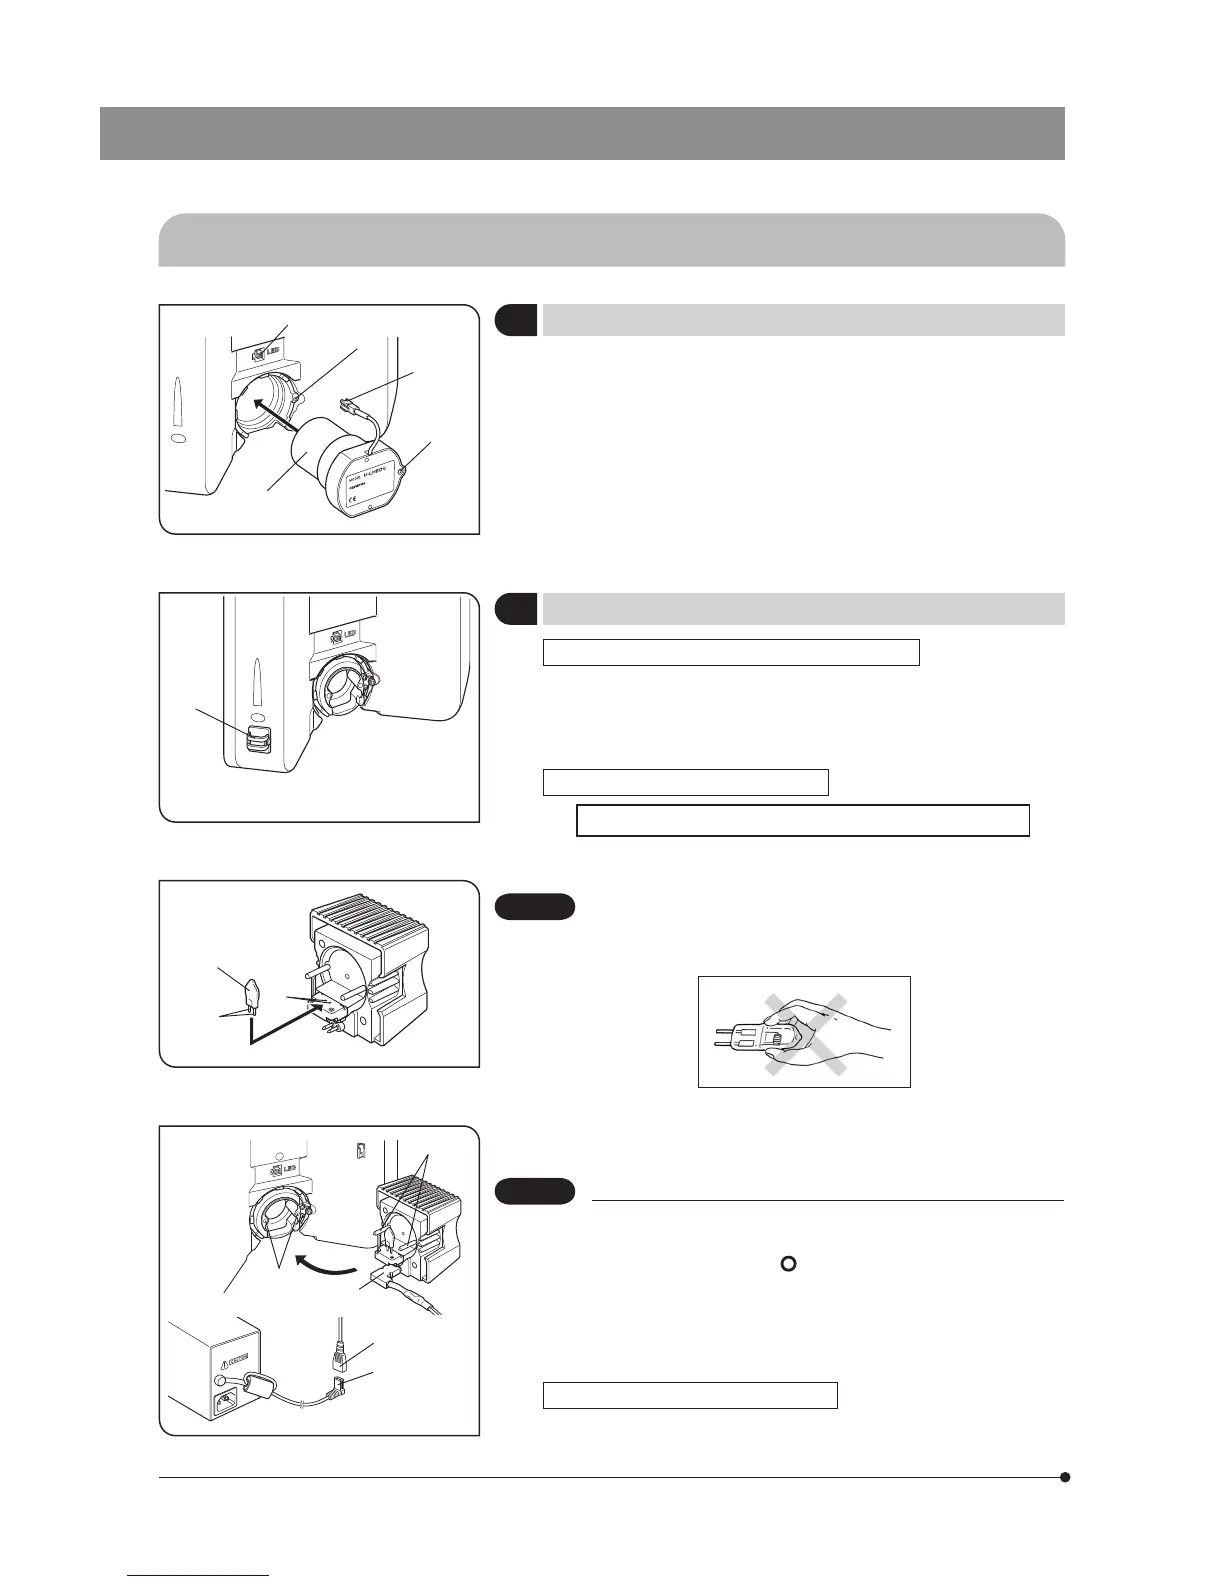
1 Attaching the LED Lamp Housing
(Fig. 35)
1. Fit the LED lamp housing @ into the mount hole on the rear of the
microscope by aligning the clamping screw 2 and screw hole 3.
2. Using the Allen screwdriver, tighten the clamping screw 2.
3. Insert the connector | of the lamp housing into the connector 5 on the
microscope.
2 Attaching the Halogen Lamp Socket
(Figs. 36 to 38)
Installing the U-LS30ADP LS30 Adapter (Fig. 36)
1. Peel off the backing of double-side adhesive tape on the cable holder
@ and attach the holder on the specified position.
2. Attach the adapter in the same way as steps 1 and 2 in the LED lamp
housing C attaching procedure described above.
Installing the Halogen Bulb (Fig. 37)
Use only the designated bulb 6V30WHAL (PHILIPS 5761).
1. Holding the bulb 2 a piece of gauze, insert the bulb pins 3 straight and
fully into the pin holes | on the lamp socket.
To prevent reduced bulb life or cracking, do not touch the bulb
with bare hands. If fingerprints are accidentally left on the bulb,
wipe the bulb with a soft cloth.
2. Insert the lamp cable 5 in the direction shown in the figure 38.
3. Aligning the guide pins 6 with the guide pin holes 7 at the rear of the
microscope frame, gently push the lamp socket all the way into place.
Caution for Bulb Replacement During Use or Right After Use
The bulb and the lamp socket are areas near these will be
extremely hot during and right after use.
Set the main switch to “
” (OFF), disconnect the power cord
from the wall outlet, then allow the old bulb and lamp socket
to cool before replacing the bulb with a new of the designated
type.
4 Pass the lamp cable through the cable holder @ (Fig. 36).
Connecting the Lamp Cable (Fig. 38)
Connect the cable connector 8 to the connector 9 of the TL4 power
supply unit.
CAUTION
CAUTION
1
1
2
4
3
5
2
3
4
5
6
7
8
9

 Loading...