14
Fig. 15
Fig. 16
Fig. 17
Fig. 18
4-5 Observation Tube
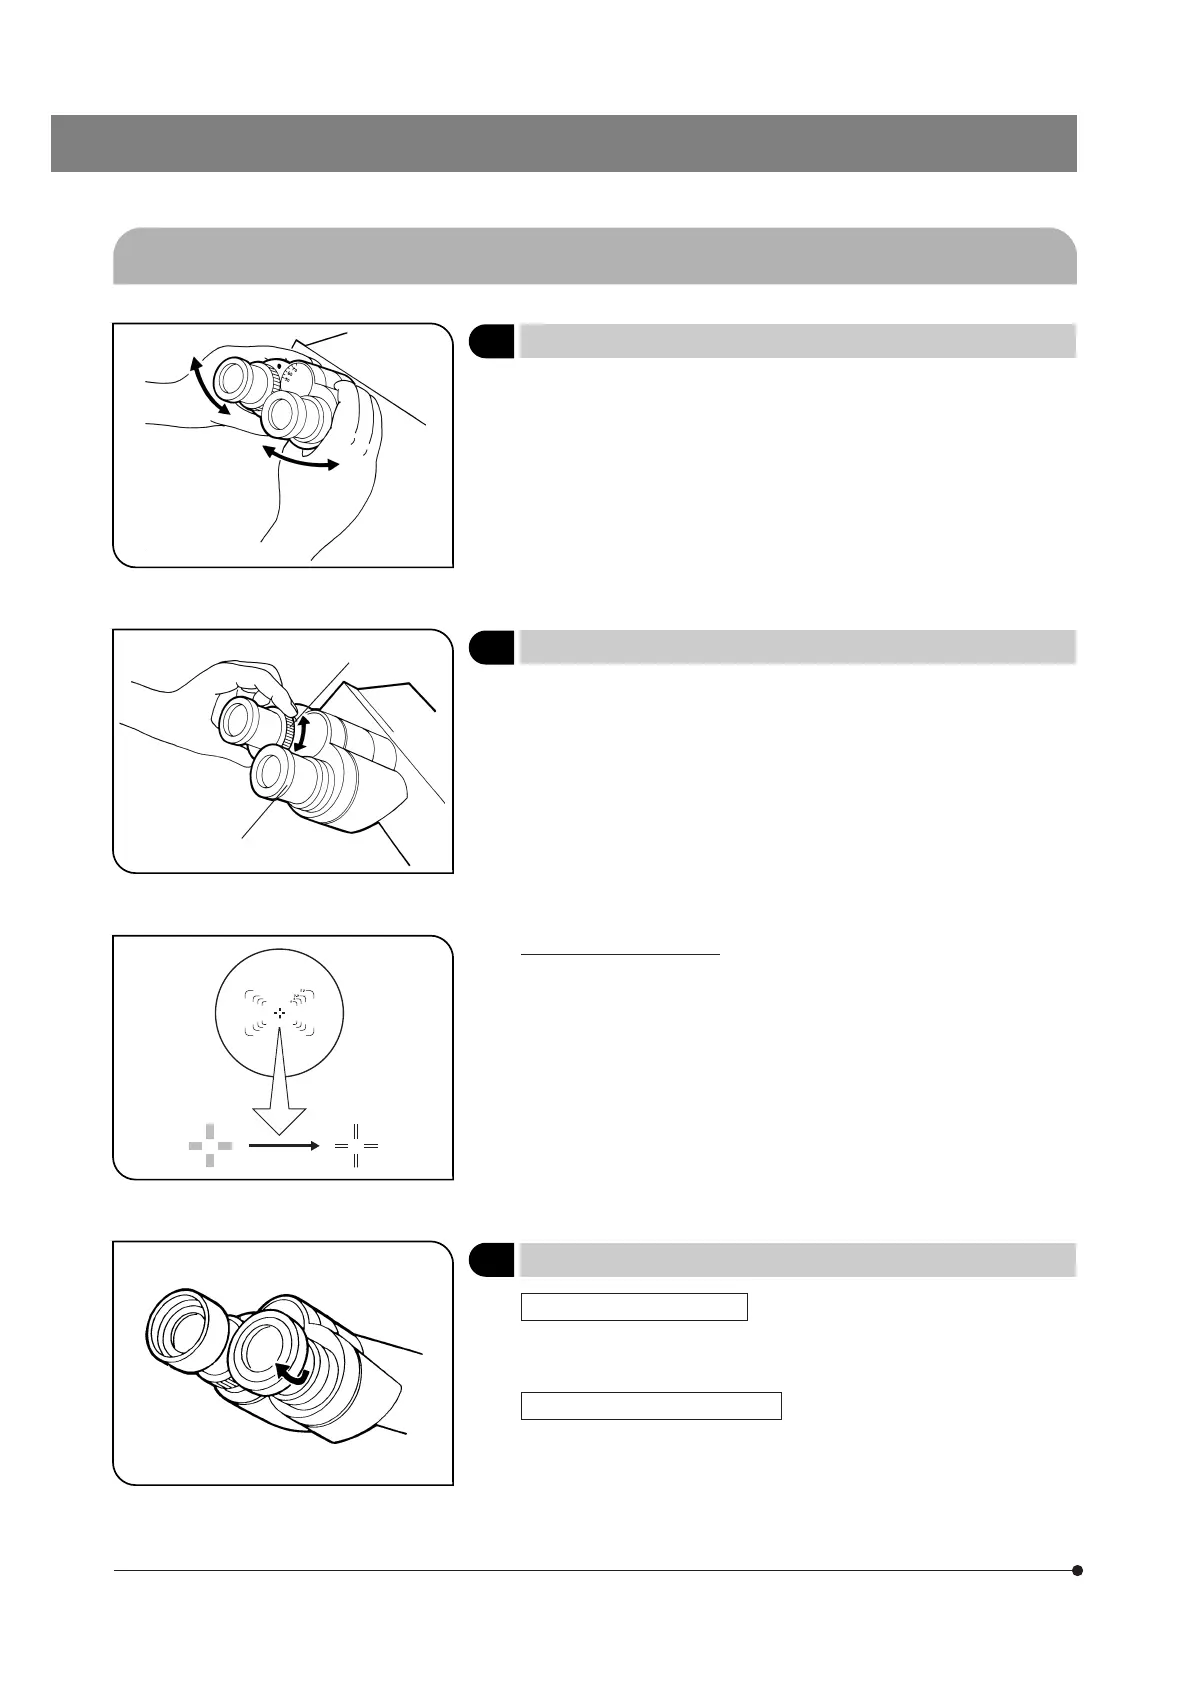
1 Adjusting the Interpupillary Distance
(Fig. 15)
While looking through the eyepieces, adjust for binocular vision until the
left and right fields of view coincide completely. The index dot · indicates
the interpupillary distance.
}Note your interpupillary distance so that it can be quickly duplicated.
2 Adjusting the Diopter
(Figs. 16 & 17)
1. Looking through the eyepiece without the diopter adjustment ring, rotate
the coarse and fine adjustment knobs to bring the specimen into focus.
2. Looking through the eyepiece sleeve with the diopter adjustment ring @,
turn only the ring to focus on the specimen. (Fig. 16)
Using a Finder Eyepiece
1. Looking through the right eyepiece with your right eye, turn the top of the
eyepiece ² until a clearly defined double crosslines can be seen in the
field of view. (Figs. 16 & 17)
2. Looking through the right eyepiece, rotate the coarse and fine adjust-
ment knobs to bring the specimen and double crosslines into simulta-
neous focus.
3. Looking through the left eyepiece with your left eye, turn the diopter
adjustment ring @ to focus on the specimen.
3 Using the Eye Shades
(Fig. 18)
When Wearing Eyeglasses
Use with the eye shades in the normal, folded-down position. This will
prevent the eyeglasses from being scratched.
When Not Wearing Eyeglasses
Extend the folded eye shades in the direction of the arrow to prevent
extraneous light from entering between the eyepieces and eyes.
@
²

 Loading...