16
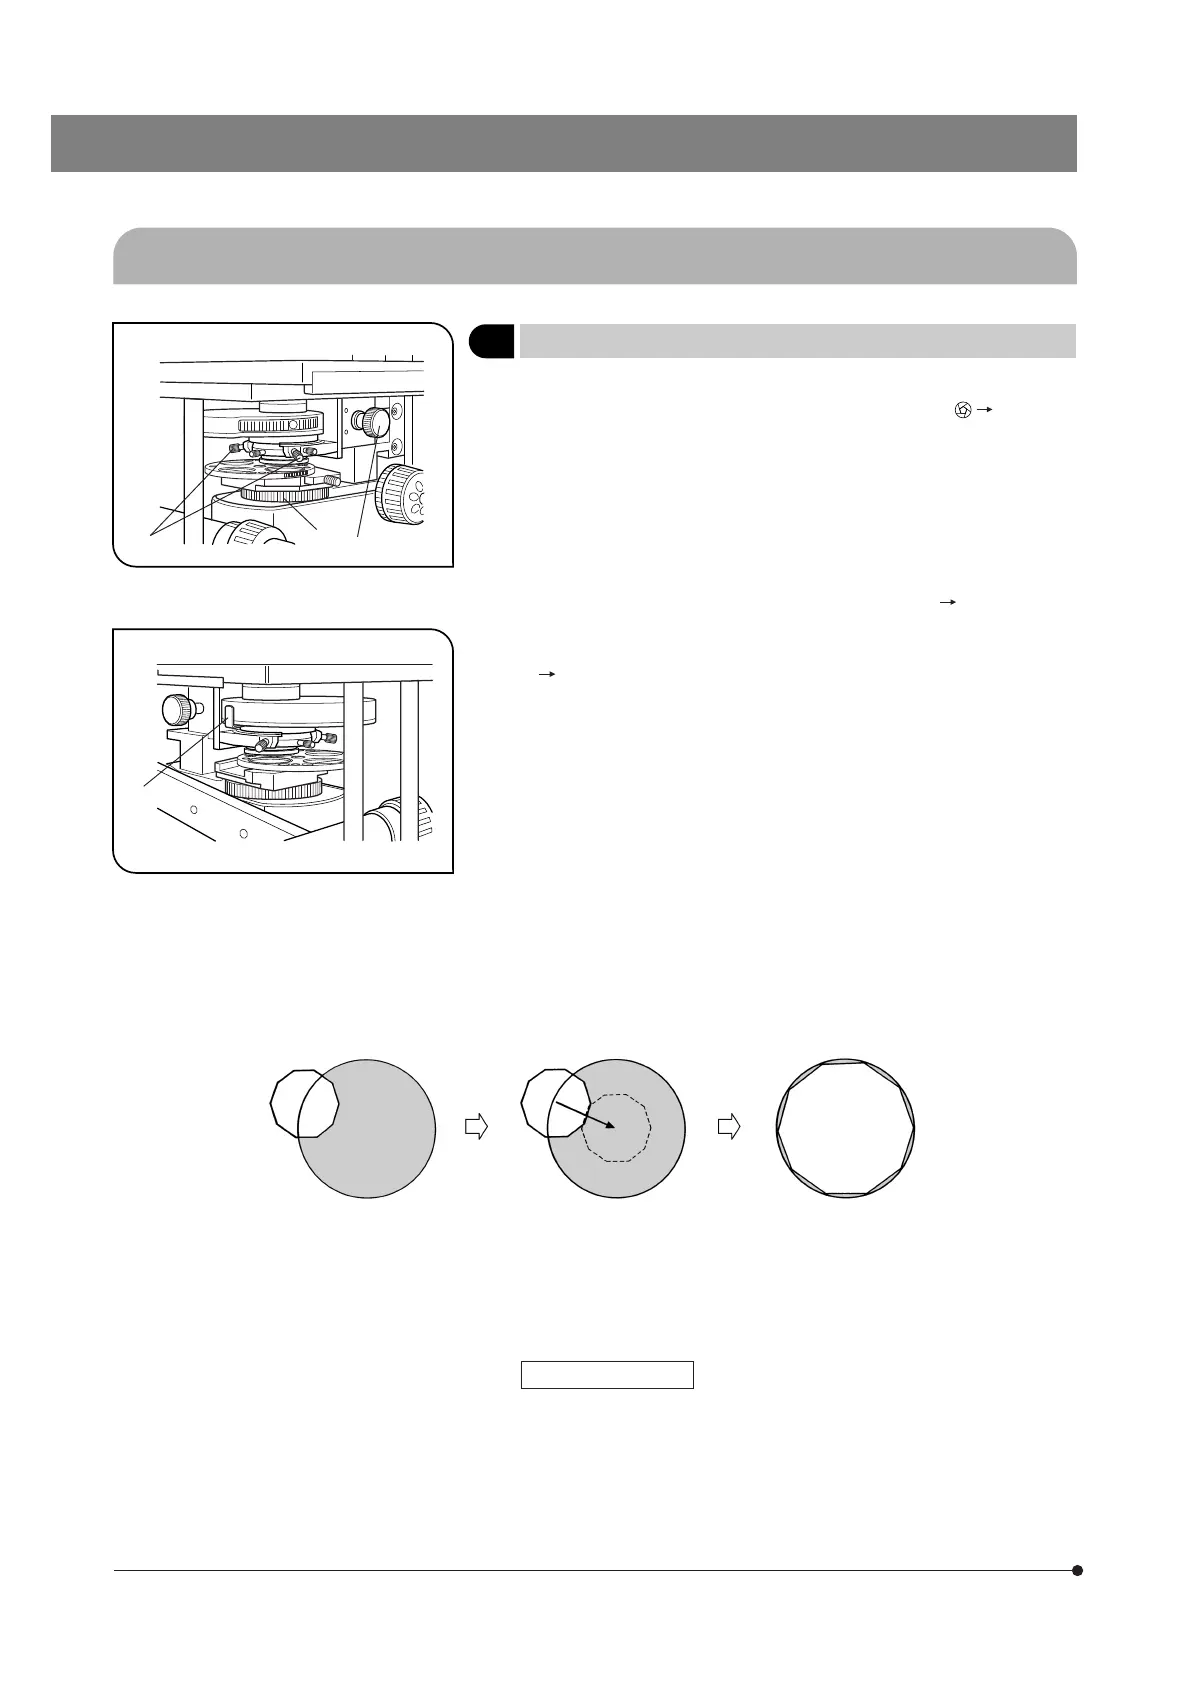
Fig. 21
Fig. 22
4-6 Condenser
1 Centering the Condenser
(Figs. 21 & 22)
1. Set the aperture iris diaphragm lever @ to the open position. (Fig. 22)
2. Set the field iris diaphragm ring ² to the open position ( ¦). (Fig. 21)
3. Focus on the specimen using the 10X objective.
4. Close the field iris diaphragm ring ² so that the diaphragm image comes
inside the field of view.
5. Manipulate the condenser height adjustment knob ³ to focus on the
diaphragm image.
6. While opening the field iris diaphragm gradually, turn the two condenser
centering screws | on the condenser holder to move the iris diaphragm
image to the center of the field of view. (Fig. 21, Fig. A Fig. B).
7. Gradually open the field iris diaphragm. The condenser is properly cen-
tered if the iris image is centered and inscribed in the field of view (Fig. B
Fig. C).
}During actual use, open the field diaphragm slightly until its image cir-
cumscribes the field of view.
Fig. A Fig. B Fig. C
Field Iris Diaphragm
The field iris diaphragm restricts the diameter of the beam of light enter-
ing the objective and thus excludes extraneous light, improving image
contrast. The diameter of the field iris should be adjusted for objective
magnification to the extent that it just circumscribes the field of view.
@
²
³
|

 Loading...