PW
ON
SETUP Setting the
startup
screen
and
volume
SCREEN
OFF
(No
picture is displayed.)
/1
/2
/
MY
FAVORITE
VOLUME
OFF
(No
sound)
/
LOW
/
HIGH
• Select [2] and press
~
to set a sti!!-gicture
in
the internal memory or card
as
the startup screen.
Select [MY FAVORITE] and press
~
to set a still picture registered
in
"My Favorite" as the startup screen.
(@"
"MY FAVORITE Viewing and registering pictures
in
My Favorite"
(P.
25)
• [VOLUME] cannot
be
set
in
the following cases:
• When [SCREEN)
is
set to [OFF)
• When [SILENT MODE] is set to [ON]
MENU
COLOR
Setting
the
menu
screen
color
and
background
NORMAL
/ COLOR1 /
COLOR2
/
COLOR3
/
MY
FAVORITE
• Select [MY FAVORITE] and press
t>
to set a still picture registered
in
"My Favorite" as the background.
(@"
"MY FAVORITE Viewing and registering pictures
in
My Favorite"
(P.
25)
SOUND SETTINGS
Setting
the
sound
output
from
the
camera
You
can
set the following items with [SOUND SETTINGS):
• Setting the type
of
button operation sounds and volume. (BEEP)
• Selecting the sound of the shutter button. (SHUTTER SOUND)
• Adjusting the volume of the camera warning sound. ( .l») )
• Adjusting the volume during playback. (VOLUME)
1 /2
OFF
(No
sound)
/
LOW
/
HIGH
BEEP
SOUND
TYPE
--------------------------
VOLUME
1 /2 /3
OFF
(No
sound)
/
LOW
/
HIGH
SHUTTER
SOUND SOUND
TYPE
-------------------------
VOLUME
~9J
Adjusting
the
monitor
brightness
• You can set all the sounds muted at once by setting [SILENT MODE).
IrW "SILENT MODE Muting operational sounds"
(P.
24)
Cf)
c
o
.......
co
~
Q.)
Cl.
o
::J
C
Q.)
~
[E)
VOLUME
OFF
(No
sound)
/
LOW
/
HIGH
•
Press
6.
\l
to adjust the volume.
• You can adjust the
volume
to
one
of
five
levels
or
mute
the volume.
BRIGHT/
NORMAL
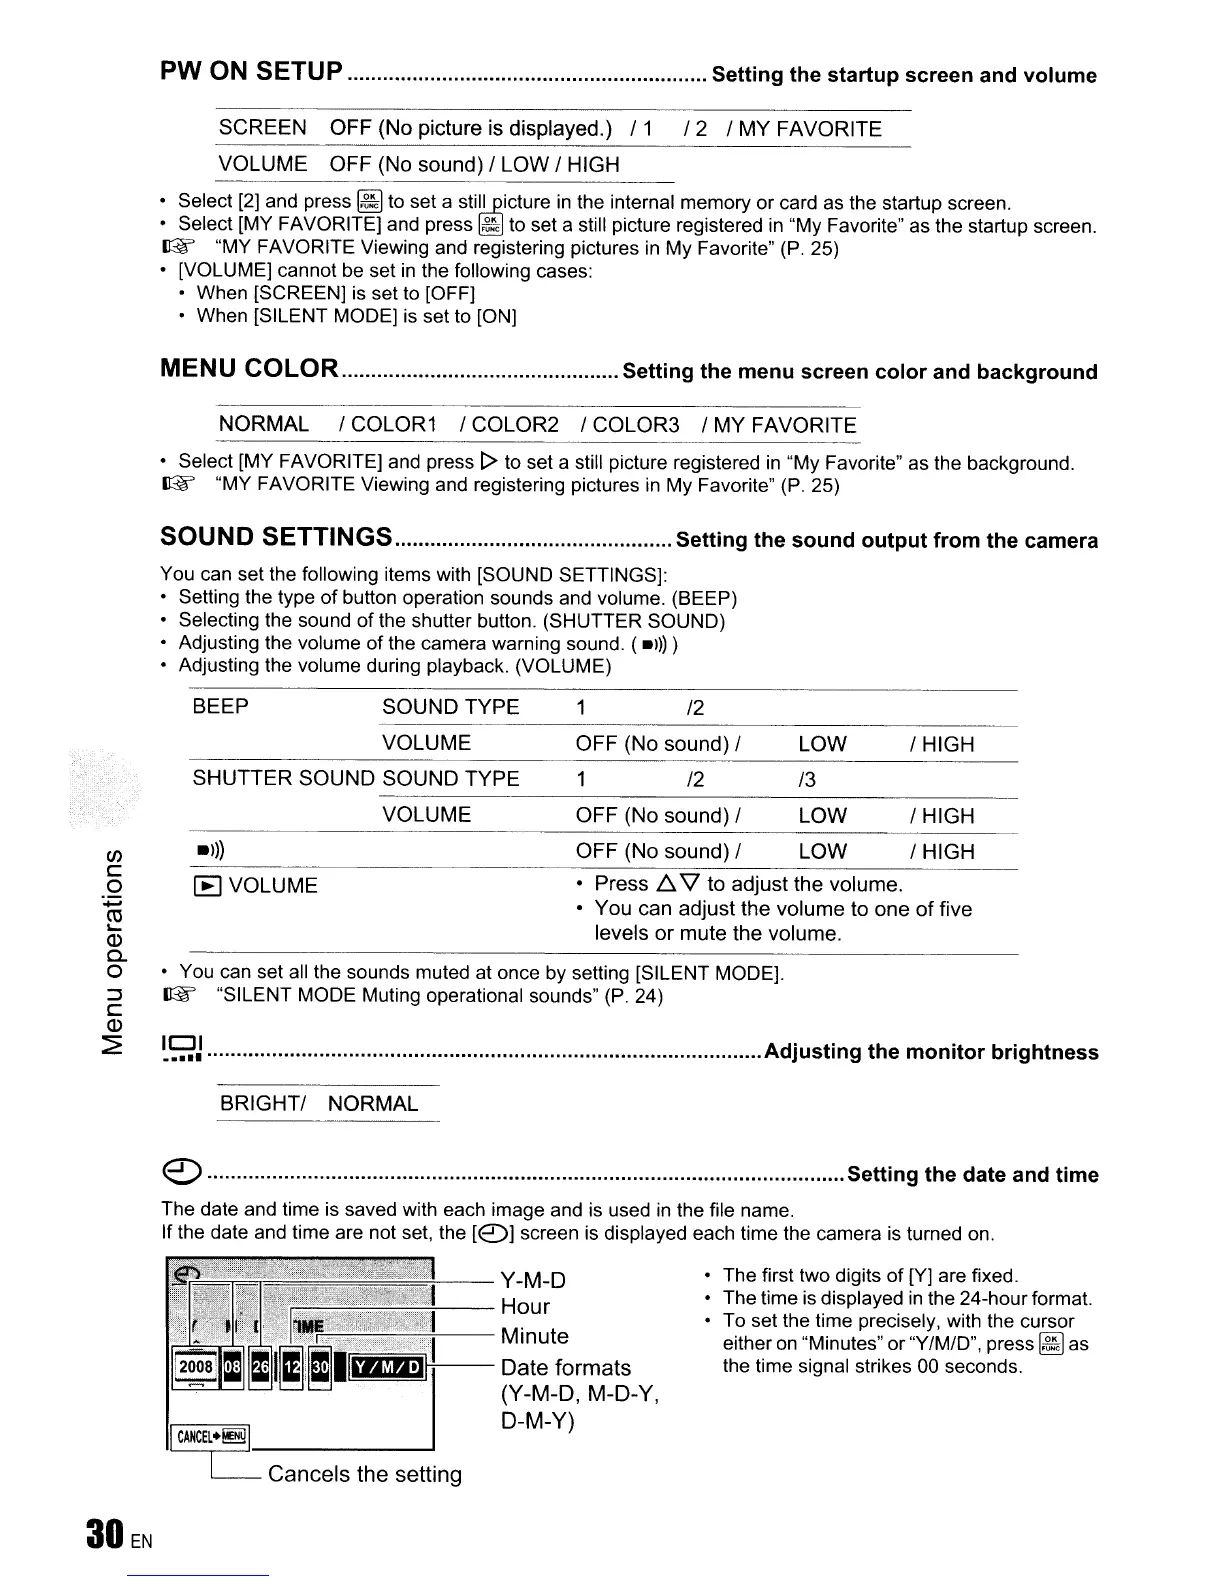
<e::>
Setting
the
date and
time
The date and time
is
saved with each image and is used
in
the file name.
If the date and time are not set, the [<2)] screen is displayed each time the camera
is
turned on.
Y-M-D
'---Hour
~==~==:7---
Minute
~~!!
+---
Date
formats
(Y-M-D,
M-D-Y,
D-M-Y)
• The first two digits of [Y] are fixed.
• The time
is
displayed
in
the 24-hour format.
• To set the time precisely, with the cursor
either
on
"Minutes" or "Y/MID", press
~
as
the time signal strikes 00 seconds.
 Loading...