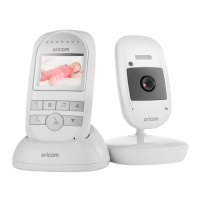
11uSING ThE BABy mONITOr
(3)Itwillonlydisplayregisteredcamerasonly,forexample,
if two camera units are registered to cam 1 and cam 2,
then every short press of the the [ ] key will cycle through
cam 1
→
cam 2
→
scan
→
cam 1 again.
(4) Press <
>buttontoconrmtheselection.
(5) Each camera channel retains its customized settings.
(6) When only one camera is registered, the camera button
will not function.
(b) Scan Mode operation
(1) To activate the scan function you must register the
cameras you would like to add to the scan cycle.
(2)Aregisteredcameraisindicatedwithaticknexttothe
camera number.
(3) Use <
▲
> and <
> to register / de-register.
(4) Once you have registered more than one camera, you
can then access the scan option by pressing the <
>
key repeatedly until you see the scan option < >.
4.14 Video On / Off (Audio only monitor mode)
Youcanturnoffthevideofeedandmonitortheaudioonly.
(1) When the screen is on, press and release <
> key,
display will then switch off whilst you continue to
receive audio from the baby unit (camera) (i.e. Audio
only mode).
(2)Youalsocanturnthevideoonatanytimebypressing
any key.
(3) If in scan mode and the screen has been activated, the
parent unit will scan between registered cameras both
for audio and video.
4.15 Scan Mode
When multiple cameras are registered to the parent unit,
the scan mode will cycle through each camera, displaying
the image for 10 seconds. The audio for the associated
image will be played, i.e. if camera 1 image is displayed,
you will receive the audio for camera 1. The parent unit
will continue to scan through all cameras connected. If
you need to view a camera for more than 10 seconds,
deactivate the scan mode.
NOTE:
When using VOX in scan mode all cameras must have
VOX set to on.
Cleaning
Wipe down the monitor with a clean dry cloth. DO NOT use
any chemical cleaner or solvents on the product.
 Loading...