Elektrical:
The level switch may be installed only by a qualifi ed
electrician in accordance to the respective national
and international regulations.
Protect the level switch from electromagnetic infl uences and
over-voltages.
Optional installation tips which are shown by experience to
reduce the infl uence of interference:
Use shorter cables
Avoid short distances between connection leads and
power consuming devices and interference-generation
elcetrical and electronical equipment.
Use free running diodes
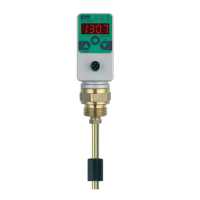
Installation
Mechanical:
Attach the level switch to the appropriate process con-
nection. Installation should be undertaken only across fl ats
spaner.
By using the rotational housing adjustment can be ensured
that the digital display is placed in the best viewing position.
*) Enter
Parameters shown in digital display
Settings of switch outputs in menu
S1 (S1 = output 1) or S2 (S2 = output 2)
PAS
This is dedicated to a password. Entry into the programming mode
can be secured only when the correct fi gures have been entered
S1
S2
Menu for programming the switch outputs: (see point 3)
S1 = Switch output 1
S2 = Switch output 2
(Menu is not active if S2 is being used as an error output)
SP1
SP2
Switching point (SP): upper limiting value/ level,
at which the switch output changes its status (see point 3)
SP1 = Switch output 1;
input as level value (e.g. 90 % or 100 mm)
SP2 = Switch output 2;
input as level value (e.g. 10 % or 80 mm)
rSP1
rSP2
Reverse switching point (rSP): lower limiting value/ level
at which switch output changes its status (see point 3)
rSP1 = Reverse switching point (rSP1) of switch output 1;
input as level value (e.g. 80 % or 90 mm)
rSP2 = Reverse switching point (rSP2) of switch output 2;
input as level value (e.g. ± 75 % or 75 mm)
If the switch point is set lower than the reverse switch point,
the reverse switch point will be adjusted automatically 5 mm lower
than the switch point.
The warning sign Att (attention) will appear,
which can be cleared with Enter *).
cont
Switch output as
noPn = closer
nCLS = opener
Func
Selection of switching functions: (see point 3)
HYSt = Hysteresisfunction
FEn = Window function
Error display and precautionary hints
Att I
The set value is lower than the other respective parameters.
When Enter is activated,
the smaller value is matched up
(see menu points SP and rSP)
Err I
Instrument electronics defective… Please send for repair.
Err 3
Device error, please send for repaire.
Settings for options programme oP
oP
Options programme
PAS
Password input
0000 = no password
Example password 1234 = 1234
uni
Setting of units:
mm/ inch = measurement of level in mm or inch from the lower edge of
the sensor (oFFS = 0) or the bottom of the container.
% = indication of level in percent
The level is displayed independently to the size of the tank.
The percentage indicating range is determined by Set0 and Set1
(please have a look at point Set0 and Set1)
dis
Display:
Value which will be shown on the digital display in run mode.
Act = Actual level
SP1 = Switch point 1
SP2 = Switch point 2
OFF = off indication
MIN = Minimum level
MA = Maximum level
oFFS
The offset value indicates the range between the bottom of the
container and the lower edge of the sensor. Therefore the indication
and the switch point refer to the real level of fi lling.
Not activated if unit = %
Reset if unit = %
Set0
This value indicates the position for „0 %“.
The point „0 %“ is always adjusted in mm
from the upper edge of the container.
Only activ if unit = %
Reset if unit = mm/ inch
Set1
This value indicates the position for „100 %“.
The point „100 %“ is always adjusted
from the upper edge of the container.
Only activ if unit = %
Reset if unit = mm/ inch
AnA
Setting of analogue output (see point 4)
0-20 = 0-20 mA 4-20 = 4-20 mA
rES
Clearing the minimum and maximum value memory
YES = yes, clear memory now
no = no, do not clear memory
Err
Programming switch output 2 as an error output (see point 3)
YES = yes
no = no
Sun
Indication of software version
tYPE
Choice of the sensor length
This menue point is only activ if the display unit is connected to the
sensor with a cable.
FILT
Indicates the waves which shall be fi ltered out in sec.
End
End of programming mode
 Loading...