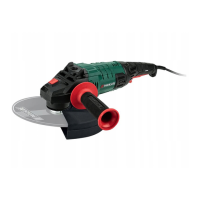
PWS 230 D4
GB
│
IE
│
11 ■
With thin grinding discs (see fig. 1)
♦ The collar of the clamping nut
faces upwards
so that a thin grinding disc can be fitted safely.
≤ 3,2 mm
Fig. 1
♦ Press the spindle locking button
to lock the
spindle.
♦ Tighten the clamping nut
using the two-hole
mounting spanner .
With thick grinding discs (see fig. 2)
> 3,2 mm
Fig. 2
The collar of the clamping nut
faces downwards
so that a thick grinding disk can be fitted securely
onto the mounting spindle .
♦ Lock the mounting spindle
.
♦ Tighten the clamping nut
in a clockwise
direction using the two-hole mounting
spanner .
NOTE
► If the disc does not turn smoothly or vibrates
after the change, the disc must be replaced
immediately.
♦ For safety's sake run the appliance at maximum
speed for 60 seconds after every disc change.
Be aware of unusual noises and sparks.
♦ Check whether all the fastening elements are
correctly fitted.
♦ Make sure that the arrow showing the direction
of rotation (if any) on the cutting or rough
grinding discs (including diamond cutting discs)
and the direction of rotation of the appliance
(arrow showing the direction of rotation on the
head) match.
Switching on and off
Check the inserted tool before use. It must be
properly installed, may not be damaged or damp,
should have no cracks and turn freely. Carry out
a 60 second test run. Do not use non-circular or
vibrating tools. Be aware of unusual noises and
sparks. Check whether all the fastening elements
are correctly installed.
NOTE
► Always switch on the angle grinder before
making contact with the material, then apply
it to the workpiece.
Switching on
♦ Press the safety lock-out
(see fig. E).
♦ Then press the ON/OFF switch
.
Switching off
♦ Let go of the ON/OFF switch
.
Turning the appliance handle
■ The handle can be turned by 90° to the
right or left (see fig. A).
■ This allows the ON/OFF switch to be moved
to the most suitable position depending on the
working conditions.
♦ Press the release button and turn the appli-
ance handle to the right or left.
♦ Allow the appliance handle
to click into
place.

 Loading...