Using the Spectrometer . 59
4. From the UV WinLab Explorer window, select the instrument you are using and select
Manual Control from the Tools menu.
5. From the Manual Control window, select Data Collection from the Folder List and then
select the Alignment Mode check box.
6. Block the sample and reference beam windows on the right side of the sample
compartment with a card to prevent white light from saturating the detector.
7. By holding a piece of matt white paper behind each cell holder, visually examine the
light spot to see whether the radiation beam is passing through the cell sample area.
Diffraction patterns become apparent if the radiation beam impinges on the cell wall.
8. If the radiation beam is not centered exactly, loosen the two locking screws and the two
milled posts on the relevant cell holder, and shift the cell-holder plate to center the
radiation beam.
Then retighten the two milled posts and the two locking screws.
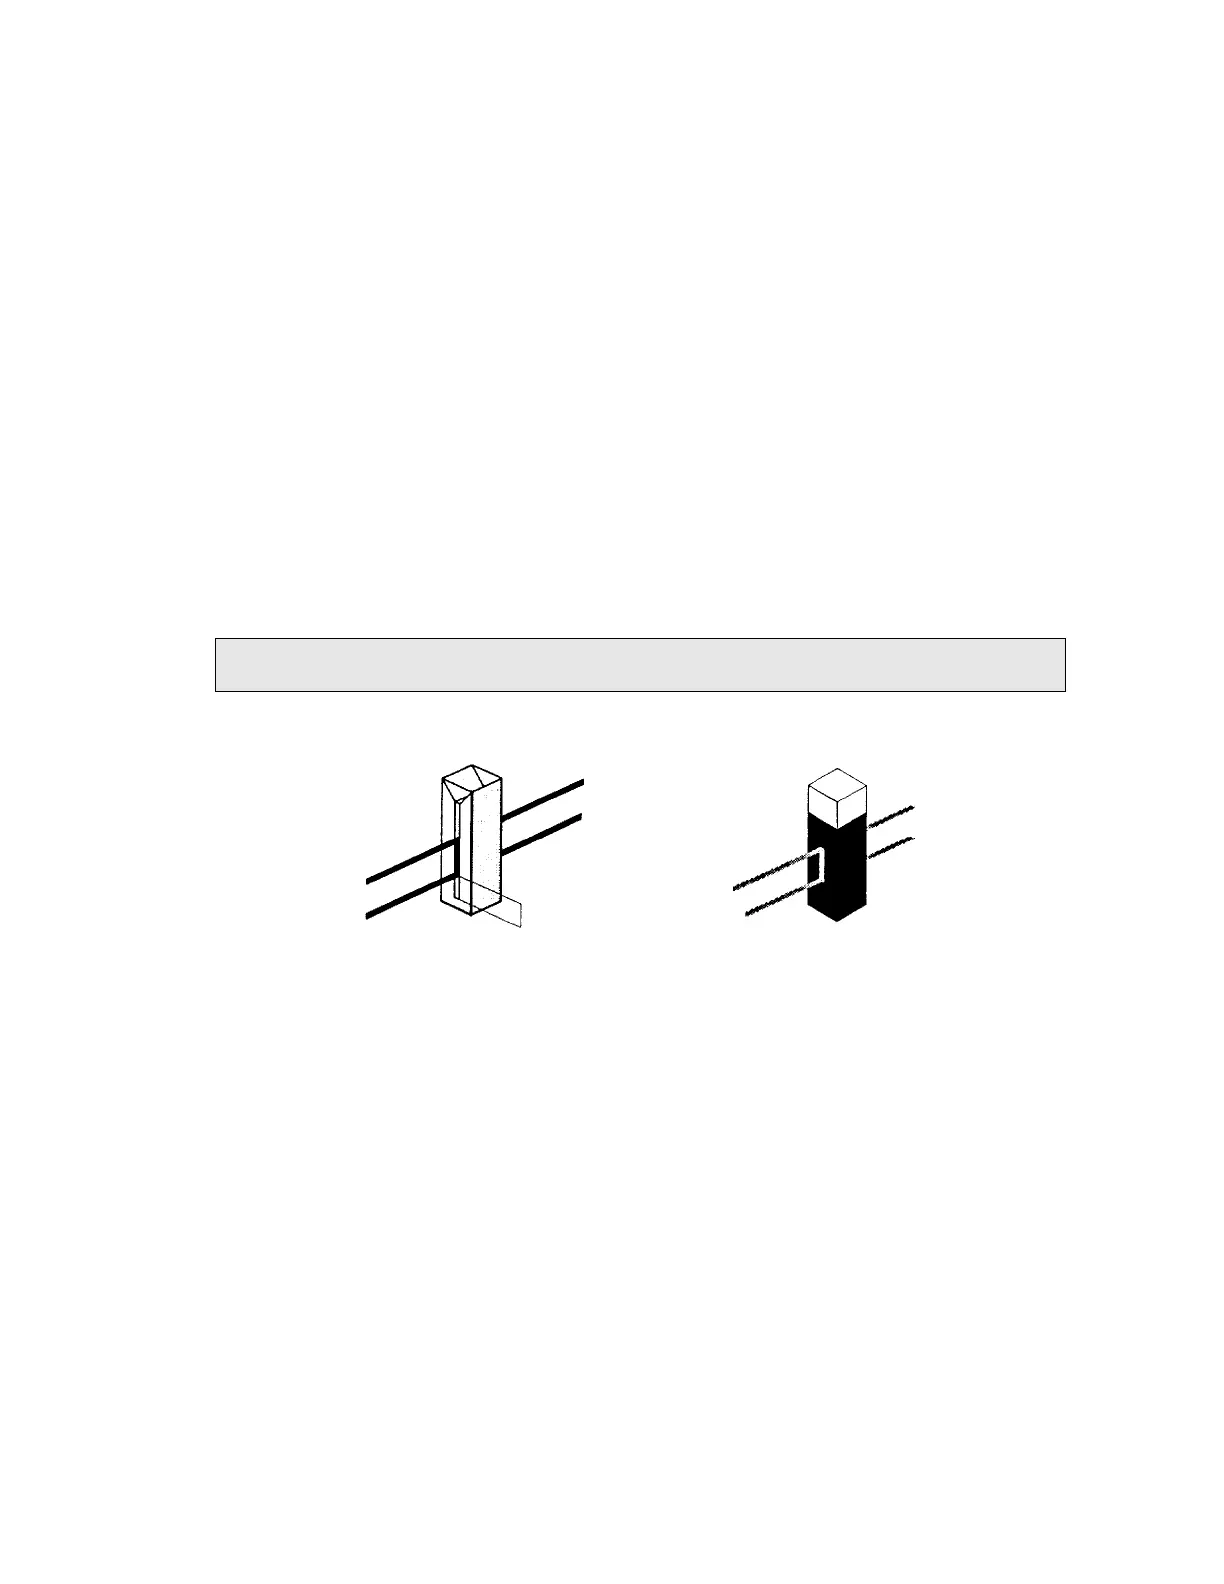
9. Visually check the vertical alignment of the radiation beam in the cell sample area.
Alignment is correct when the radiation beam is just above the floor of the cell sample
area (minimum 2 mm) or covers the cell window, as shown in Figure 28.
NOTE: The center of the window for micro flow cells should be ideally approximately 15 mm
above the base of the cell.
Figure 28 Correct alignment of the radiation beam in the cell sample area
10. If alignment is required, turn the vertical adjustment screw on the lifter either clockwise
to raise the cell, or counterclockwise to lower the cell.
11. Recheck the horizontal alignment of the radiation beam through the cell and correct if
necessary.
12. Slew the monochromator to any value above 200 nm.
13. Remove the card blocking the sample beam window and close the sample compartment
cover.
This completes the coarse alignment of the cell holders. If necessary, proceed with the
fine alignment as described below.
 Loading...