37
D
C
G
F
E
A
B
1540
1530
1520
Utility stitches and practical sewing
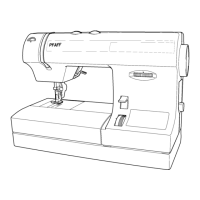
Darning with the straight stitch
Insert the darning foot:
Loosen screw D. Set the needle at its highest
point and push the pin of the darning foot fully
into the hole C of the sewing foot holder. When
doing this, the guide fork G should position
itself around the presser bar. The lever E must
be behind the fi xing screw F. Now tighten
screw D.
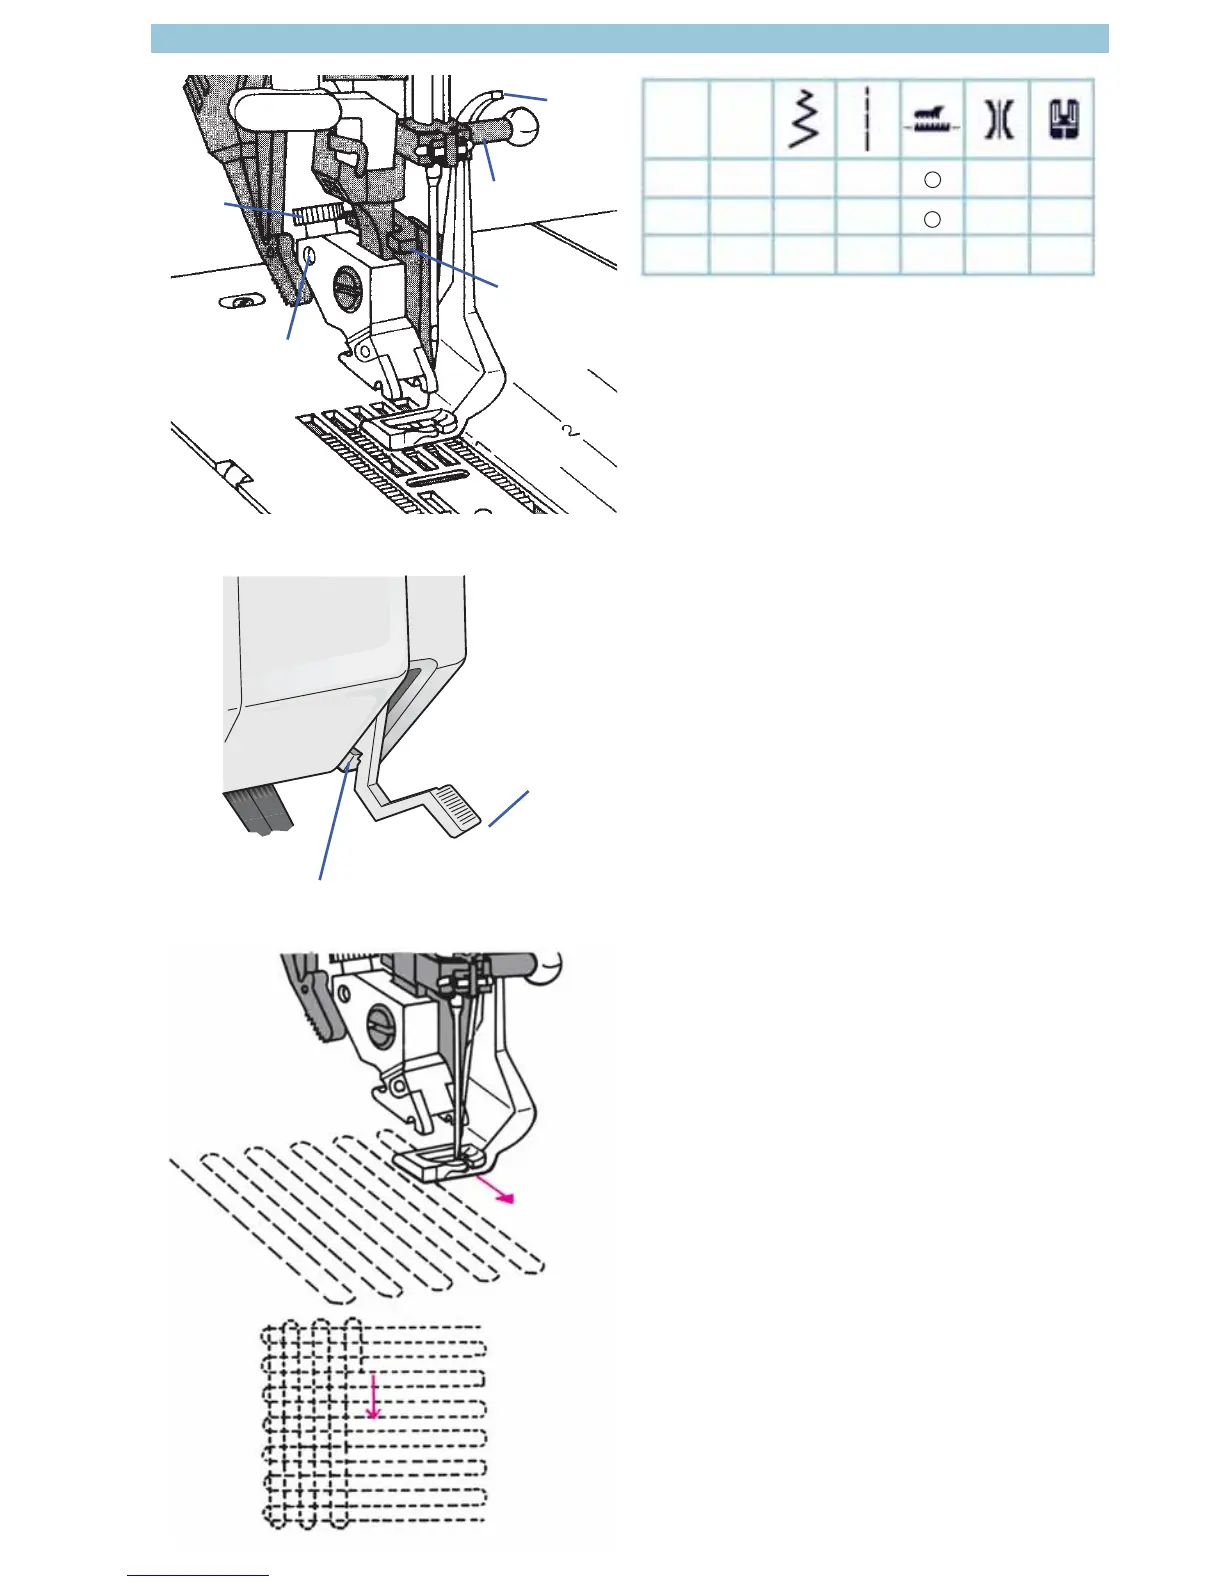
Darning position:
Lower the presser-foot lifter (A) while pushing
it lightly to the rear. This snaps the presser foot
lifter into a notch (B) on the back side of the
sewing machine into the darning position.
• Place the darning work in the darning hoop.
• Drop the feed dog.
• Pull up the bobbin thread and hold the
threads when you start sewing.
• Darn the damaged area by guiding
the fabric back and forth evenly in the
prescribed direction while ensuring that
each line ends with a small curve. This
helps to avoid the fabric ripping again.
• When you have fi nished sewing the
damaged area, rotate the fabric again.
You determine the stitch length yourself by
moving the fabric back and forth.
Tip: If you move the fabric too slowly, small
knots will appear on the reverse side of the
fabric.
stitch
G
E
E
0
0
0
–
–
–
2-3
2-3
2-3
6
Optional
Optional
 Loading...