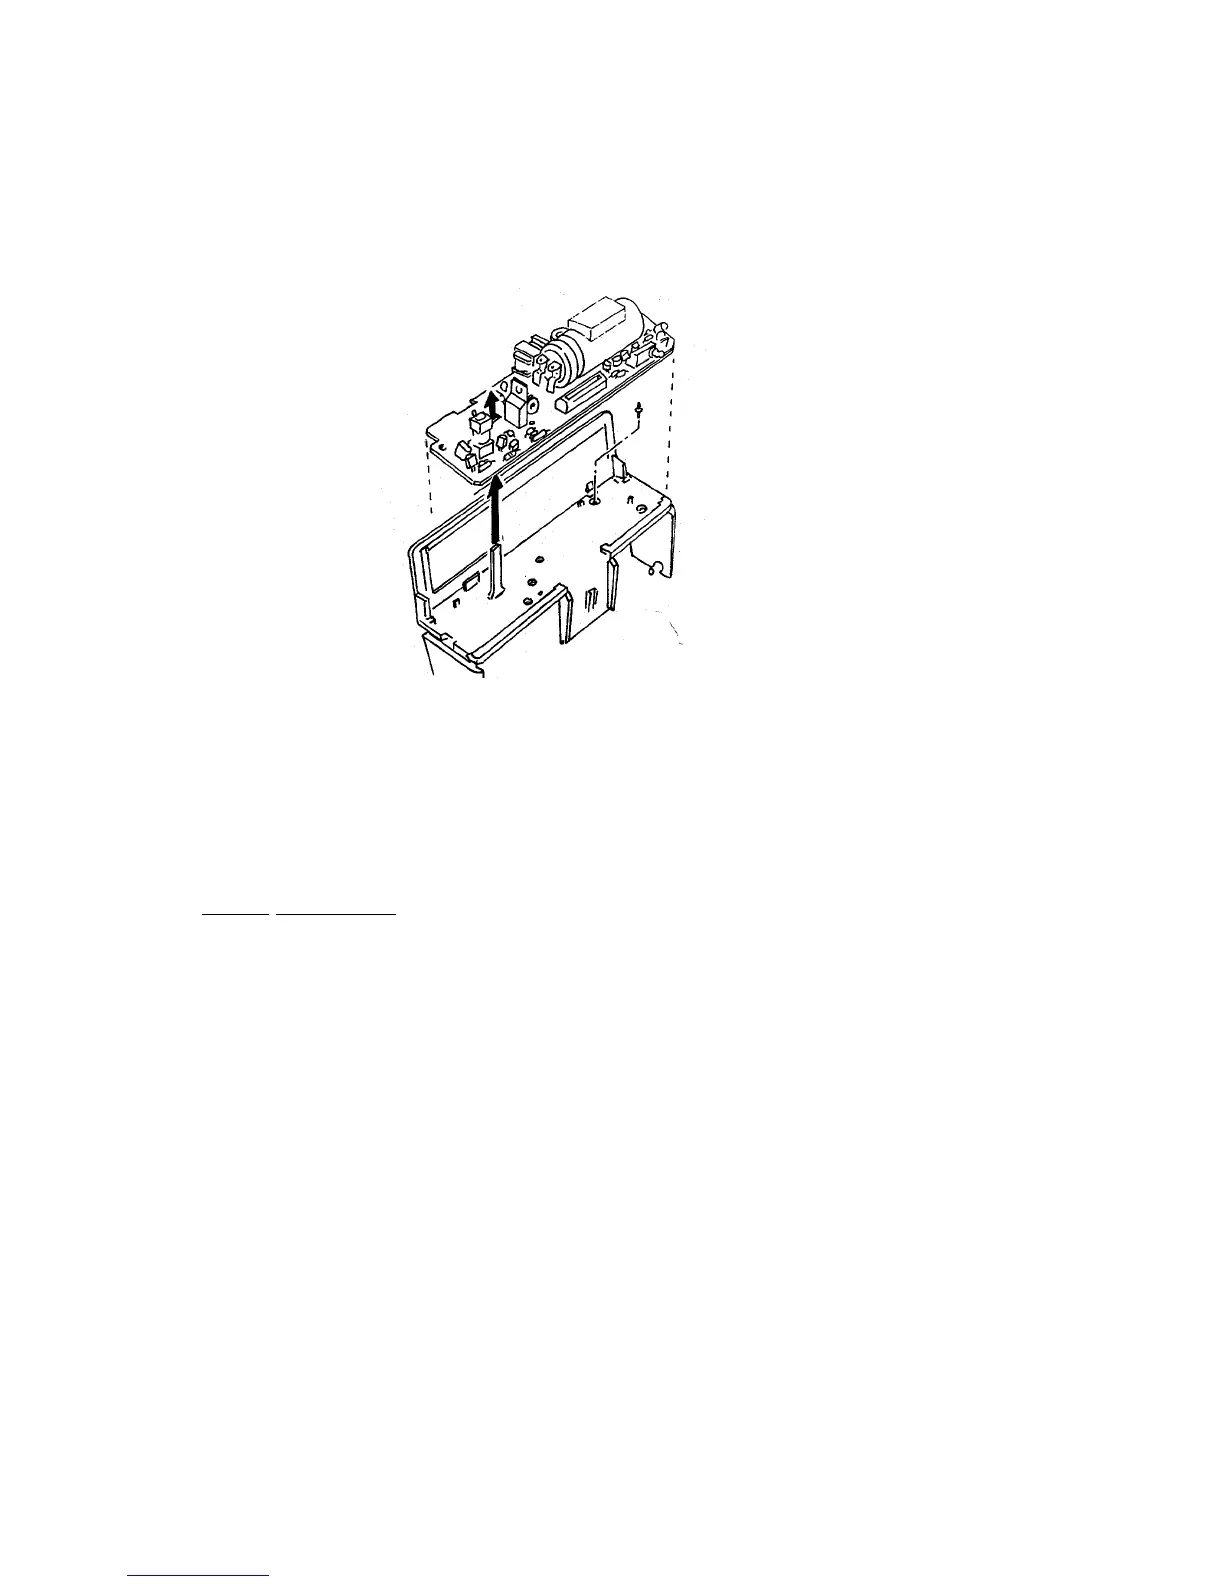
7. Remove the PC Board by lifting it straight up off the molded post on the Lower
Housing (Fig. 7), being careful not to lose the small S10 Plunger from the base of
the Lower Housing. Set Plunger aside.
Fig. 7 Removing PC Board & Flashtube Assembly & Plunger
Strobe Reassembly
Replace the parts removed in the preceding Steps 1 - 7, in this order:
Flash Shield
Plunger in hole in Lower Housing
PC Board onto two posts in Lower Housing
Insulator
Flashtube Assembly into Lower Housing
Insert the Lower Housing pivots into the openings in the Apron.
Reconnect the Flex to the PC Board.
Replace the Cover by inserting the tab and snapping the Cover into place on the Lower
Housing.
41

 Loading...