Do not leave a battery unattended while charging.
Never use a modified or damaged charger.
Charge the Battery Pack at a temperature ranging from 0 °C to
+45 °C.
Otherwise batter's life will decrease significantly.
Do not leave the Battery Pack with a charger connected to the mains
longer than 24 hours after full charge.
Do not expose the battery pack to high temperature or to a naked
flame.
Do not submerge the battery in water.
Do not connect external device with a current consumption that
exceeds permitted levels.
The Battery Pack is short circuit protected. However, any situation
that may cause short-circuiting should be avoided.
Do not dismantle or deform the Battery Pack.
Do not drop or hit the battery.
When using the battery at negative temperatures, battery's capacity
decreases, this is normal and is not a defect.
Do not use the battery at the temperatures above those shown in the
table – this may decrease battery's life.
Keep the battery out of the reach of children.
8
7
10
Choose an adapter with an insert of the required diameter depending
on the outer diameter of the bell of the daylight device.
The figures 42 mm, 50 mm, 56 mm in adapter's model name
correspond to the optical diameter of the device's bell.
Measure the outer diameter of the housing of your device's bell and
select an insert in accordance with reference data in the tables below.
Mounting the attachment on daylight device
Example. If the lens diameter of your day device is 42 mm, and the
measured outer diameter of the housing of the device’s bell is 47.2 mm,
you need to use an insert with marking "Ø 47". Compatibility chart of
inserts for the day devices.
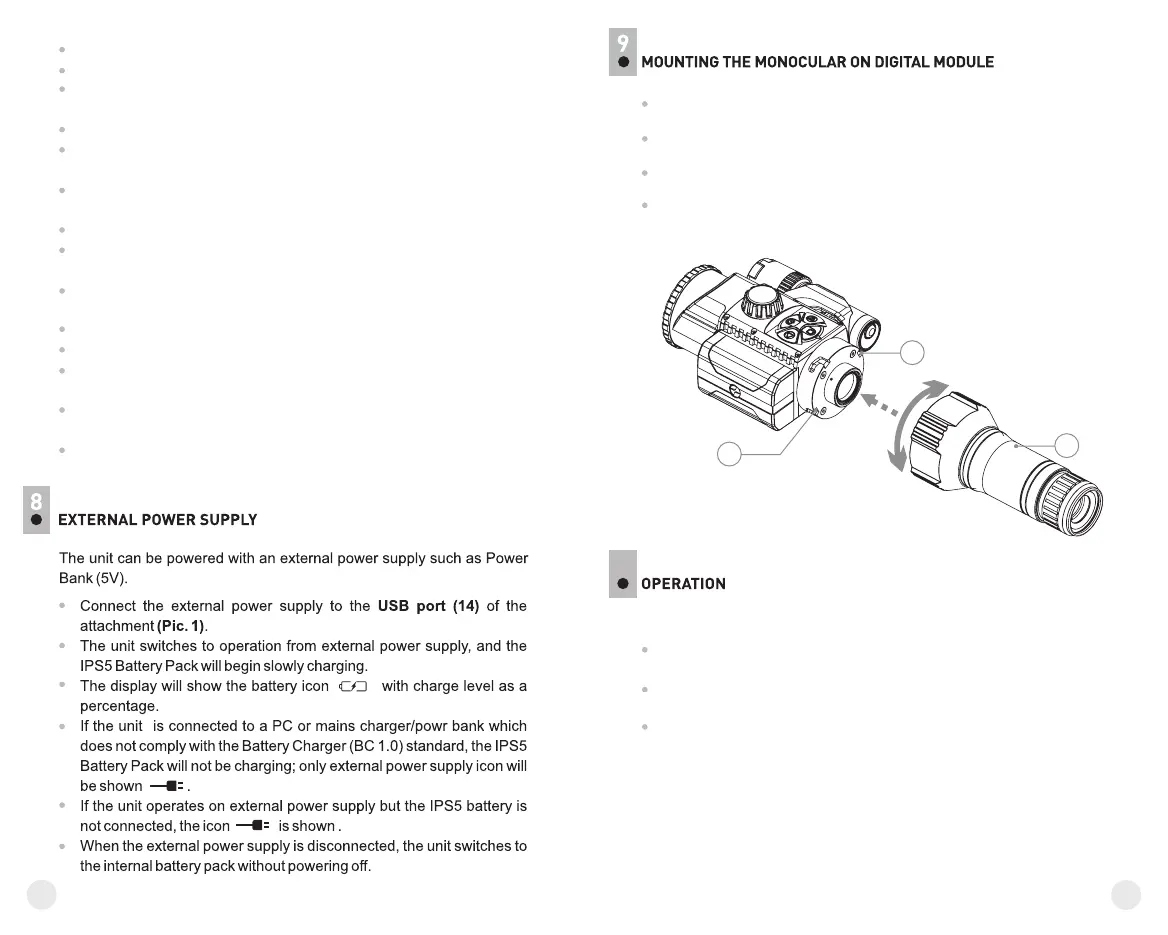
The monocular Pulsar 5x30 (C) (included) converts the digital
module into a 5x digital night vision device.
Insert the monocular firmly so that the pins in the monocular’s body
enter the notches (D) of the digital module.
Turn the monocular fully counterclockwise to fix it on the digital
module.
In order to remove the monocular, turn the monocular clockwise and
pull carefully.
mount
detach
D
D
C
 Loading...