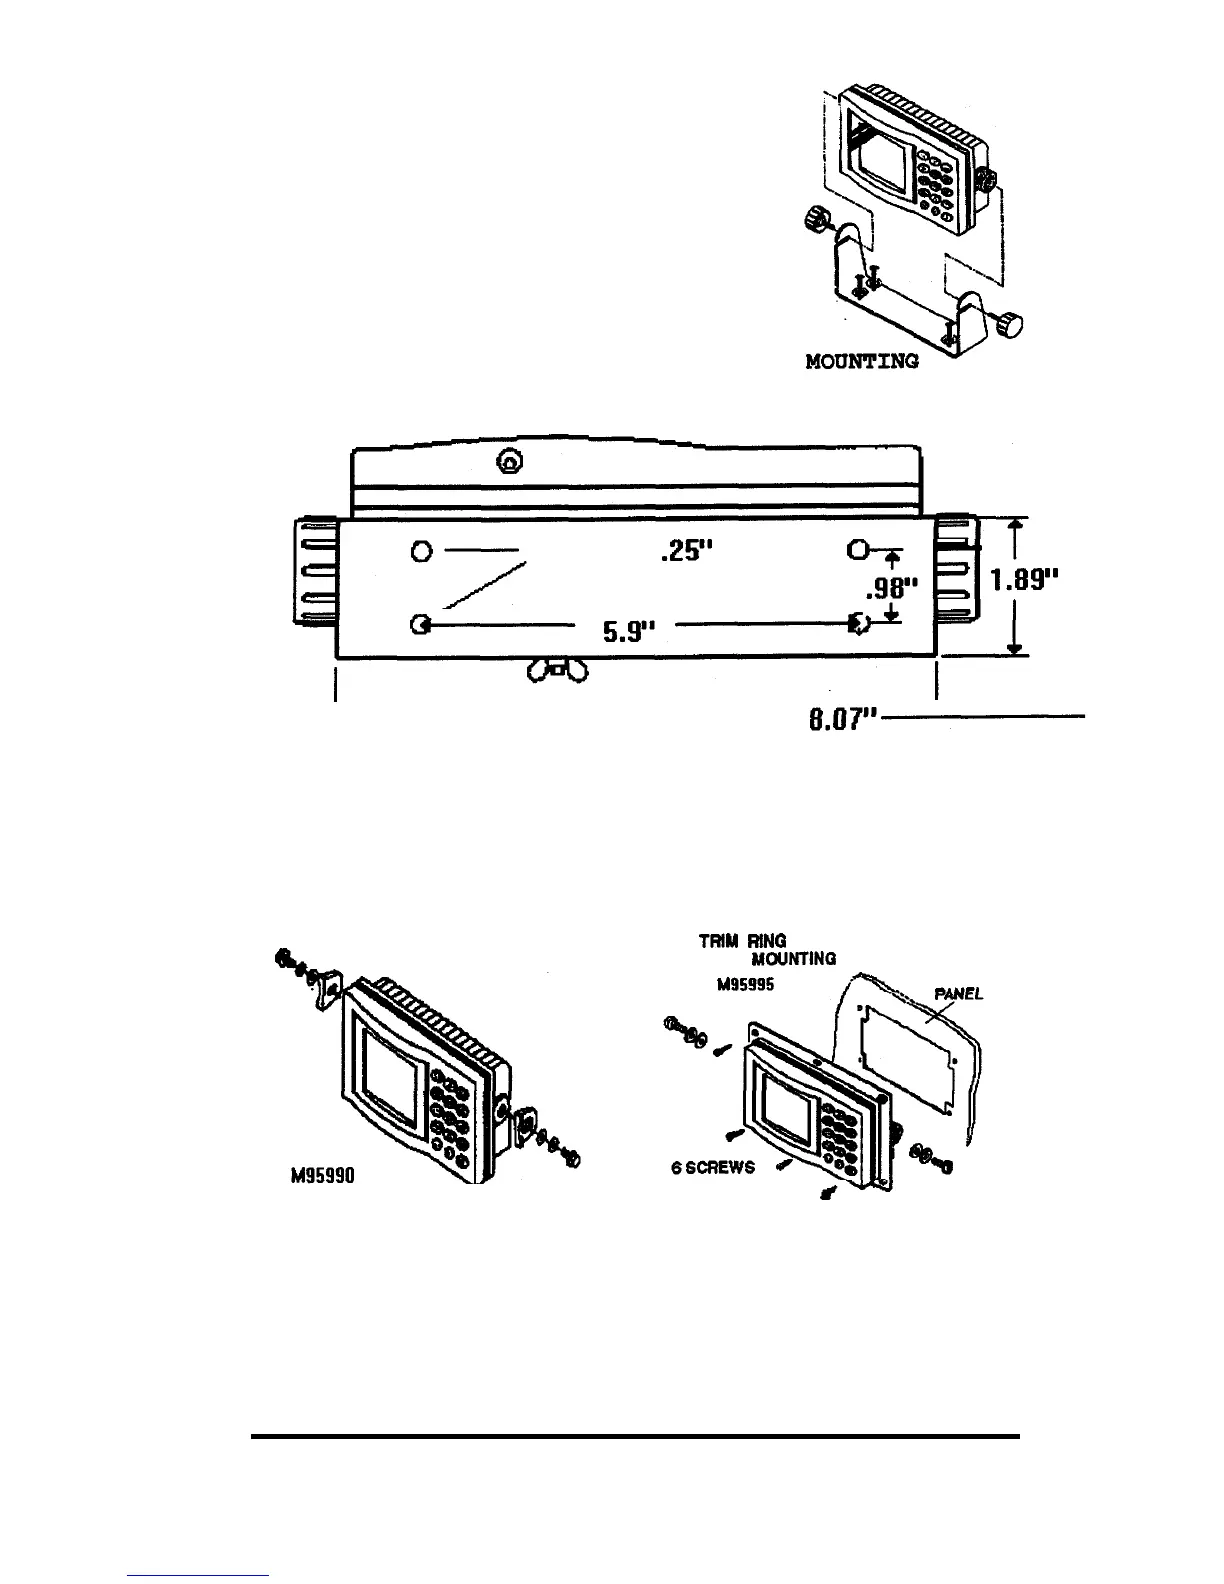
2.2.2 Mounting the NAV Unit
Use the following steps for yoke mounting of the
NAV
Unit:
1.
Loosen the yoke knobs on each side of the
unit. and remove the mounting yoke bracket.
2. Position the bracket to the mounting surface
and mark the holes for the mounting screws.
3. Mount the bracket with the screws supplied.
4. Slide the unit back into the yoke and secure
in the desired viewing position by
tightening the yoke knobs. IN THE YOKE BRACKET
4 HOLES .25”
I,
2.2.3 Flush Mounting
The display can also be flush mounted in a console using the Optional Flush
Mount Kit (M95990) or the Trim Ring Kit (M95995) to give a more finished
look to your installation.
TRIM
RING
&
CONSOLE
MOUNTINQ
M95995
,+=+A -__.-.
d-
FLUSH MOUNT KIT
1. Select the desired flush mounting location. A clear, flat area of at least
9” wide by 5” high having at least 5” of clear depth behind the panel is
INSTALLATION 23
 Loading...