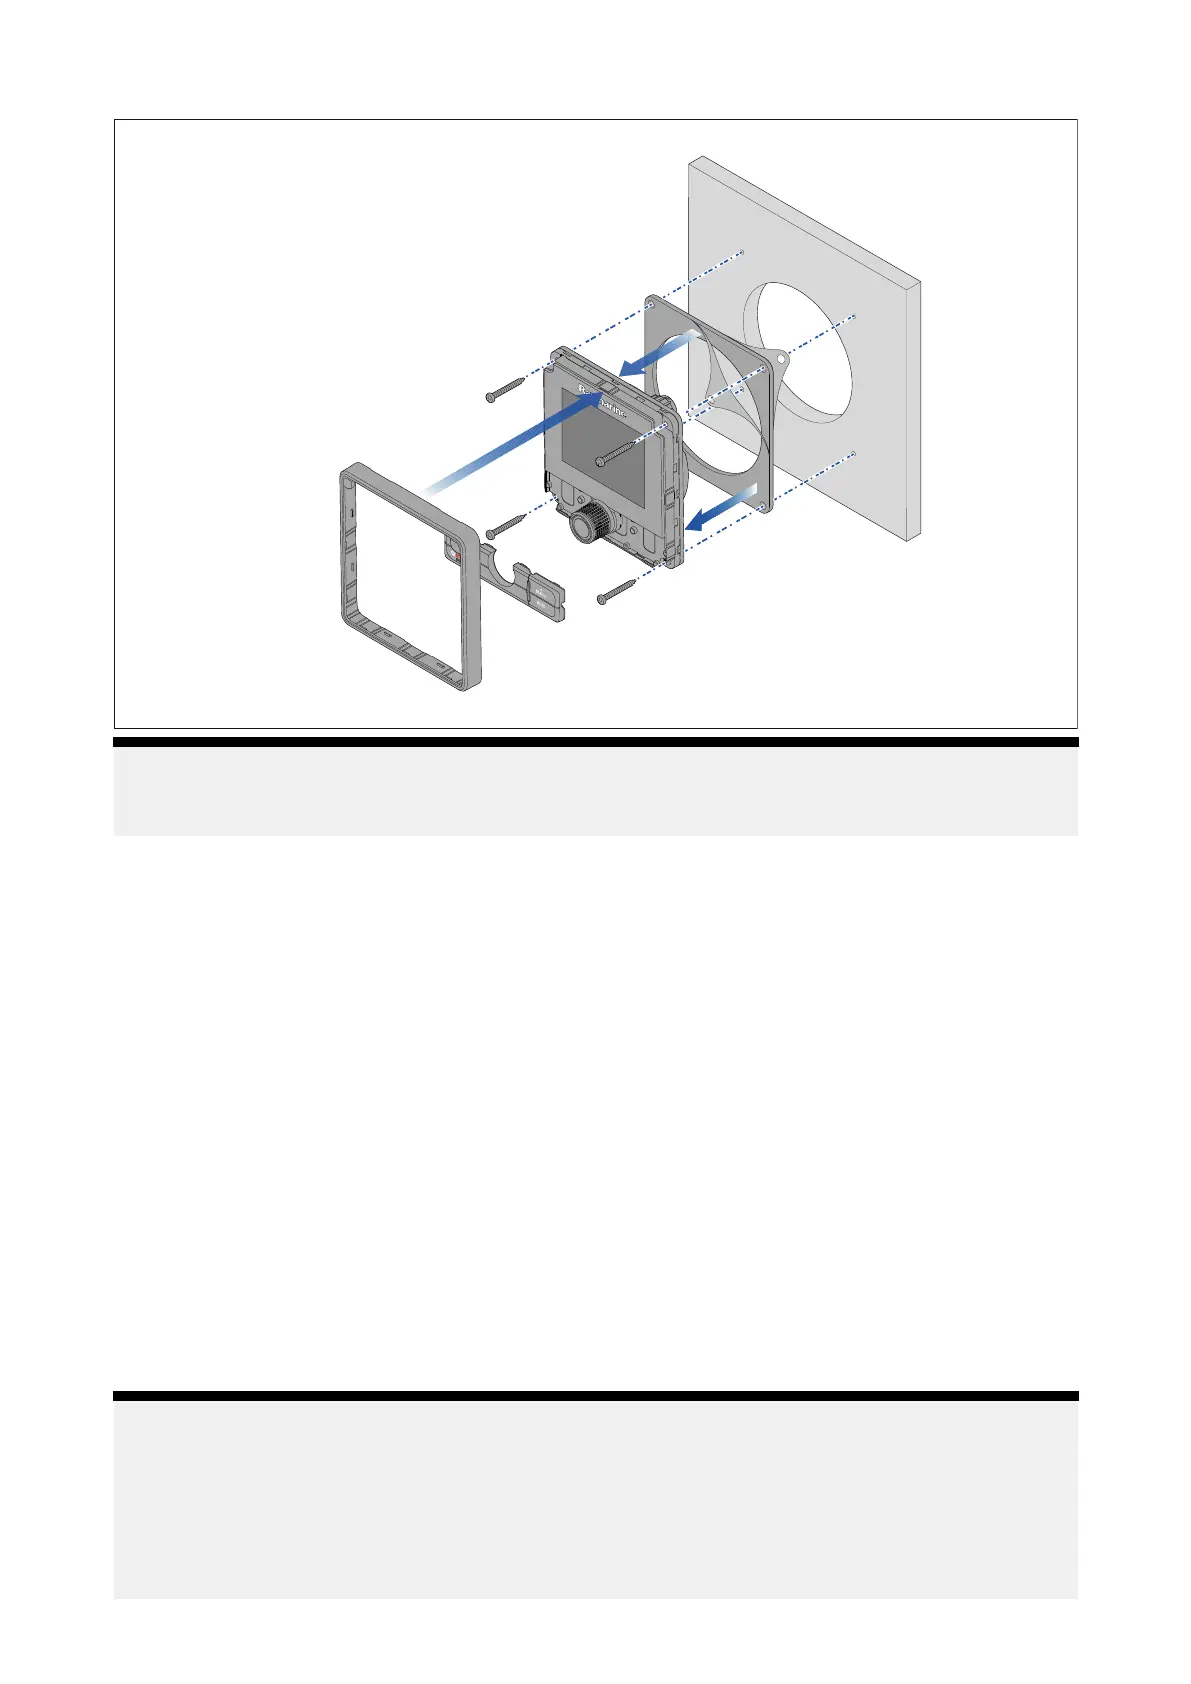
Mountingdiagram
Note:
Theillustrationabovedepictsmountingofap70R s.Themountingprocedureforthep70sand
p70Rsarethesame.
Mountinginstructions
1.Ensuretheselectedlocationmeetsthelocationrequirementsfoundhere:
p .18—Generallocationrequirements
2.Checktheselectedlocationforthedisplay,aclear,flatareawithsuitableclearancebehind
thepanelisrequired.
3.Removethebezelandbuttonpadfromthedisplay.
4.Fixthesuppliedmountingtemplatetotheselectedlocation,usingselfadhesivetape.
5.Drillthecutoutholeusinga92mm(35/8”)holecutter.
Alternatively,usesmalldrillbittomakepilotholesineachcornerofthecutoutareaandthen
useajigsawtocutalongtheinsideedgeofthecutoutline.
6.Ensurethatthedisplayfitsintotheremovedarea.
7.Filearoundanyroughedges.
8.Drillthefixingholesasindicatedonthemountingtemplate.
9.Peelthebackingoffofthepanelmountinggasketandplacetheadhesivesideofthegasketonto
thebackofthedisplayandpressfirmlyontotheflange.
10.ConnecttheSea Talkng®cable.
11.Positionthedisplayinplaceandsecureusingthefixingsprovided.
12.Refitbuttonpadandbezel.
Note:
•Drillbit,tapsizeandtighteningtorquesaredependantuponthematerialtypeandthicknessof
themountingsurface .
•Thesuppliedgasketprovidesasealbetweentheunitandasuitablyflatandstiffmounting
surfaceorbinnacle.Thegasketshouldbeusedinallinstallations.Ifthemountingsurfaceor
binnacleisnotentirelyflatandstifforhasaroughsurfacefinish,itmayalsobenecessaryto
useamarine-gradesealant.
Installation23
 Loading...