EasyManuals Logo
Home>Raynor>Garage Door Opener>ControlHoist ATS2113X-CX

Raynor ControlHoist ATS2113X-CX User Manual

Raynor ControlHoist ATS2113X-CX
32 pages
To Next Page IconTo Next Page
To Previous Page IconTo Previous Page
Page #10 background imageLoading...
Page #10 background image
10
Clevis Pin
5/16"x2-3/4"
Ring Fastener
Header
Bracket
Chain
Pulley
Bracket
Temporary
Support
Header Wall
Garage
Door
Rail
Clevis Pin
5/16"x2-3/4"
Ring Fastener
Header Bracket
Chain
Pulley
Bracket
Rail
HARDWARE SHOWN ACTUAL SIZE
INSTALLATION STEP 3
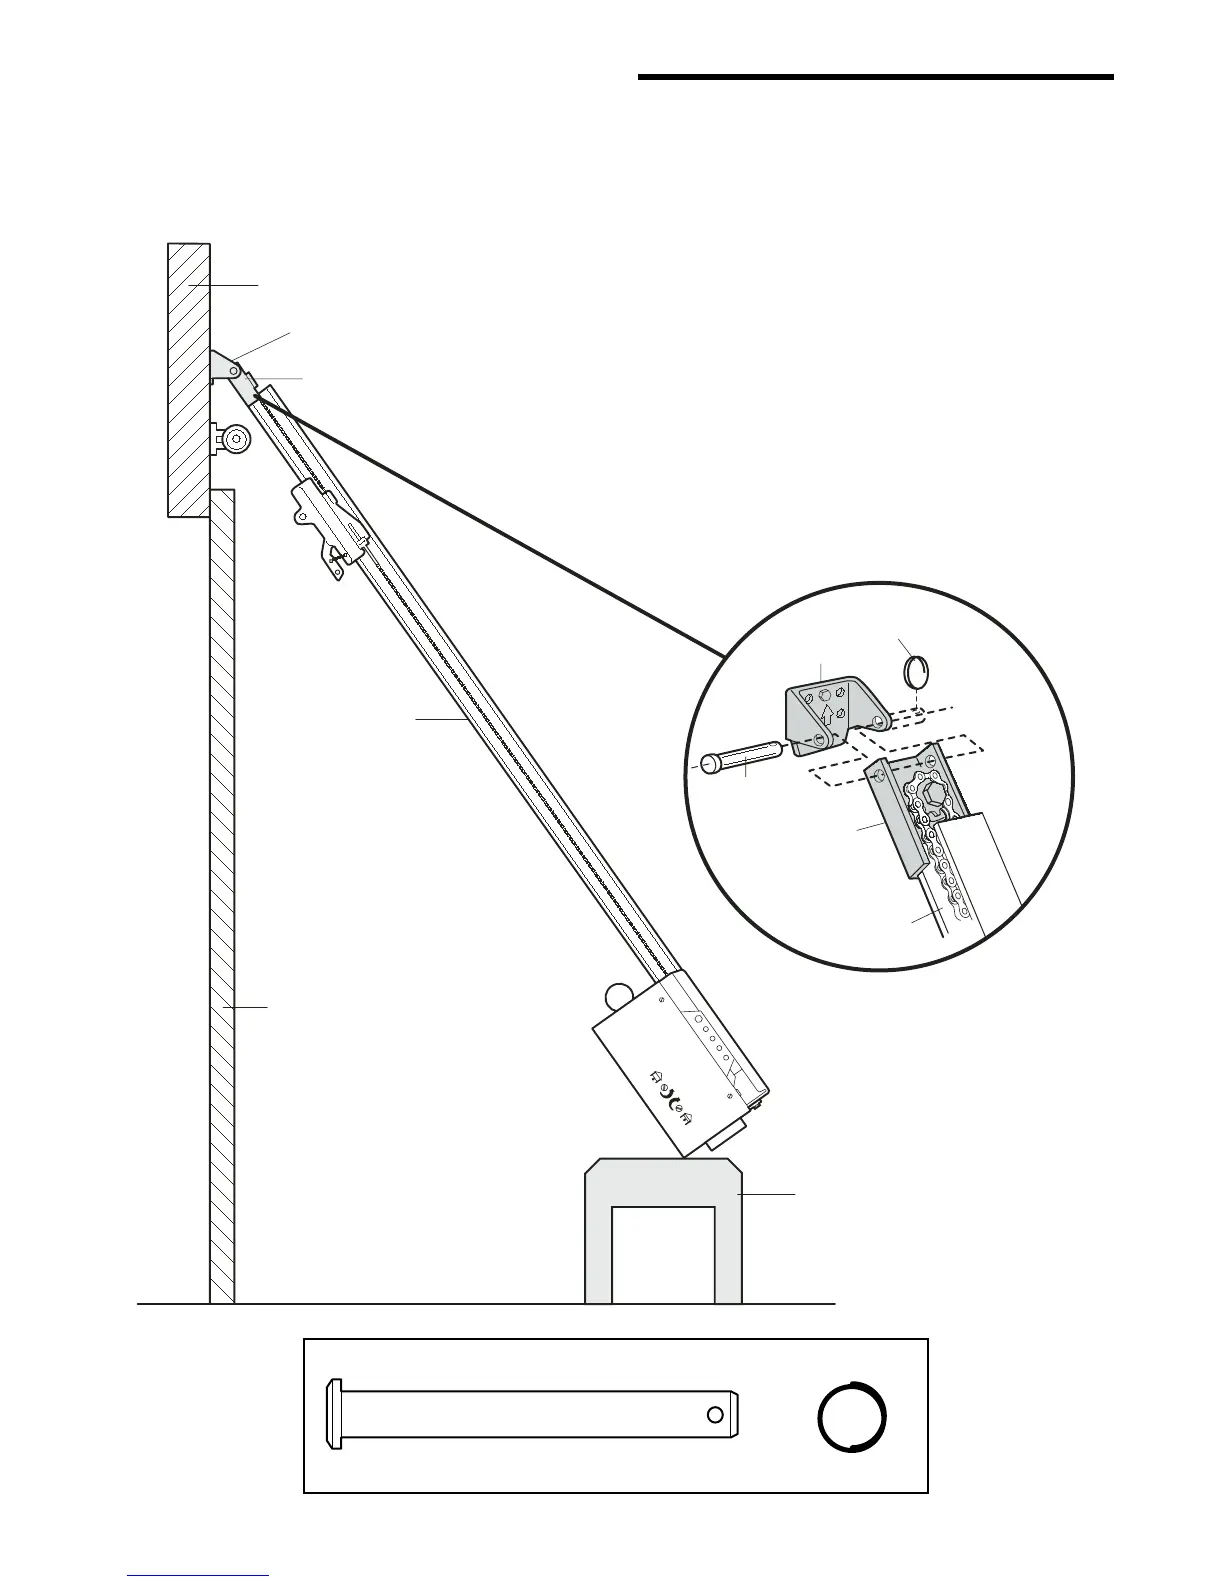
Attach the Rail to the Header
Bracket
Position the opener on the garage floor below the
header bracket. Use packing material as a
protective base. NOTE: If the door spring is in the
way you’ll need help. Have someone hold the
opener securely on a temporary support to allow
the rail to clear the spring.
Position the chain pulley bracket against the
header bracket.
Align the bracket holes and join with a clevis pin
as shown.
Insert a ring fastener to secure.

Questions and Answers:

Question and Answer IconNeed help?

Do you have a question about the Raynor ControlHoist ATS2113X-CX and is the answer not in the manual?

Raynor ControlHoist ATS2113X-CX Specifications

General IconGeneral
BrandRaynor
ModelControlHoist ATS2113X-CX
CategoryGarage Door Opener
LanguageEnglish

Related product manuals