Need Help? Visit our website for replacement parts, product support, a list of authorized service centers in the US and customer service contact information
at www.razor.com. Please have the product I.D. code (located on the white label of your product) available for better assistance. Additional Customer
Service contact information is listed at the back of this manual.
6
USAGE
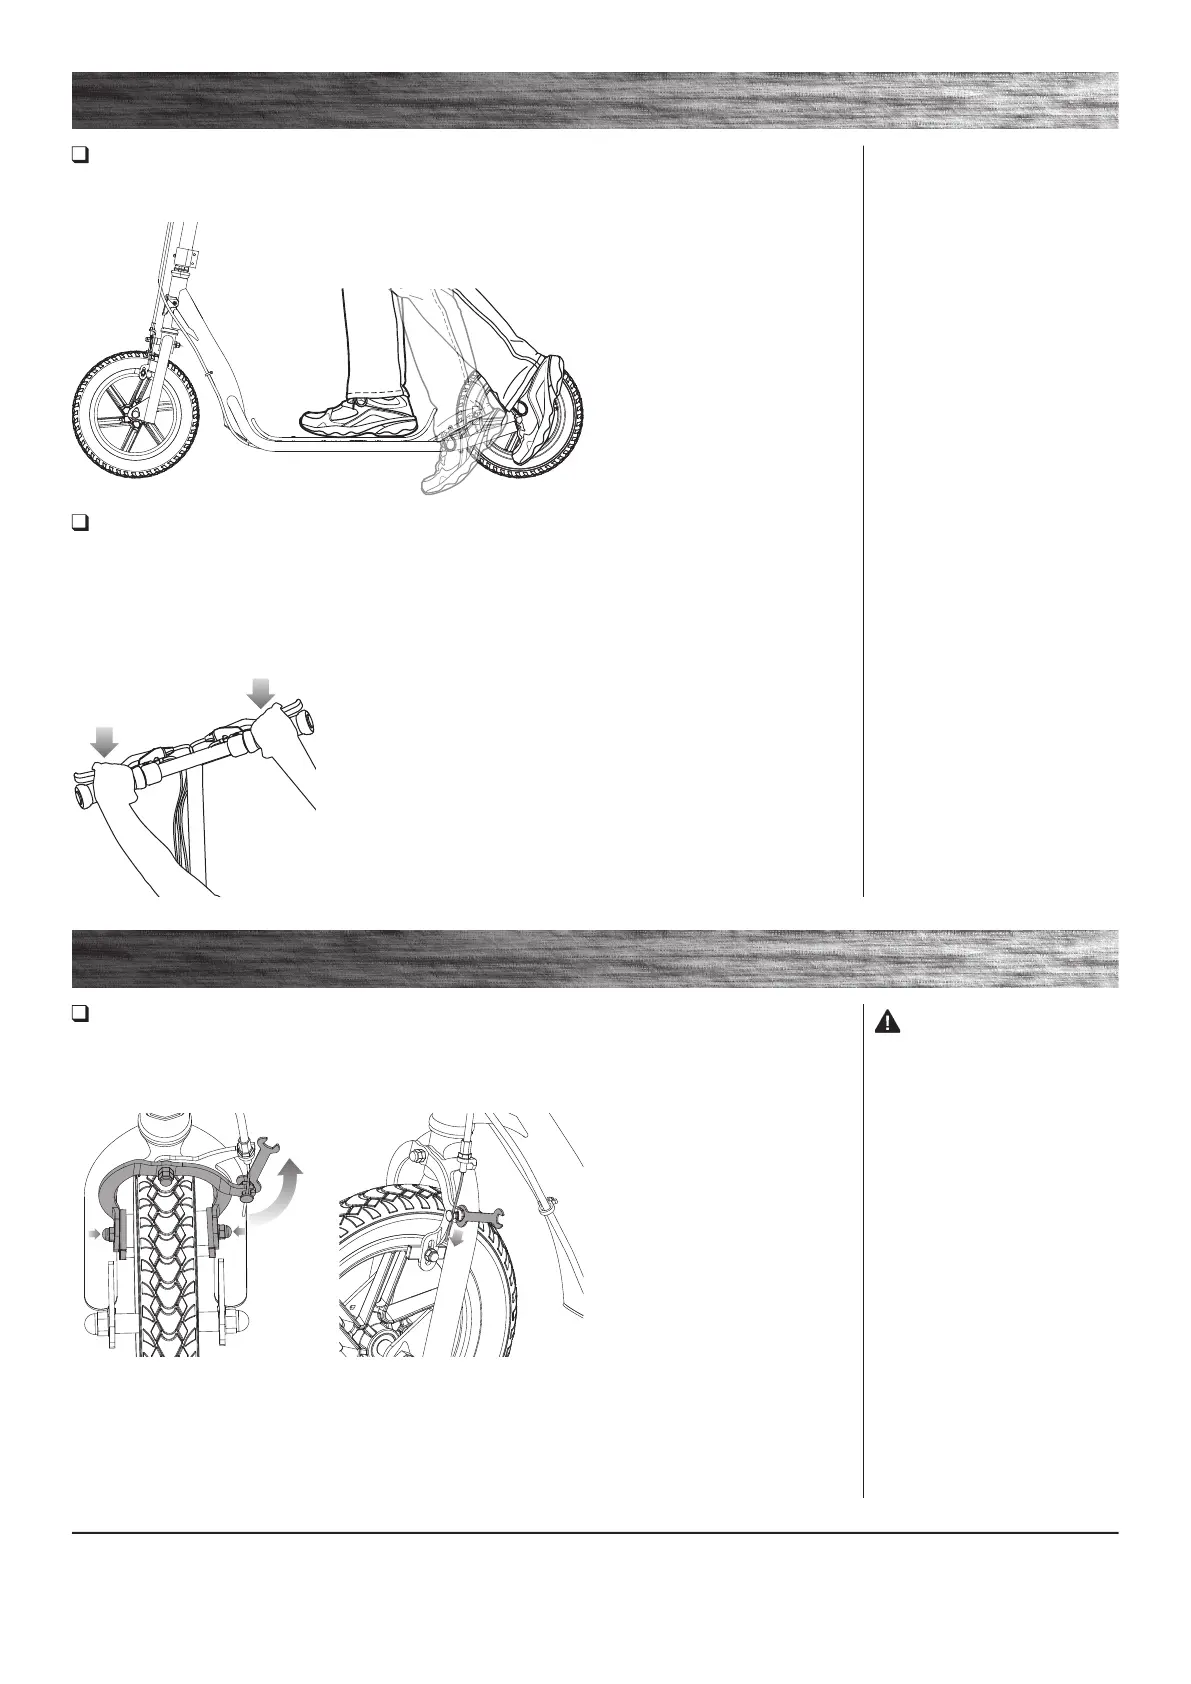
How to Ride
Place one foot on the baseboard, push forward with the other foot. Steer with both hands on the handlebars. For
enhanced cornering, lean slightly into the direction of the turn.
How to Stop
The front brake is controlled by the brake lever on the left. The rear brake is controlled by the brake lever on the
right. Each brake functions independently. For controlled stops apply one brake (by squeezing on the right or left
brake lever) or apply both brakes (by squeezing both brake levers at the same time) for increased stopping power.
Apply brake(s) until the product comes to a complete stop. Razor recommends that you practice applying the brakes
at various speeds and in an open area free from obstructions before riding your scooter around others.
REPAIR AND MAINTENANCE
Adjusting the Front Brake
Required Tool: 10 mm Wrench (included)
The brake lever is fitted with a cable adjuster to compensate for cable stretch and/or to fine tune the lever movement
to brake engagement.
WARNING: The front brake
is capable of skidding the front tire
and throwing an unsuspecting rider.
Practice in an open area free from
obstacles until you are familiar with
the brake function. Avoid skidding to
a stop as this can cause you to lose
control and/or damage the front tire.
1 Loosen the clamp brake nut with
a 10 mm wrench and press both
sides of the clamp brake inward to
the position close to the hub.
2 Keep both sides of the clamp
motionless while pulling the brake
cable down. Tighten the nut with a
10 mm wrench.
 Loading...