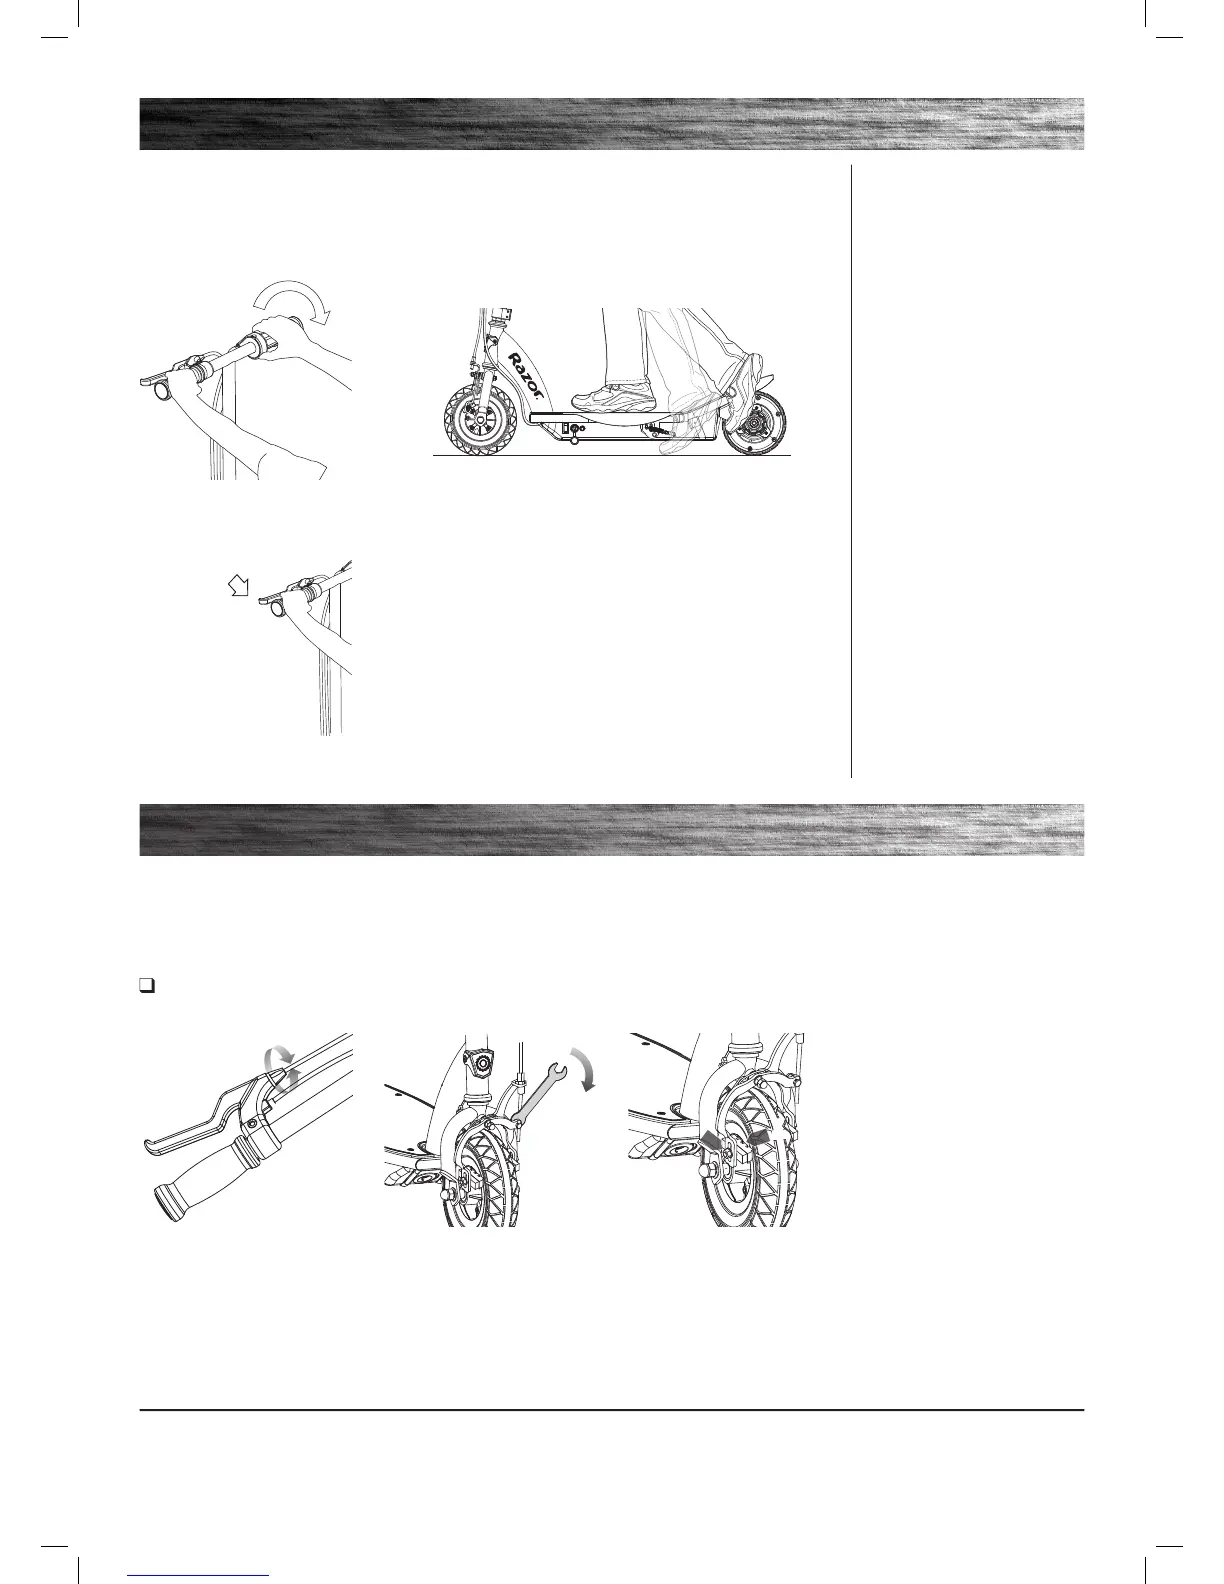
q Starting the Scooter
Turn power “ON”; put kickstand up and place both hands on the handlebars.
Place one foot on deck plate and with the other foot, push (kick start) scooter while twisting throttle. Place other foot on
deck plate once motor has engaged.
USAGE
q Stopping the Scooter
To stop, release the throttle and apply the brake until the product comes to a complete stop.
Note: Electric scooter must be
moving at least 3 mph (5 km/h)
while engaging throttle to
engage motor.
Note: As an additional safety
feature, the scooter is designed to
cut power to the motor when the
hand brake is applied.
Note: Motor will re-engage,
(without having to kick start),
if brake is released and throttle
is engaged before scooter has
slowed down to under 3 mph
(5km/h).
REPAIR AND MAINTENANCE
1 To adjust brake cable play, thread
the brake lever adjuster in or out 1/4
to 1/2 turn until the desired brake
adjustment is attained. Most adjust-
ments are complete at this step. If
brake still needs further adjustment,
proceed to step 2.
2 If brake is too tight or has too
much slack, use a 10 mm wrench
to loosen the brake cable and
adjust accordingly.
3 Inspect the brake pads (A) for
proper alignment against the wheel
or excess wear. To realign brake
pads, loosen the fixing nut (B) and
adjust the pad to contact the rim.
Re-tighten and readjust as needed.
Verify proper brake function prior to
riding the scooter.
Adjusting the Brakes
Tool Required: 10 mm Wrench
Turn power “OFF” before beginning repair or maintenance:
• Read the instructions
• Remove charger plug
• Turn the power off
• Secure the product under repair
• Exercise caution around
exposed parts
• Contact Razor customer service
if unsure about any repair or
maintenance
 Loading...